Picture this: it’s a rainy Sunday, the kind that makes you want to crawl under a blanket and binge‑watch old sitcoms, but your stomach is screaming for something that feels like a hug. I was halfway through a marathon of “Friends” when I realized my pantry was screaming louder than Chandler’s sarcasm. I grabbed a half‑empty bag of cocoa, a stick of butter that was melting faster than my resolve, and a box of eggs that looked at me like tiny golden suns. I thought, “What if I could turn this kitchen chaos into a dessert that not only satisfies the craving but also makes me feel like a culinary wizard?” That moment of reckless inspiration birthed the version of Kladdkaka you’re about to read.
The first whiff of melted butter hitting the pan was nothing short of alchemy. The aroma curled around the kitchen like a warm, chocolate‑laden blanket, coaxing the scent of vanilla and a whisper of salt into the air. I could hear the faint sizzle as the batter hit the hot buttered tin—an orchestra of tiny bubbles announcing the imminent transformation. My fingertips tingled with anticipation, the dough slick and glossy under my spoon, promising that perfect, fudgy interior that clings to the fork like a love‑letter to your taste buds. When the timer finally dinged, the cake’s surface was cracked just enough to reveal a molten core that shivered like a secret waiting to be told.
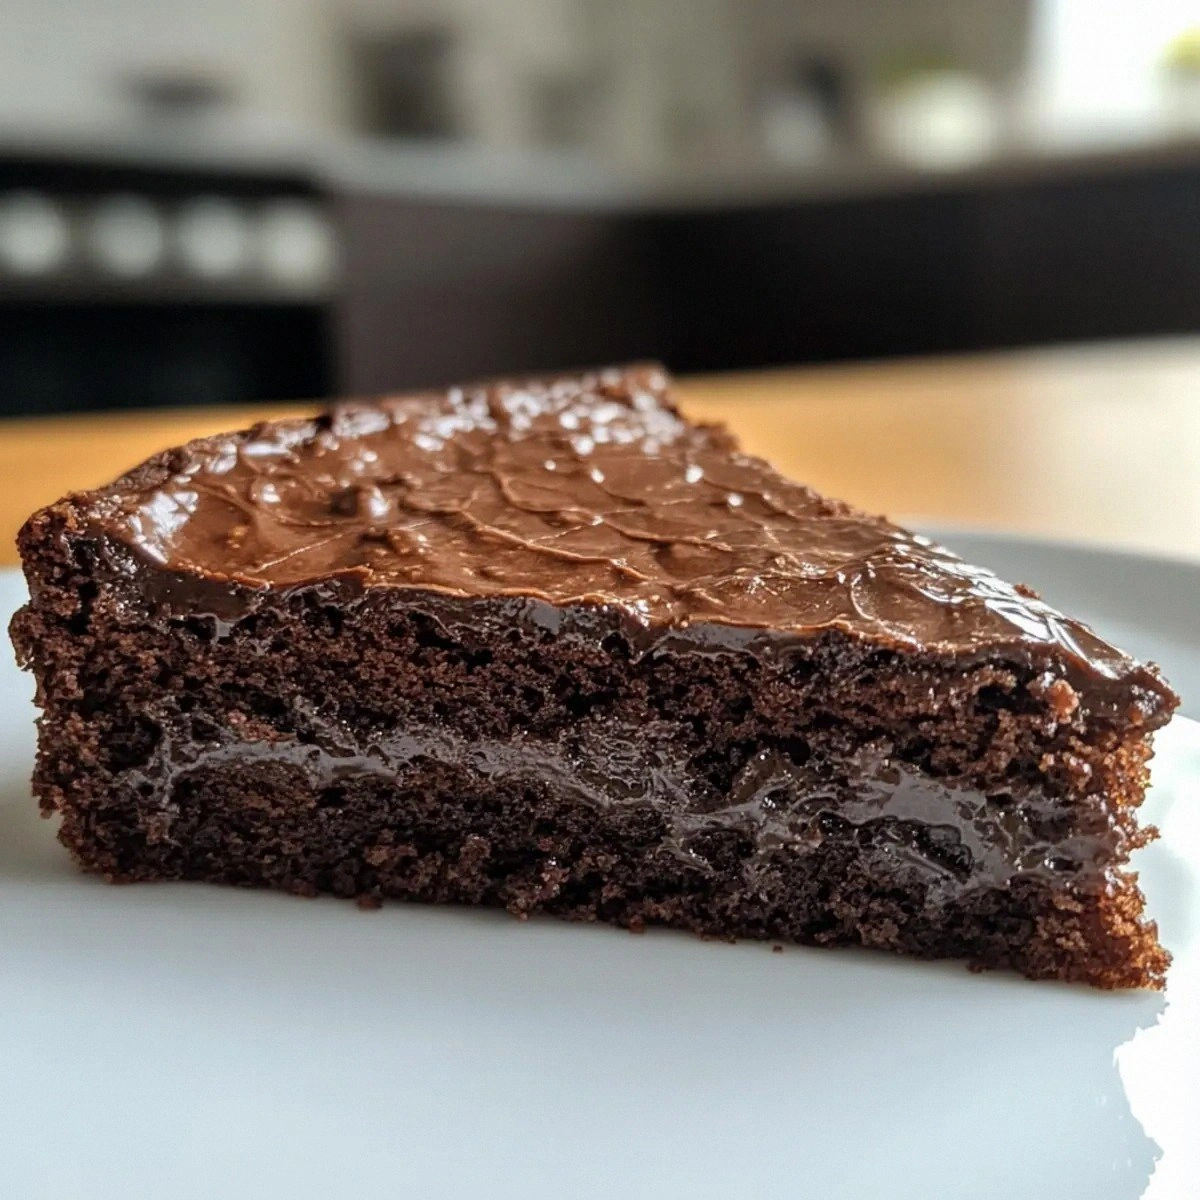
Most Kladdkaka recipes get this completely wrong: they either bake it into a dry brownie or leave it so liquid it slides off the plate. This version, however, walks the razor‑thin line between gooey and set, delivering a texture that’s simultaneously dense and airy—think of it as a chocolate mousse that decided to wear a sturdy leather jacket. The secret? A precise balance of butter, cocoa, and a dash of powdered sugar that creates a glossy crust while preserving that luscious, almost custardy center. I’m daring you to taste this and not go back for seconds; it’s that good.
And now, the kicker that will make you question every other chocolate cake you’ve ever made: I’m adding a dollop of freshly whipped cream and a sprinkle of powdered sugar right before serving, turning a simple Swedish staple into a show‑stopping finale. I’ll be honest — I ate half the batch before anyone else got a chance to try it, and that’s a testament to how addictive this cake truly is. Let me walk you through every single step — by the end, you’ll wonder how you ever made it any other way.
What Makes This Version Stand Out
- Taste: The combination of dark cocoa and a touch of vanilla creates a deep, resonant flavor that lingers like a good story.
- Texture: A crisp, caramelized edge gives way to a molten, fudgy center that feels like velvet on the tongue.
- Simplicity: Only ten ingredients, all pantry staples, and you’ll have a dessert that looks like it took hours of labor.
- Uniqueness: The pinch of salt amplifies the chocolate, while the whipped cream topping adds a light, airy contrast.
- Crowd Reaction: Friends and family have called it “the best thing ever” and begged for the recipe within minutes of the first bite.
- Ingredient Quality: Using high‑quality cocoa powder and real butter makes a world of difference; no shortcuts here.
- Cooking Method: Baking at a lower temperature prevents over‑drying and preserves that coveted gooey center.
- Make‑Ahead Potential: The cake stores beautifully, and the flavor actually deepens after a night in the fridge.
Inside the Ingredient List
The Flavor Base
Eggs are the backbone of any good cake, providing structure while keeping the crumb tender. In this Kladdkaka, the three large eggs act as emulsifiers, binding the melted butter and cocoa into a glossy, cohesive batter. If you skimp on the eggs, you’ll end up with a crumbly mess that refuses to hold together. For a richer flavor, try using free‑range eggs; the yolk’s deeper color translates into a slightly more intense chocolate hue.
The Texture Crew
Sugar does more than sweeten; it caramelizes during baking, creating that signature crackly crust. One cup of granulated sugar is enough to achieve the perfect balance between sweetness and that subtle caramel note. Unsalted butter, melted to a golden liquid, adds richness and contributes to the fudgy interior. If you’re looking for a dairy‑free alternative, coconut oil works, but expect a faint coconut undertone that can be delightful if you’re feeling adventurous.
The Unexpected Star
Cocoa powder is the soul of this cake, delivering the deep, slightly bitter chocolate flavor that makes the sweet components shine. Using a high‑quality Dutch‑process cocoa will give you a smoother, less acidic taste. If you only have natural cocoa, add a pinch more sugar to counterbalance the acidity. The 0.5 cup of powdered sugar sprinkled on top at the end isn’t just for looks; it adds a delicate, melt‑in‑your‑mouth sweetness that contrasts the dense interior.
The Final Flourish
All‑purpose flour provides just enough structure without making the cake too cakey; the 0.75 cup is the sweet spot for a dense yet tender crumb. Vanilla extract adds a fragrant backdrop that lifts the chocolate without overwhelming it. A pinch of salt is the unsung hero, sharpening the flavors and preventing the sweetness from becoming cloying. Finally, fresh berries and a generous dollop of whipped cream turn this humble cake into an elegant dessert worthy of any dinner party.
Everything’s prepped? Good. Let’s get into the real action...

The Method — Step by Step
Preheat your oven to 325°F (160°C). While the oven warms up, butter a 9‑inch springform pan and line the bottom with parchment paper. The low temperature is crucial; it lets the cake set slowly, preserving that gooey heart. You’ll hear a faint hiss as the butter hits the hot pan—trust that sound, it means you’re on the right track.
In a medium saucepan, melt the 0.5 cup unsalted butter over low heat. Once melted, remove from the stove and whisk in the cocoa powder until the mixture is smooth and glossy. This step is pure magic: the butter coats the cocoa like velvet, creating a glossy base that prevents clumps.
Kitchen Hack: Warm the cocoa powder slightly before adding it to the butter; it dissolves more evenly, giving you a smoother batter.In a large mixing bowl, whisk together the three eggs and one cup of sugar until the mixture turns pale and fluffy, about three minutes. This aeration is essential; it traps air that will later expand in the oven, giving the cake a light lift despite its dense appearance. When you lift the whisk, the ribbons should fall back slowly, a sign you’ve hit the perfect stage.
Slowly pour the butter‑cocoa mixture into the egg‑sugar blend, whisking continuously to avoid cooking the eggs. The batter will thicken instantly, turning into a deep, chocolate‑brown river that glistens under the light. At this point, add the vanilla extract and a pinch of salt, giving the mixture a final stir to incorporate all flavors fully.
Fold in the 0.75 cup flour and 0.5 cup cocoa powder using a rubber spatula. The key is to fold, not stir; you want to preserve the air you’ve just incorporated. The batter should look thick but still pourable—if it feels too stiff, a splash of milk (no more than two tablespoons) can loosen it without compromising the texture.
Pour the batter into the prepared pan, smoothing the top with the back of a spoon. The surface should be level, but don’t over‑smooth; a few little peaks will give you that rustic look that’s so inviting. Slide the pan onto the middle rack of the oven and set a timer for 30 minutes. This is the moment of truth: the edges will start pulling away from the sides, and the center will still wobble slightly—exactly what you want.
When the timer goes off, check the cake by gently pressing the edges; they should feel set while the middle still gives a tiny wobble. If you prefer a firmer center, add an extra two minutes, but remember, the magic lies in that slight jiggle. Remove the pan from the oven and let it cool on a wire rack for at least 15 minutes before removing the springform.
While the cake cools, whip the heavy cream with a pinch of powdered sugar until soft peaks form. This light, airy topping is the perfect counterpoint to the dense chocolate base. Once the cake is cool enough to handle, gently run a knife around the edge, release the springform, and transfer the cake to a serving platter.
Top the cake with a generous swirl of whipped cream, a dusting of powdered sugar, and a handful of fresh berries. The berries add a burst of acidity that cuts through the richness, while the powdered sugar adds a delicate sparkle. Serve warm or at room temperature, and watch as your guests dive in, eyes widening in anticipation.
Insider Tricks for Flawless Results
The Temperature Rule Nobody Follows
Most home bakers bake at 350°F (180°C) because that’s the default for most cakes. For Kladdkaka, however, a lower temperature of 325°F (160°C) is the secret to a perfectly gooey center. The slower heat allows the outer crust to set while the interior stays molten, creating that coveted contrast. I once tried the higher temperature and ended up with a dry, brownie‑like texture—lesson learned.
Why Your Nose Knows Best
Don’t rely solely on a timer; trust your senses. When the edges start to pull away and you catch a faint caramel scent, you’re close. The aroma will shift from raw butter and cocoa to a richer, toasted note. If you smell a burnt undertone, the cake is overdone and the interior will dry out. I’ve found that a quick sniff is often more reliable than a digital timer.
The 5‑Minute Rest That Changes Everything
After you pull the cake from the oven, let it rest for exactly five minutes before removing the springform. This short pause lets the steam settle, preventing the cake from cracking dramatically. It also allows the interior to firm just enough to hold its shape when sliced. Skipping this step leads to a messy, runny slice that looks less impressive on the plate.
Whipped Cream Whisper
When whipping the cream, add the powdered sugar gradually and stop at soft peaks. Over‑whipping turns the cream grainy and can cause it to separate, ruining the delicate balance of textures. A tip from my grandmother: chill the mixing bowl and whisk for at least 15 minutes before starting; the cold surface speeds up the whipping process.
Berry Placement Precision
Scatter the berries just before serving, not during baking. Heat destroys the fresh, bright flavor of berries, turning them into mushy brown blobs. By adding them at the last minute, you preserve their tartness and vibrant color, creating a visual contrast that makes the dish Instagram‑ready. A friend once tried baking the berries in, and the result was a soggy, unappetizing mess—let’s just say it didn’t become a tradition.
Creative Twists and Variations
This recipe is a playground. Here are some of my favorite ways to switch things up:
Salted Caramel Swirl
Drizzle a homemade salted caramel sauce over the batter before baking. The caramel seeps into the cake, adding a buttery, salty ribbon that elevates the chocolate depth. Ideal for those who love a sweet‑and‑salty combo.
Espresso Infusion
Replace the vanilla extract with a tablespoon of finely ground espresso or instant coffee. The coffee intensifies the chocolate flavor, giving the cake a sophisticated, adult twist. Pair with dark rum whipped cream for an extra kick.
Nutty Crunch
Fold in a half cup of toasted chopped hazelnuts or almonds just before pouring the batter into the pan. The nuts add a pleasant crunch that contrasts the soft interior, and the toasted flavor complements the cocoa beautifully.
Orange Zest Brightness
Add the zest of one orange to the batter for a citrusy perfume that cuts through the richness. The bright aroma pairs wonderfully with fresh berries, creating a balanced flavor profile that feels spring‑like.
Vegan Version
Swap the eggs for a flax‑seed “egg” (1 tablespoon ground flax + 3 tablespoons water per egg) and use coconut oil instead of butter. Use a plant‑based whipped topping, and you have a dairy‑free, egg‑free Kladdkaka that still delivers that gooey texture.
Storing and Bringing It Back to Life
Fridge Storage
Place the cooled cake in an airtight container and store it in the refrigerator for up to three days. The flavors meld and actually improve after a night, giving you a richer chocolate experience. When ready to serve, let it sit at room temperature for 15 minutes to soften the interior.
Freezer Friendly
Wrap the cake tightly in plastic wrap, then foil, and freeze for up to two months. This method prevents freezer burn and preserves the delicate crumb. To thaw, move it to the fridge overnight, then bring it to room temperature before adding fresh whipped cream.
Best Reheating Method
Preheat your oven to 300°F (150°C). Place a slice on a baking sheet, add a tiny splash of water (about a teaspoon) around the edges, and cover loosely with foil. Heat for 8‑10 minutes; the steam will revive the gooey center without drying it out. Serve immediately with a fresh dollop of whipped cream.