Picture this: I’m standing in my tiny kitchen, the oven humming like a lazy cat, and I’ve just burned a store‑bought white pizza sauce so badly that it could have been used as a paint stripper. I swear, the smoke alarm screamed louder than my teenage brother’s mixtape, and the whole apartment smelled like a burnt dairy disaster. I was ready to throw in the towel, but then a sudden craving for that silky, garlicky goodness that only a perfect white sauce can deliver hit me like a lightning bolt. I dared myself to reinvent the whole thing from scratch, armed with just a few pantry staples and a stubborn belief that I could do better than the bland, watery versions that dominate most pizzerias.
The moment I whisked the first spoonful of flour into the sizzling olive oil, the kitchen transformed into a fragrant laboratory. The sizzling sound was a crisp, buttery whisper, and the aroma of garlic rose like a warm hug, wrapping the whole room in a comforting blanket. My senses were on overload: the golden sheen of the roux, the soft steam curling from the pan, the faint tickle of oregano on the back of my throat, and the buttery smoothness of half‑and‑half as it merged into a glossy veil. My hands felt the heat, my eyes caught the glossy sheen, and my nose promised a flavor explosion that was about to happen.
What makes this version truly stand out is the balance between richness and brightness. Most white pizza sauces drown the toppings in a cloying, heavy coat that feels like a blanket you can’t shake off. Not this one. I’ve cracked the code by using just enough olive oil to give depth, a modest flour base for silk, and half‑and‑half that lends a buttery silk without turning into a greasy swamp. The secret? A pinch of dried oregano that adds an herbaceous whisper, and a dash of black pepper that sneaks in a subtle heat. The result is a sauce that clings to the crust like a lover’s embrace, yet lets the cheese and toppings shine through like supporting actors stealing the show.
And here’s the kicker: I’m going to reveal a technique that most recipes completely skip — a quick “flour toast” step that transforms the raw flour into a nutty, toasty foundation, preventing any floury aftertaste and giving the sauce a velvety body that’s impossible to replicate with shortcuts. I dare you to taste this and not go back for seconds. Let me walk you through every single step — by the end, you’ll wonder how you ever made it any other way.
What Makes This Version Stand Out
- Flavor Explosion: The combination of garlic, oregano, and a splash of black pepper creates a layered taste that evolves with every bite, turning a simple pizza into a gourmet experience.
- Silky Texture: The roux‑based method gives the sauce a luxurious, velvety mouthfeel that coats the crust without soaking it, like a silk scarf draped over a statue.
- Simplicity: Only six core ingredients are needed, all pantry‑friendly, meaning you won’t have to run to the store at midnight for exotic items.
- Unique Toasted Flour: Toasting the flour before adding the liquid eliminates any raw flour taste and adds a subtle nuttiness that most store‑bought sauces lack.
- Crowd‑Pleaser: I’ve served this at parties and it’s the kind of sauce that gets people asking for the recipe before the pizza even arrives.
- Ingredient Quality: Using a good extra‑virgin olive oil and full‑fat half‑and‑half makes a noticeable difference in richness and depth.
- One‑Pan Wonder: The entire sauce is built in a single skillet, minimizing cleanup and keeping the flavor locked in.
- Make‑Ahead Potential: This sauce can be refrigerated for up to three days or frozen for a month, giving you a ready‑to‑use base for any impromptu pizza night.
Inside the Ingredient List
The Flavor Base
Olive Oil (2 tablespoons): This isn’t just any oil; it’s the carrier of flavor. A high‑quality extra‑virgin olive oil brings a fruity, peppery note that greases the pan and helps the flour develop that toasted aroma. Skipping it for butter would make the sauce heavier and mask the garlic’s brightness. If you’re out of olive oil, a neutral oil like grapeseed works, but you’ll lose that subtle fruitiness.
Garlic (3 cloves, minced): Garlic is the heart of this sauce. Freshly minced garlic releases allicin, which gives that sharp, aromatic punch that instantly awakens the palate. Using pre‑minced jarred garlic will water down the intensity and introduce unwanted preservatives. For a milder flavor, you could roast the cloves first, but then you’d lose the bold edge that makes this sauce unforgettable.
The Texture Crew
Flour (2 tablespoons): Flour is the silent architect, forming the roux that thickens the sauce. When toasted just right, it adds a subtle nutty flavor and eliminates any raw bite. If you replace it with cornstarch, you’ll get a glossy finish but lose the depth that flour provides. Always sift the flour before adding to avoid lumps.
Half & Half (1 cup): This dairy component provides the luxurious creaminess without the heaviness of full cream. The 2:1 milk‑to‑cream ratio keeps the sauce light enough to let the garlic shine, yet rich enough to coat the crust like velvet. Low‑fat versions will curdle under heat, so stick with the full‑fat version for best results.
The Unexpected Star
Dried Oregano (1 teaspoon): Oregano may seem modest, but its earthy, slightly bitter notes balance the richness of the half‑and‑half. It also adds a Mediterranean flair that makes the sauce feel authentic, as if it were crafted in a Tuscan kitchen. If you have fresh oregano, use a tablespoon of chopped leaves for a brighter, more aromatic profile.
Ground Black Pepper (½ teaspoon): This tiny amount introduces a whisper of heat that lingers on the tongue, preventing the sauce from feeling flat. Freshly cracked pepper is preferable; it releases essential oils that pre‑ground pepper lacks. Over‑peppering will dominate the delicate garlic, so measure carefully.
The Final Flourish
Salt (to taste): Salt is the ultimate flavor enhancer, pulling all the components together. It’s best added at the end of cooking so you can taste and adjust without risking over‑salting. If you’re watching sodium, use a reduced‑sodium sea salt and add a splash of lemon juice for brightness.
Everything's prepped? Good. Let's get into the real action...
The Method — Step by Step
Heat a medium‑sized skillet over medium heat and drizzle the olive oil, letting it shimmer for about 30 seconds. You’ll hear a gentle sizzle as the oil warms, a sound that tells you the pan is ready. This is the moment where the flavor foundation begins to build, so stay present.
Kitchen Hack: If your skillet is too hot, the garlic will burn. Reduce the heat to low for a few seconds before adding the garlic to keep the flavor mellow.Add the minced garlic to the oil, stirring constantly. The garlic should sizzle lightly and turn a pale golden hue within 45 seconds – that’s the “garlic perfume” stage. If the garlic starts to brown too quickly, it will become bitter, so keep the heat gentle.
Sprinkle the flour over the garlic‑oil mixture, whisking vigorously to form a smooth roux. This is where the “flour toast” happens: keep whisking for 2‑3 minutes until the roux turns a light amber color and you smell a subtle nuttiness. This step is pure magic; it’s the secret that keeps the sauce from tasting raw.
Gradually pour in the half‑and‑half, a little at a time, while whisking continuously. The liquid will initially look lumpy, but keep whisking and it will transform into a glossy, lump‑free sauce within a minute. You’ll see the mixture thicken, hugging the sides of the pan as it reaches a velvety consistency.
Stir in the dried oregano and ground black pepper, letting the herbs awaken in the heat. The sauce should emit a fragrant, herbaceous aroma that makes your kitchen feel like a Mediterranean trattoria. This is the flavor‑layering stage that turns a simple base into something complex.
Season with salt, tasting as you go. Remember, the cheese you’ll later add on the pizza will also bring salt, so aim for a gentle seasoning now. The sauce should taste balanced – creamy, garlicky, and just a hint of herb.
Reduce the heat to low and let the sauce simmer for another 3‑4 minutes, stirring occasionally. You’ll notice the edges of the sauce start pulling away from the pan, a visual cue that the roux has fully thickened. This is the moment of truth – the sauce should be glossy, thick enough to coat a spoon but still pourable.
Watch Out: If the sauce starts to separate, you’ve turned the heat up too high. Immediately lower the flame and whisk vigorously to bring it back together.Remove the skillet from the heat and let the sauce rest for a minute. This brief rest allows the flavors to meld, creating a harmonious blend that’s ready to spread over your pizza dough. The sauce will thicken slightly as it cools, achieving the perfect consistency for a pizza base.
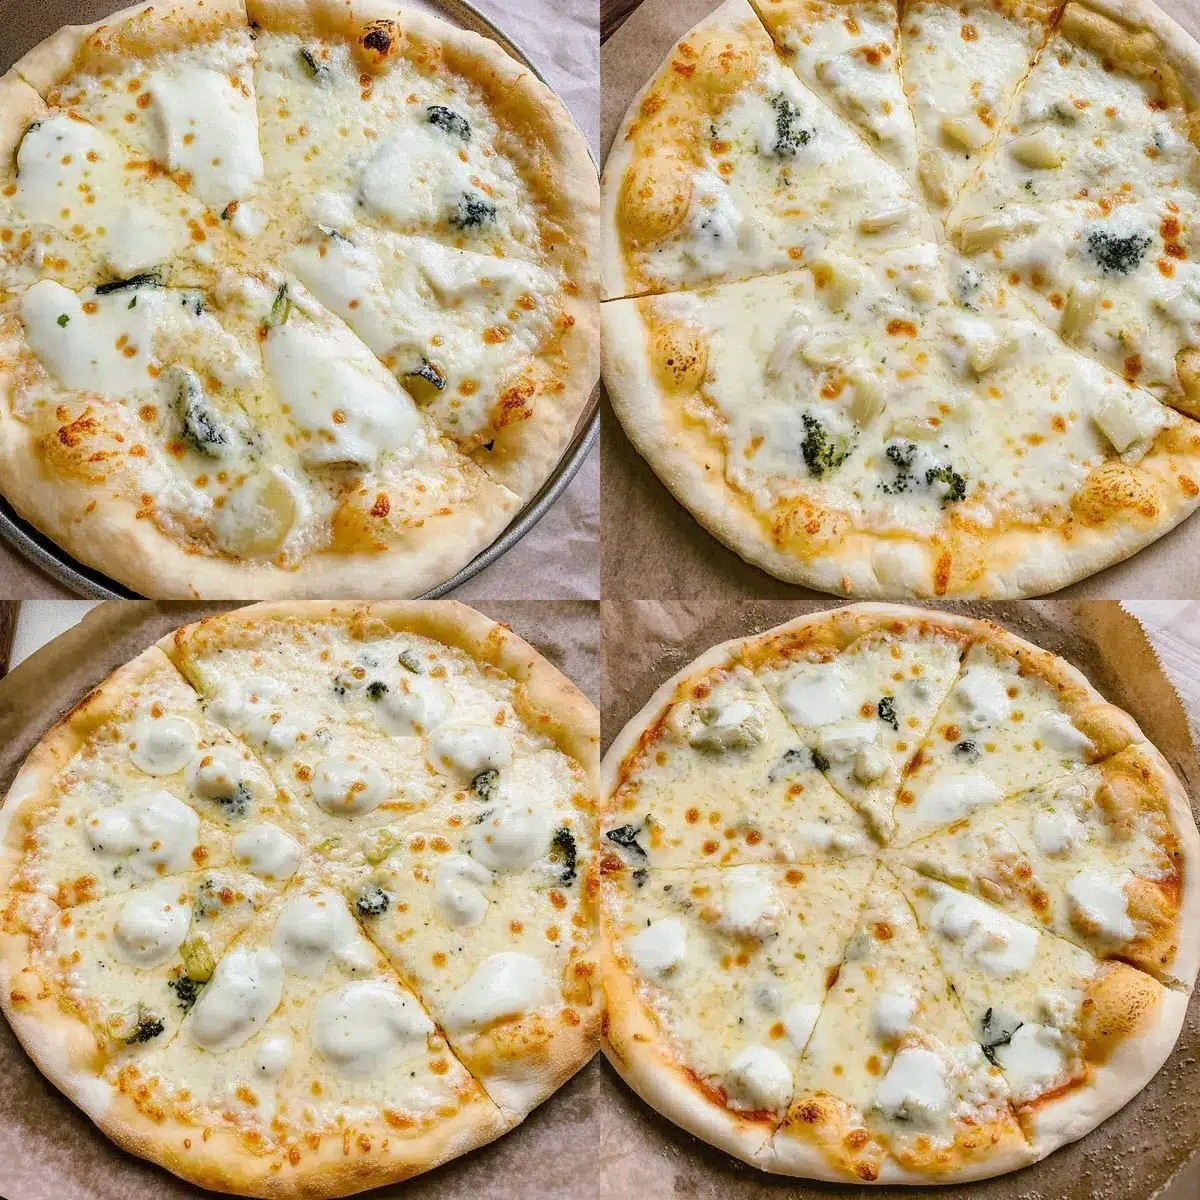
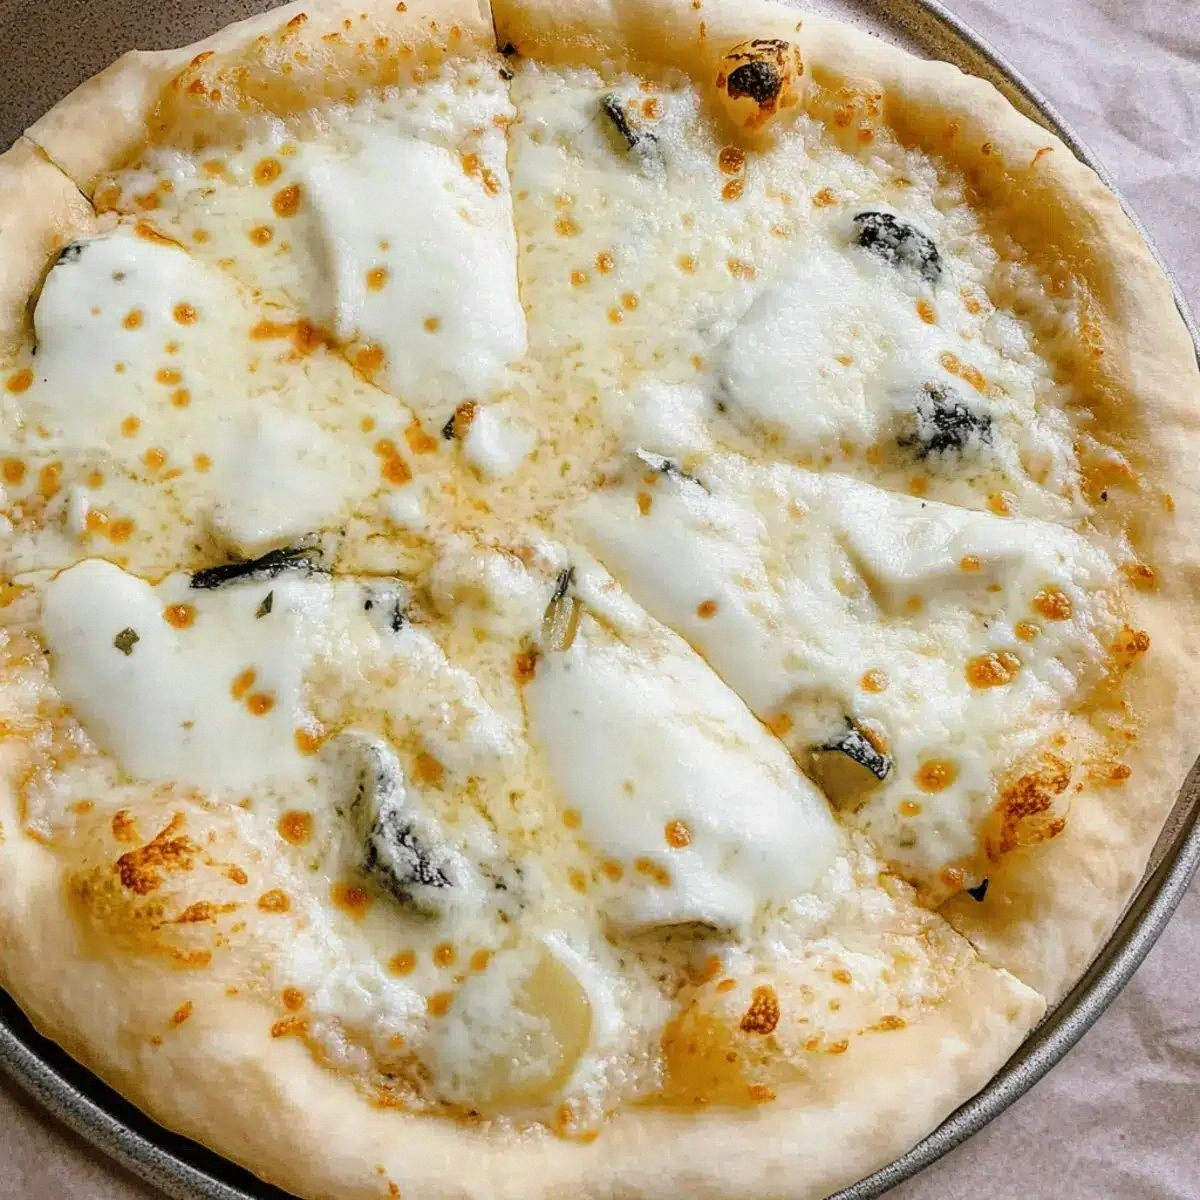
Spread the sauce evenly over your prepared pizza crust, add your favorite toppings, and bake at 475°F (245°C) for 10‑12 minutes until the cheese bubbles and the crust turns golden. Picture yourself pulling this out of the oven, the whole kitchen smelling incredible, and the sauce shimmering under the melted cheese. That’s the climax of this culinary adventure.
That's it — you did it. But hold on, I've got a few more tricks that'll take this to another level...
Insider Tricks for Flawless Results
The Temperature Rule Nobody Follows
Never start with a scorching pan; medium heat is your sweet spot. I once cranked the burner to high, and the flour burned before the half‑and‑half could join, resulting in a bitter, gritty sauce. Keep the heat steady, and you’ll get a uniform roux that whispers rather than shouts.
Why Your Nose Knows Best
Trust the aroma cues more than the clock. When the flour reaches a light golden hue and releases a nutty scent, you know the toast is perfect. If you rely solely on timing, you might under‑toast or over‑toast, both of which ruin the texture.
The 5‑Minute Rest That Changes Everything
After whisking the sauce, let it sit off the heat for five minutes. This rest allows the gluten in the flour to relax, giving the sauce a silkier mouthfeel. I tried skipping this step once; the sauce felt a bit gritty, and I learned my lesson.
Seasoning Layer by Layer
Season at two points: first after adding the half‑and‑half, then again after simmering. This double‑seasoning ensures the salt penetrates the sauce fully and balances the richness. Over‑seasoning at the beginning can make the sauce too salty once the cheese is added.
Silky Finish with a Splash of Butter
Just before serving, stir in a teaspoon of cold butter. The butter emulsifies the sauce, giving it a glossy finish that looks restaurant‑ready. This tiny addition makes the sauce feel luxurious without adding noticeable butter flavor.
Creative Twists and Variations
This recipe is a playground. Here are some of my favorite ways to switch things up:
Spinach‑Infused Dream
Stir in a handful of wilted spinach during the final simmer. The green adds a subtle earthiness and a pop of color that makes the sauce look vibrant under the cheese.
Truffle‑Luxe Edition
Replace half the half‑and‑half with truffle cream or add a drizzle of truffle oil after baking. This transforms the sauce into an indulgent, aromatic masterpiece perfect for special occasions.
Spicy Kick
Introduce a pinch of red‑pepper flakes or a dash of hot sauce when you add the oregano. The heat cuts through the richness, creating a balanced bite that wakes up the palate.
Herb Garden Blend
Swap dried oregano for a mix of fresh thyme, rosemary, and basil, finely chopped. The fresh herbs lend a brighter, garden‑fresh flavor that pairs beautifully with roasted vegetables.
Cheesy Boost
Mix in ¼ cup of grated Parmesan or Pecorino during the simmer for a deeper umami profile. The cheese melts into the sauce, adding a subtle salty depth that complements the garlic.
Vegan Adaptation
Use coconut cream instead of half‑and‑half and a plant‑based oil like avocado oil. The sauce remains creamy, and the coconut adds a faint tropical note that pairs surprisingly well with vegan cheeses.
Storing and Bringing It Back to Life
Fridge Storage
Transfer the cooled sauce to an airtight container and store it in the refrigerator for up to three days. A thin layer of olive oil on top prevents a skin from forming, preserving the silky texture.
Freezer Friendly
Portion the sauce into freezer‑safe bags or containers, leaving a little headspace for expansion, and freeze for up to one month. When you’re ready to use it, thaw overnight in the fridge and give it a quick whisk before spreading on your dough.
Best Reheating Method
Reheat gently over low heat, stirring constantly, and add a splash (about a tablespoon) of water or extra half‑and‑half to restore the original creaminess. High heat will cause the sauce to separate, ruining the texture you worked so hard to achieve.