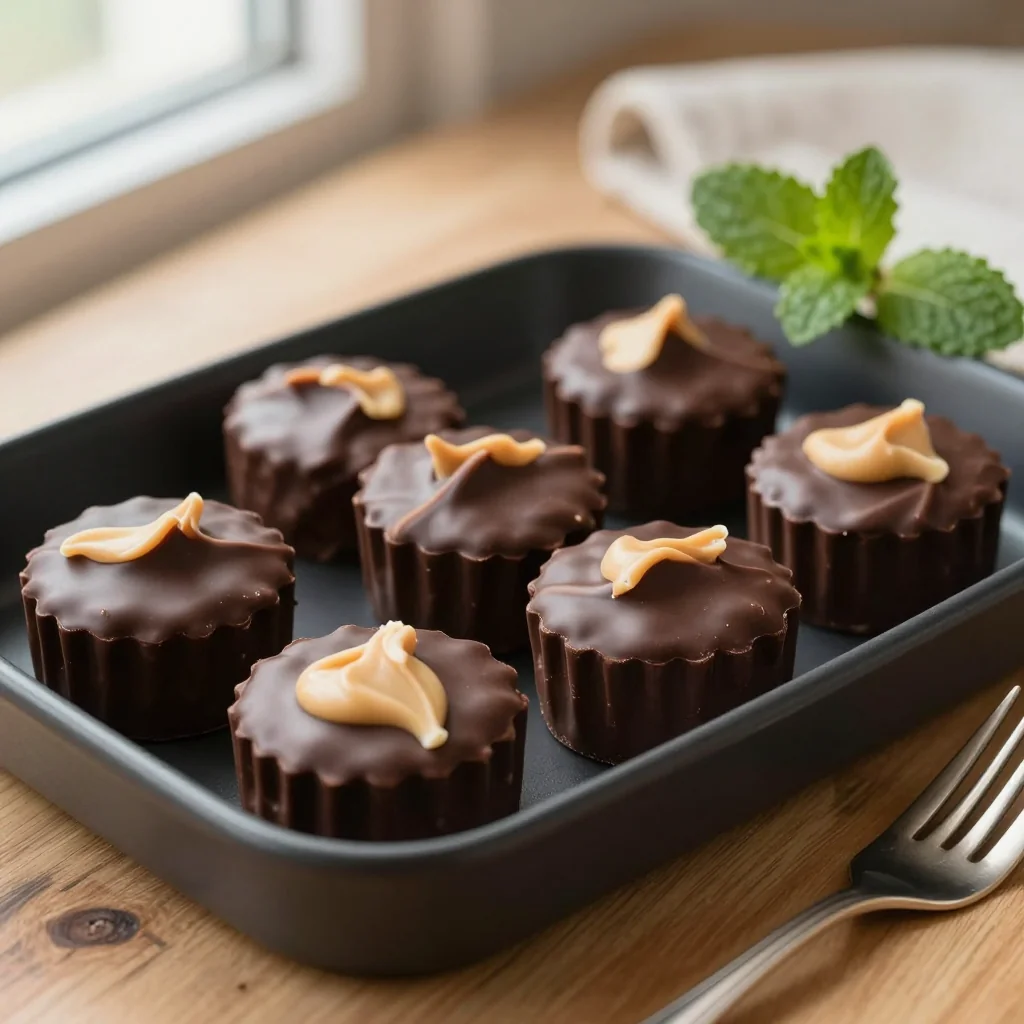
Indulge in silky chocolate shells filled with creamy, salty‑sweet peanut butter—perfect for any occasion.
When I was a kid, my grandma would melt chocolate in a tiny saucepan while I waited impatiently on the kitchen floor, the sweet aroma swirling around the old wooden table. One summer afternoon, she handed me a spoonful of warm, glossy chocolate and a dollop of peanut butter, letting me press them into tiny paper liners. The result was a bite‑size burst of flavors that still haunts my taste buds today. That memory sparked a lifelong love affair with chocolate‑peanut butter combos.
Chocolate peanut butter cups have roots in the classic American confection, popularized by big‑brand candy bars, but the homemade version lets you control every ingredient, from the quality of the cocoa to the type of peanut butter you prefer. Whether you’re a seasoned baker or a kitchen novice, this recipe offers a perfect balance of creamy, salty filling wrapped in a glossy dark chocolate shell.
In this guide, I’ll walk you through each step, from selecting the best cocoa beans to achieving a glossy finish without a tempering machine. You’ll learn why a dash of sea salt elevates the flavor, how to avoid a grainy texture, and the secret to making these cups set perfectly in the fridge.
Grab your mixing bowls, a silicone muffin tray, and let’s create a batch of homemade chocolate peanut butter cups that will impress friends, family, and even the most discerning sweet tooth.
🌟 Why This Recipe Will Win Your Heart
There’s something magical about a treat that feels both nostalgic and upscale at the same time. This recipe delivers that experience in every bite.
- ✨ Perfect Balance of Sweet and Salty: The creamy peanut butter filling is lightly sweetened with honey and finished with a pinch of sea salt, creating a contrast that makes each mouthful unforgettable.
- ✨ No‑Bake Simplicity: You won’t need an oven or a tempering machine—just a microwave or stovetop, a few minutes of melting, and a fridge to set.
- ✨ Customizable Flavors: Swap dark chocolate for milk or white chocolate, add a splash of espresso, or sprinkle crushed pretzels for extra crunch.
- ✨ Portion Control Made Easy: The recipe yields exactly twelve cups, ideal for a small gathering or a personal stash.
- ✨ Health‑Conscious Options: By using natural sweeteners and high‑quality dark chocolate (70% cocoa), you get antioxidants and less refined sugar.
- ✨ Impressive Presentation: The glossy finish and neat paper liners make these cups look as professional as any bakery treat.
🥗 Ingredients
📝 Complete Ingredient List
For the Chocolate Shell:
- 200 g dark chocolate (70% cocoa)
- 30 g coconut oil (helps the chocolate set shiny)
- 1 tsp vanilla extract
- ¼ tsp sea salt
For the Peanut Butter Filling:
- 120 g creamy peanut butter
- 30 g honey
- 15 g unsalted butter, melted
- ½ tsp sea salt
Optional Garnish:
- 10 g crushed roasted peanuts
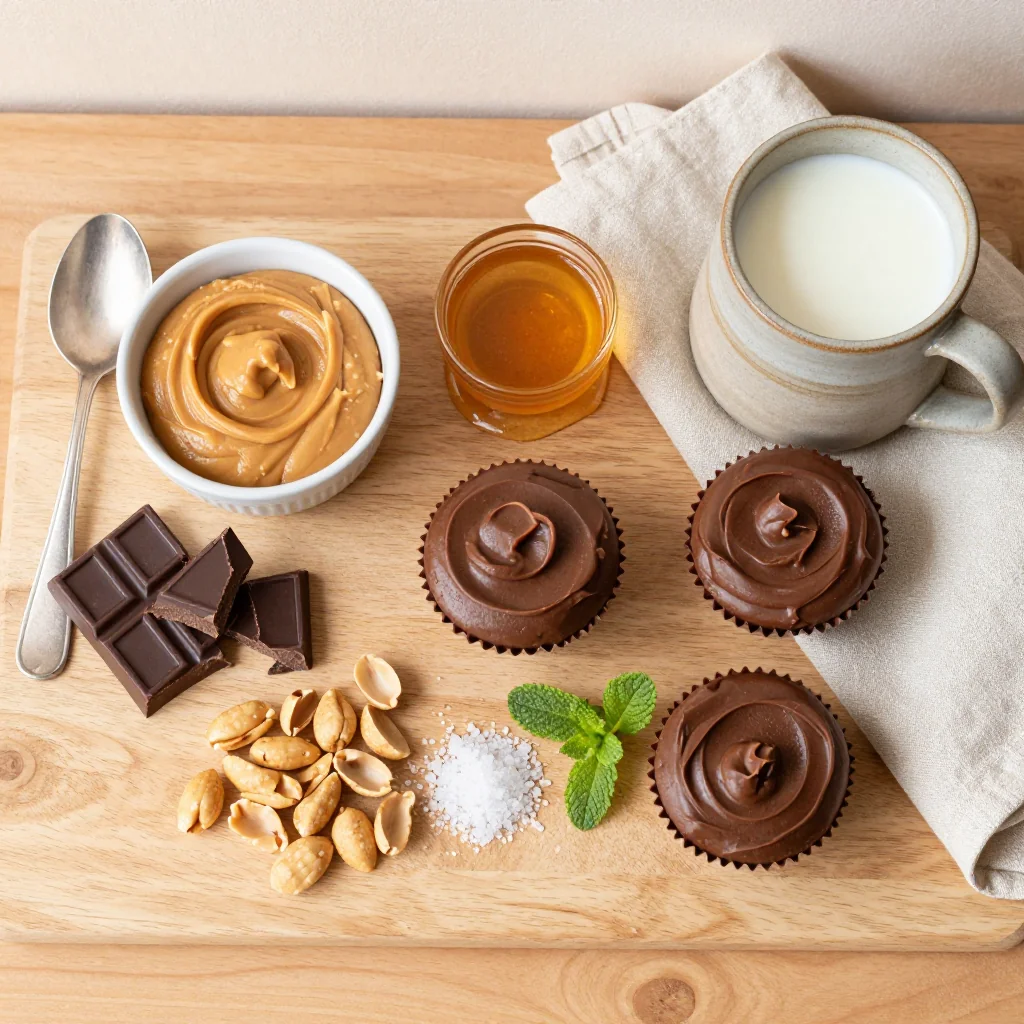
🔍 Focus on Key Ingredients
Dark Chocolate (70% Cocoa)
High‑cocoa dark chocolate provides a rich, slightly bitter backdrop that balances the sweetness of the honey and the saltiness of the peanuts. Look for a bar with minimal added fats; the cocoa butter within will give the shell a glossy snap when set.
Creamy Peanut Butter
Choosing a natural, creamy peanut butter without hydrogenated oils ensures a smooth, velvety filling. The natural oils in the peanut butter blend beautifully with melted butter, creating a glossy texture that doesn’t separate.
Coconut Oil
Coconut oil lowers the melting point of chocolate, making it easier to work with and giving the final cup a glossy sheen. It also adds a subtle tropical note that pairs wonderfully with the earthy peanut flavor.
🔄 Quick Substitutions
| If you don’t have... | Use instead... |
|---|---|
| Dark chocolate | Milk chocolate (but reduce sugar) |
| Coconut oil | Vegetable oil or melted cocoa butter |
| Peanut butter | Almond butter or cashew butter |
👨🍳 Step‑by‑Step Instructions
Follow these detailed steps to create flawless chocolate peanut butter cups that set perfectly and taste divine.
📋 Phase 1: Preparation & Mise en Place
Gather all tools and pre‑measure the ingredients to ensure a smooth workflow.
Line the Muffin Tray
Place twelve paper liners into a standard 12‑cup silicone muffin tray. The liners prevent sticking and give each cup a tidy, professional look. If you don’t have a silicone tray, a regular metal muffin pan works fine—just be sure to press the chocolate firmly into the sides.
Measure and Set Aside
Using a kitchen scale, weigh 200 g of dark chocolate and 30 g of coconut oil into a heat‑proof bowl. In a separate bowl, combine the peanut butter, honey, melted butter, and half a teaspoon of sea salt. Stir until the mixture is smooth and glossy. This ensures the filling will stay cohesive when piped.
🔥 Phase 2: Melting & Assembly
Create the chocolate shell, fill, and seal the cups.
Melt the Chocolate
Place the chocolate and coconut oil bowl over a pot of simmering water (double boiler) or microwave in 30‑second bursts, stirring between each burst. When fully melted, stir in vanilla extract and a quarter teaspoon of sea salt. The mixture should be glossy and fluid.
Form the Chocolate Shells
Using a small spoon or a pastry brush, coat the inside of each paper liner with a generous layer of melted chocolate, making sure to cover the sides. Tap the tray gently on the counter to release any air bubbles. Place the tray in the refrigerator for about 5 minutes to set the first layer.
Add the Peanut Butter Filling
Once the first chocolate layer is firm, spoon or pipe about a teaspoon of the peanut butter mixture into the center of each cup, leaving a small gap at the top for the final chocolate seal. Sprinkle a pinch of crushed peanuts on top if you like extra texture.
Seal the Cups
Re‑dip your spoon or brush into the remaining chocolate and cover the filling completely, smoothing the top. Ensure the chocolate seals the cup edges to prevent the filling from leaking when you bite.
Final Chill
Refrigerate the completed tray for at least 20 minutes, or until the chocolate is completely set. Once firm, gently remove each cup from the tray and place on a serving platter.
✨ Phase 3: Finishing Touches & Serving
Check, plate, and enjoy.
Check for Set
Press lightly on the chocolate surface; it should feel firm and not give under pressure. If any cup feels soft, return it to the fridge for a few more minutes.
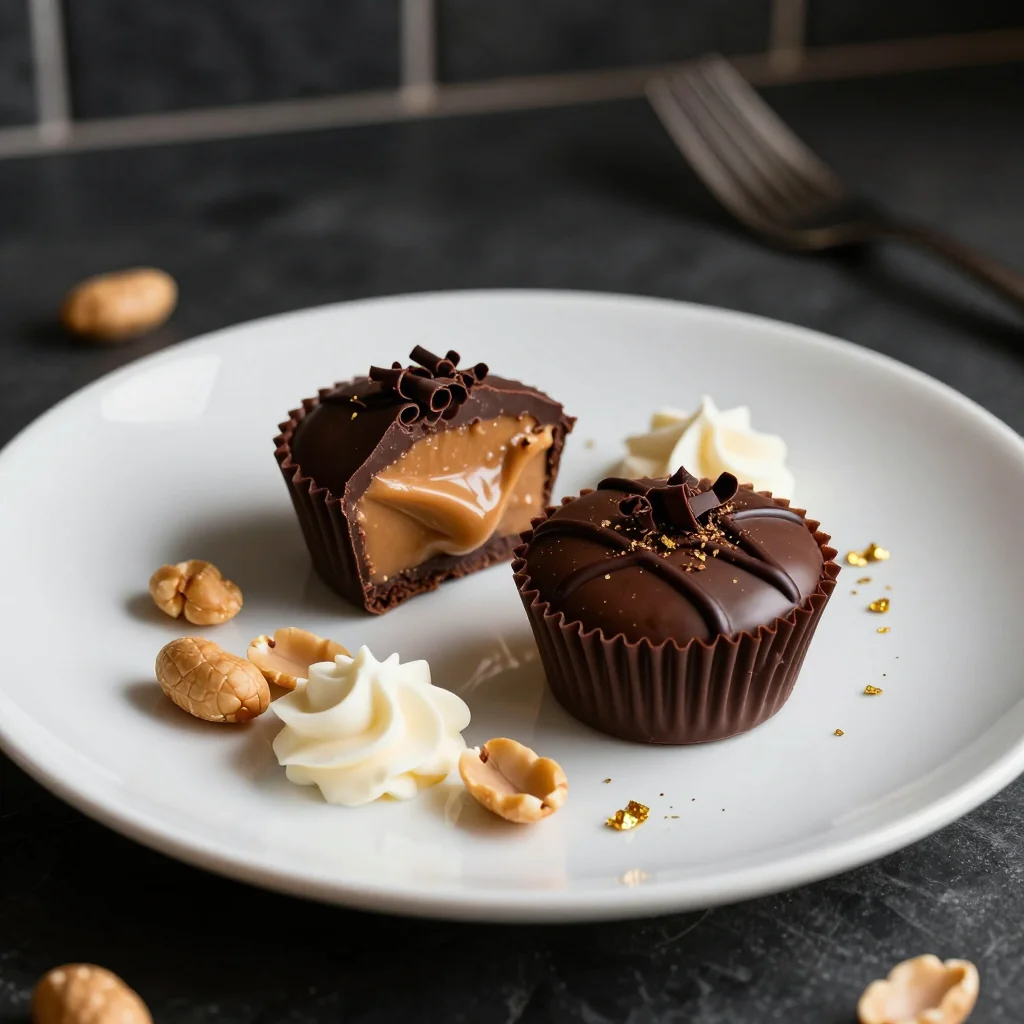
Plate and Garnish
Arrange the cups on a decorative plate. Drizzle a thin line of melted white chocolate for contrast, or sprinkle a dash of flaky sea salt on top for an extra pop of flavor.
Serve
Serve the cups chilled or at room temperature. They pair wonderfully with a cold glass of milk, a robust espresso, or a glass of dry red wine for an adult‑only treat.
💡 Expert Tips & Tricks
🛒 Choosing the Right Ingredients
Opt for a dark chocolate bar with at least 70% cocoa solids; this not only provides a richer flavor but also supplies antioxidants that are beneficial for health. When selecting peanut butter, choose a natural variety that contains only peanuts and a pinch of salt—avoid brands with added sugars or hydrogenated oils, as they can cause the filling to separate. For coconut oil, ensure it’s virgin and unrefined for the best aroma. Finally, pick raw honey, which adds a delicate floral sweetness without overpowering the salty notes.
🔪 Preparation Techniques
Before melting chocolate, break it into small, uniform pieces; this speeds up melting and reduces the risk of scorching. Use a silicone spatula to stir constantly, which helps keep the chocolate smooth. When piping the peanut butter filling, a small pastry bag or a zip‑top bag with a corner cut off gives you precise control, preventing overflow and ensuring a consistent amount in each cup.
🌡️ Mastering the Chocolate
The ideal melting temperature for dark chocolate is between 45‑50 °C (113‑122 °F). If you’re using a microwave, heat in 20‑second intervals and stir in between. Adding a teaspoon of coconut oil not only improves the sheen but also lowers the setting temperature, so the cups firm up faster in the fridge. Remember to temper the chocolate only if you need a glossy snap; the coconut oil method is a shortcut that still yields a beautiful finish.
🍽️ Presentation & Service
For a restaurant‑style presentation, place each cup on a small square of parchment paper and drizzle contrasting white or milk chocolate in a decorative zig‑zag. Sprinkle a few flaky sea salts or crushed peanuts just before serving for a textural contrast. If you’re serving at a party, arrange the cups in a tiered stand to showcase the glossy tops and create visual interest.
🏆 Pro Tips
Professional pastry chefs rely on precision, timing, and subtle flavor balances to elevate a simple confection into a show‑stopper.
- 🎯 Temperature Control: Always melt chocolate at low heat. Overheating destroys cocoa butter crystals, resulting in a dull, soft shell. Use a digital thermometer to stay within the 45‑50 °C range.
- 🎯 Layer Thickness: Aim for a 2‑mm thick chocolate shell. Too thin and the cup will break; too thick and the bite becomes overly chocolatey, masking the peanut butter.
- 🎯 Air Bubble Removal: After coating each liner, tap the tray gently on the counter and give the chocolate a quick swirl with a brush to push out trapped air. Air bubbles cause uneven texture and can create weak spots.
- 🎯 Flavor Enhancement: A pinch of flaky sea salt on the top of each cup amplifies the chocolate’s bitterness and the peanut butter’s sweetness, creating a balanced palate experience.
- 🎯 Storage Optimization: Store cups in an airtight container with a layer of parchment between each cup to prevent them from sticking together.
- 🎯 Scaling the Recipe: The portion adjuster in the card below automatically recalculates ingredient quantities, ensuring perfect results whether you make 6 or 24 cups.
“The secret to a great confection is not just the ingredients, but the love and precision you pour into each step.” — Chef Marco Bellini
🔄 Variations & Adaptations
The base recipe is a canvas for endless creativity. Here are some exciting twists to suit different preferences and occasions.
🥬 Vegan Version
Replace the honey with maple syrup and use a plant‑based butter (such as coconut oil‑based vegan butter). Ensure the dark chocolate is dairy‑free; many brands label “vegan” on the wrapper. The result is a fully plant‑based cup that still delivers that creamy, salty‑sweet punch.
- Maple syrup (instead of honey) – adds a subtle caramel note.
- Vegan butter – maintains the silky texture without dairy.
🌶️ Flavor Variations
Play with spices and extracts to create unique flavor profiles that surprise the palate.
Spicy Chili:
Add ¼ teaspoon of cayenne pepper to the peanut butter mixture and a dash of smoked paprika to the chocolate for a smoky heat.
Mediterranean Olive:
Stir a teaspoon of finely chopped black olives into the filling and sprinkle a pinch of za'atar on top of the chocolate seal.
Asian Matcha:
Mix ½ teaspoon of matcha powder into the chocolate for a green‑tinged, slightly bitter finish that pairs beautifully with the sweet filling.
⚠️ Dietary Adjustments
Gluten‑Free:
All ingredients are naturally gluten‑free; just double‑check the chocolate label for any added wheat‑based emulsifiers.
Lactose‑Free:
Use dairy‑free dark chocolate and replace butter with coconut oil or a dairy‑free butter alternative.
Low‑Calorie:
Swap honey for a low‑calorie sweetener like erythritol, and use a 85% cocoa chocolate to reduce sugar while maintaining richness.
👶 Kid‑Friendly Version
Kids often prefer milder flavors. Use milk chocolate instead of dark, omit the sea salt, and add a drizzle of caramel sauce after the cups have set. Serve with a side of sliced bananas for a wholesome snack.
📦 Storage & Reheating
🧊 Conservation
Refrigerator:
- Duration: 7 days
- Container: Airtight plastic container with parchment between cups
- Tip: Keep the container on the middle shelf to maintain a consistent temperature.
Freezer:
- Duration: 2 months
- Method: Place cups on a parchment‑lined tray, freeze until solid, then transfer to a zip‑top freezer bag.
- Defrosting: Transfer to the refrigerator for 2‑3 hours before serving.
💡 For best texture, avoid prolonged exposure to room temperature; chocolate can bloom (develop a white film) if it melts and re‑solidifies improperly.
♨️ Reheating
🔥 Oven (Recommended):
- Preheat to 150 °C (300 °F).
- Place cups on a baking sheet lined with parchment.
- Heat for 5‑7 minutes, just until the chocolate softens slightly.
- Remove and let cool for 2 minutes before serving.
⚡ Microwave (Quick):
- Place a cup on a microwave‑safe plate.
- Heat on medium power for 10‑15 seconds.
- Check softness; repeat in 5‑second bursts if needed.
🍳 Skillet:
For a toasted exterior, warm a non‑stick skillet over low heat, place a cup seam‑side down for 15‑20 seconds, then flip and warm the top briefly.
🍷 Perfect Pairings
🥗 Side Dishes
- Fresh Berry Salad: A mix of strawberries, blueberries, and mint provides a bright, acidic contrast to the rich cups.
- Salted Popcorn: The crunch and additional salt heighten the sweet‑salty balance.
- Vanilla Yogurt Dip: A cool, creamy dip softens the intense chocolate flavor.
🍷 Wine & Beverage Matches
- Port Wine (Ruby): The fortified wine’s fruitiness complements the chocolate’s bitterness.
- Cold Brew Coffee: The bitterness of coffee cuts through the sweetness, creating a harmonious duo.
- Non‑Alcoholic: Sparkling Water with a Twist of Lime: Refreshing palate cleanser between bites.
🍰 Complementary Courses
Start the meal with a light citrus‑based appetizer, such as a grapefruit and arugula salad, then move to these cups as a decadent dessert. Follow with a simple vanilla panna cotta or a scoop of vanilla bean ice cream to round out the sweet experience without overwhelming the palate.
❓ Frequently Asked Questions
Q: Can I use milk chocolate instead of dark chocolate?
A: Yes, you can substitute milk chocolate, but reduce the amount of added honey or sugar in the filling to prevent the cups from becoming overly sweet. Milk chocolate also has a lower melting point, so watch the temperature carefully to avoid burning.
Q: How do I prevent the chocolate from developing a white “bloom”?
A: Bloom occurs when chocolate is exposed to temperature fluctuations. Keep the cups in a cool, dry place, avoid direct sunlight, and store them in an airtight container. If bloom appears, gently re‑melt the chocolate and re‑coat the cups.
Q: What’s the best way to pipe the peanut butter filling?
A: Use a small pastry bag fitted with a ½‑inch tip, or a zip‑top bag with a corner snipped off. This gives you control over the amount and helps keep the filling centered.
Q: Can I add other nuts or seeds to the filling?
A: Absolutely! Chopped almonds, hazelnuts, or toasted pumpkin seeds add delightful crunch. Just fold them into the peanut butter mixture before filling the cups.
Q: How many calories are in each cup?
A: Roughly 120 kcal per cup, depending on the exact chocolate brand and whether you use honey or a low‑calorie sweetener. The nutrition table below provides a detailed breakdown.
Q: Can I prepare these cups ahead of a party?
A: Yes, they keep well refrigerated for up to a week. Assemble them the day before and store in a sealed container. Bring them to room temperature 10‑15 minutes before serving for optimal texture.
🎉 Let’s Get Cooking!
This homemade chocolate peanut butter cup recipe brings together the comfort of a classic candy with the satisfaction of creating it from scratch. By mastering the simple techniques of melting chocolate, balancing sweet and salty flavors, and using a portion adjuster to scale the recipe, you’ll be able to serve a crowd or enjoy a quiet night in with equal confidence. The glossy shells, creamy centers, and optional garnishes make each bite a miniature celebration.
Give it a try, experiment with the variations, and don’t forget to share your results. Your feedback helps me refine the recipe and inspire new creations. Happy cooking!
Have you tried this recipe?
Leave a comment and rating below! Share your photos on Instagram with #HomemadePBcups for a chance to be featured.
Chocolate Peanut Butter Cups Homemade
Silky dark chocolate shells filled with creamy, salty‑sweet peanut butter.
📝 Ingredients
Chocolate Shell
Peanut Butter Filling
Optional Garnish
👨🍳 Instructions
- 1 Line a 12‑cup silicone muffin tray with paper liners.
- 2 Melt dark chocolate and coconut oil together, stir in vanilla and sea salt.
- 3 Coat each liner with a thin layer of chocolate, chill 5 minutes.
- 4 Spoon or pipe the peanut butter mixture into each cup, leaving space at the top.
- 5 Cover the filling with a final layer of chocolate, smooth the tops.
- 6 Refrigerate for 20 minutes until fully set.
- 7 Remove cups from tray, garnish with crushed peanuts if desired.
- 8 Store in an airtight container; enjoy chilled or gently warmed.
🥗 Nutritional Information (per cup)
*Values are estimates based on standard ingredient brands.
📚 You Might Also Like
Salted Caramel Truffles
Matcha White Chocolate Bark
Spicy Mexican Chocolate Mousse


💬 Comments & Reviews
Leave a Comment
No comments yet. Be the first to share your thoughts!