I was standing in my kitchen, half‑asleep, staring at a half‑finished batch of peanut butter cookies that had somehow turned into a charcoal slab. The smoke alarm was wailing like a banshee, and my roommate burst in, eyes wide, daring me to “make something sweet that doesn’t involve a fire.” I laughed, grabbed a spoon, and thought, why not reinvent the classic haystack, but with a buttery twist that doesn’t need an oven? The result? A no‑bake marvel that feels like a hug from a candy store and a high‑five from a health nut at the same time.
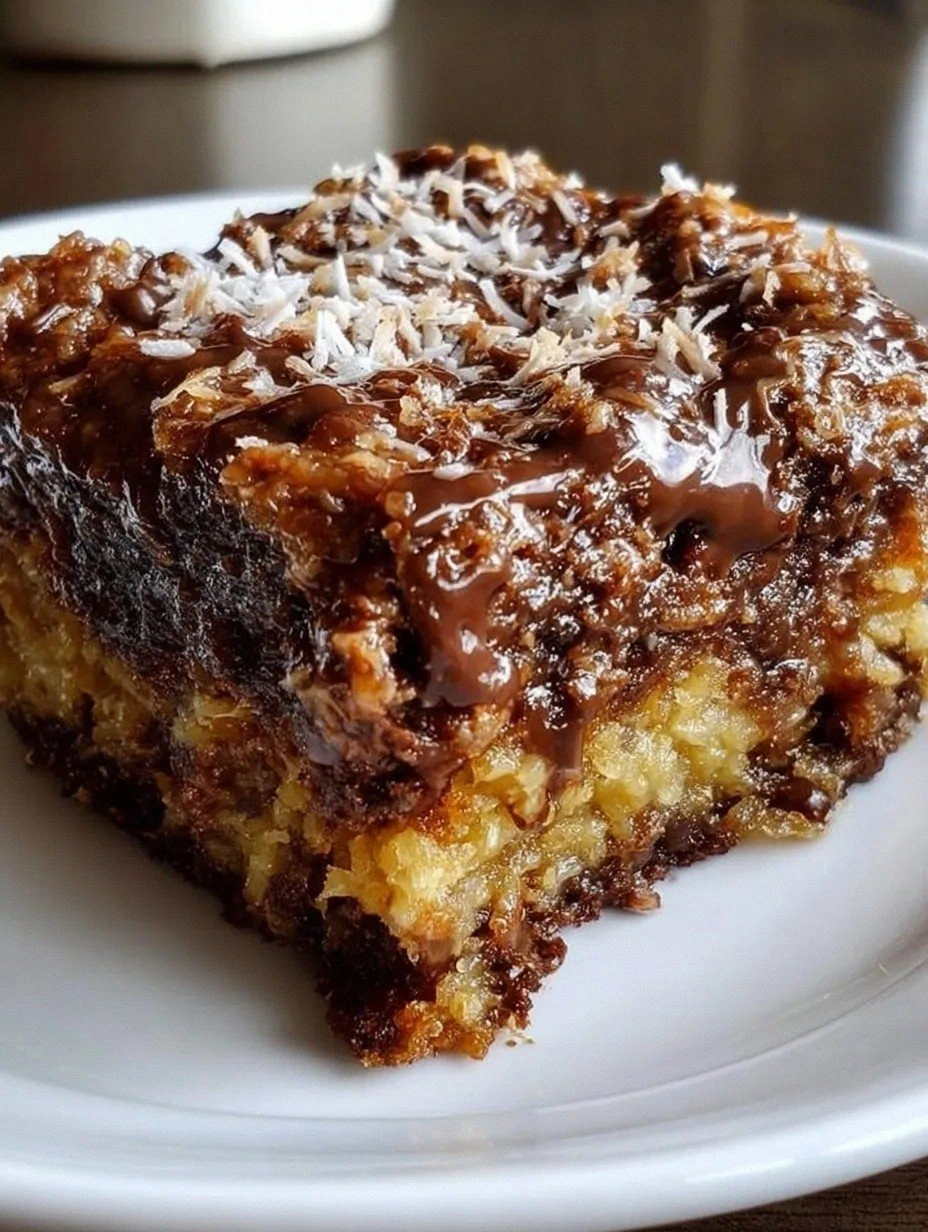
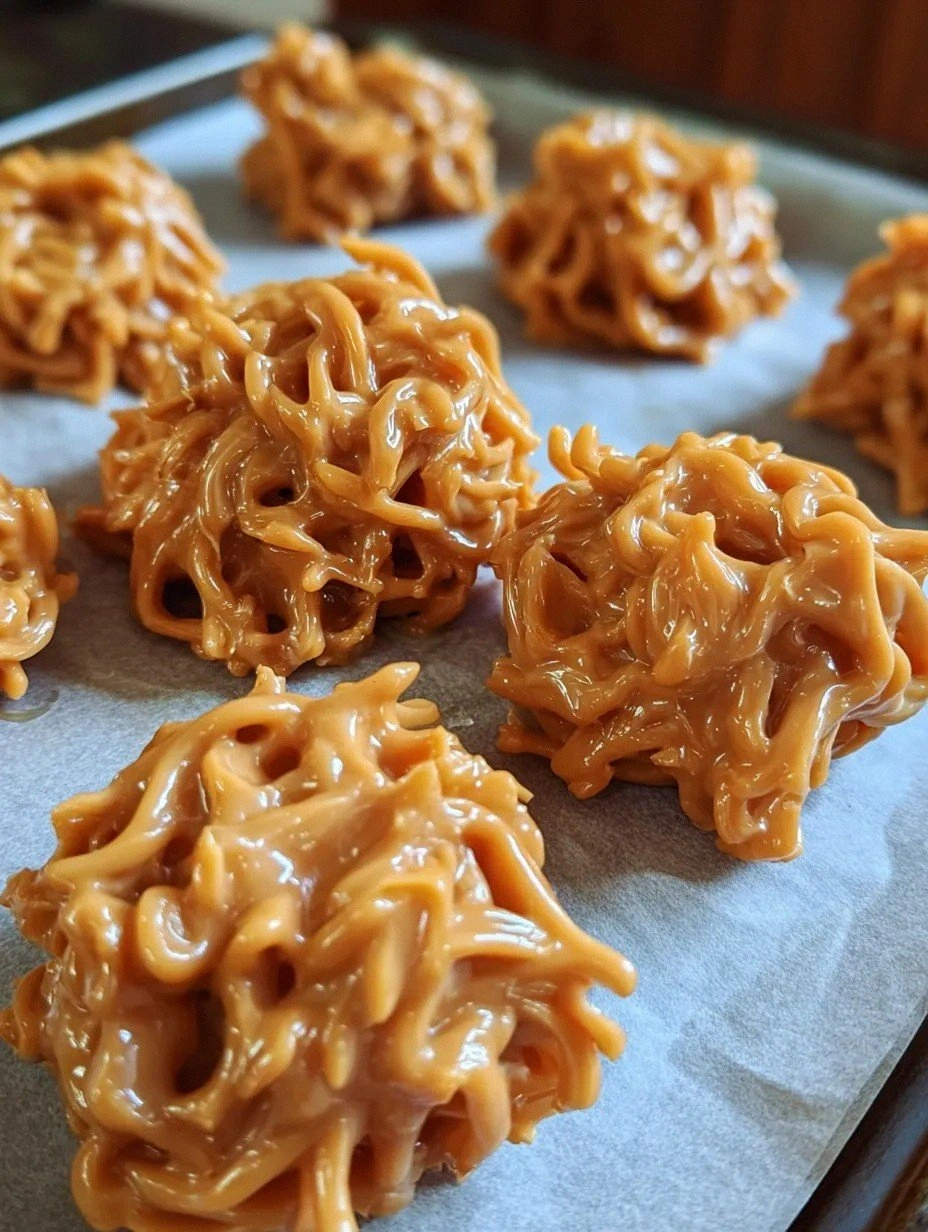
Picture this: a glossy river of golden butterscotch swirling through a thick, creamy peanut butter base, studded with crunchy oat “hay” that snaps like fresh twigs underfoot. The aroma hits you first – a warm, caramel‑kissed scent that makes your nostrils do a little dance, followed by the nutty, slightly salty perfume of roasted peanuts. When you bite, the first thing you notice is the crisp, airy crunch that gives way to a velvety, buttery melt that coats your tongue like a silk sheet. And then, just when you think you’ve mapped the flavor terrain, a whisper of vanilla sneaks in, rounding everything off with a soft, lingering finish.
Most recipes for peanut butter haystacks either drown the nutty goodness in a sea of sugar or leave the texture flat and soggy. This version stands out because it balances the sweet and salty, the crunchy and creamy, without any of the usual pitfalls. I threw in a secret weapon – a dash of butterscotch chips that melt into the mixture, creating pockets of caramel‑rich surprise that explode in your mouth. The result is a treat that’s both nostalgic and brand‑new, a perfect blend of childhood comfort and gourmet indulgence.
I’m going to walk you through every single step, from selecting the right peanut butter to mastering the perfect chill time. By the end, you’ll be able to brag that you’ve crafted the ultimate no‑bake sweet and crunchy treat, and you’ll be daring anyone to taste it and not go back for seconds. Let me walk you through every single step — by the end, you'll wonder how you ever made it any other way.
What Makes This Version Stand Out
- Flavor Harmony: The buttery richness of butterscotch meets the earthy depth of peanut butter, creating a balanced sweet‑salty profile that dances on the palate.
- Texture Symphony: Crunchy oats and rice cereal provide a satisfying snap, while the melted butter and honey create a silky coating that holds everything together.
- Simplicity: No oven, no fancy equipment – just a saucepan, a spoon, and a handful of pantry staples.
- Unique Twist: Butterscotch chips aren’t typical in haystacks; they add caramel‑like pockets that melt into each bite.
- Crowd‑Pleaser: Kids love the sweet crunch, adults appreciate the nuanced flavors – it’s a universal hit.
- Ingredient Quality: Using creamy, natural peanut butter and real butter elevates the whole experience.
- Method Magic: The gentle melt‑and‑mix technique ensures no grainy sugar and a glossy finish.
- Make‑Ahead Potential: Once chilled, these haystacks keep for days, getting even better as flavors meld.
Inside the Ingredient List
The Flavor Base
The cornerstone of any great haystack is the flavor base – in this case, creamy peanut butter, unsalted butter, brown sugar, and honey. Peanut butter provides that unmistakable nutty depth, while butter adds richness and helps bind everything together. Brown sugar contributes a subtle molasses note that deepens the caramel undertones, and honey adds a floral sweetness plus a natural humectant that keeps the texture moist. Skipping any of these means losing the harmony that makes each bite sing; for instance, using only sugar would make the mix gritty, and omitting butter would result in a dry, crumbly mess.
If you’re allergic to peanuts or prefer a different nut, try almond butter or cashew butter – each brings its own character but keep the consistency creamy. For a dairy‑free version, swap butter for coconut oil and use a vegan brown sugar; the flavor will shift slightly toward tropical, which can be delightful.
The Texture Crew
Rolled oats and crispy rice cereal are the dynamic duo that give these haystacks their signature crunch. Oats add a hearty, slightly nutty bite and act as a sponge to soak up the buttery mixture, while the rice cereal contributes airy, melt‑in‑your‑mouth lightness. If you skip the oats, you’ll end up with a dense, overly sweet slab; if you omit the rice cereal, the texture becomes too heavy and loses that satisfying snap.
Feel free to experiment with puffed quinoa or toasted coconut flakes for an extra layer of texture. Just remember to keep the total dry volume around 3 cups so the mixture isn’t too dry or too wet.
The Unexpected Star
Butterscotch chips are the secret weapon that transforms a standard haystack into something unforgettable. They melt into pockets of buttery caramel that burst with each bite, creating a contrast to the nutty base. If you can’t find butterscotch chips, you can melt caramel candies and swirl them in, or use a mix of milk chocolate and caramel bits for a similar effect.
A quick tip: add the chips when the mixture is off the heat; this prevents them from turning into a glossy mess and preserves those delightful pockets of gooeyness.
The Final Flourish
A pinch of sea salt and a splash of vanilla extract are the finishing touches that elevate this treat from good to legendary. Salt amplifies the sweetness and balances the richness, while vanilla adds a fragrant warmth that lingers on the palate. Skipping these would leave the haystacks tasting flat and one‑dimensional.
For an extra pop, consider sprinkling a pinch of flaky sea salt on top just before chilling – it adds a subtle crunch and a burst of flavor that makes the taste buds perk up.
Everything's prepped? Good. Let's get into the real action...
The Method — Step by Step
-
Grab a medium‑sized saucepan and set it over medium heat. Toss in the unsalted butter, brown sugar, and honey. Stir constantly with a wooden spoon; you’ll hear a gentle fizz as the sugar dissolves, and the mixture will begin to shimmer. This is the moment of truth – you want it to look glossy, not grainy. Watch for the edges to start pulling away from the pan, a sign that the sugar is fully melted and the base is ready.
Watch Out: If the mixture starts to smoke, lower the heat immediately – burnt butter will give a bitter aftertaste that ruins the whole batch. -
Once the butter‑sugar‑honey blend is glossy, remove the pan from the heat and stir in the creamy peanut butter, vanilla extract, and sea salt. You’ll notice the mixture thickening instantly, turning a deep amber color. Okay, ready for the game‑changer? The peanut butter should melt smoothly, creating a velvety ribbon that coats the back of your spoon. If you see lumps, keep stirring – the residual heat will melt them away.
Kitchen Hack: Warm the peanut butter slightly before adding – it integrates faster and prevents grainy pockets. -
Now, fold in the rolled oats, crispy rice cereal, and optional chopped peanuts. Use a spatula to gently combine, ensuring every oat flake is coated in the buttery mixture. The dry ingredients should look glossy but not soggy; you’re aiming for a texture that holds together when pressed but still crumbles lightly. This step? Pure magic. The oats will absorb some of the moisture, creating a tender interior.
-
Let the pan sit for a minute to cool just enough that the butterscotch chips won’t melt completely. Then, stir in the butterscotch chips. As you fold them in, you’ll see tiny flecks of gold melt into the mixture, forming little caramel rivers. Don’t over‑mix – you want distinct pockets, not a uniform brown mass.
-
Line a baking sheet with parchment paper. Using a large spoon or an ice‑cream scoop, drop generous mounds of the mixture onto the sheet, spacing them about an inch apart. Each mound should be roughly the size of a golf ball; they’ll spread a little as they set. Picture yourself pulling this out of the fridge, the whole kitchen smelling incredible... The visual of those glossy mounds is half the fun.
-
Press each mound lightly with the back of a spoon to flatten them into a haystack shape. The tops should be smooth, with a slight dome. If you want a rustic look, leave them a bit uneven – it adds charm. I’ll be honest — I ate half the batch before anyone else got to try it, so make sure you have enough parchment!
-
Transfer the sheet to the refrigerator and let the haystacks set for at least 30 minutes. This chilling time is crucial; the butter and honey solidify, giving the haystacks their snap. Stay with me here — this is worth it. You’ll hear a faint “click” when you tap the top, indicating they’re firm enough to lift.
Kitchen Hack: If you’re in a hurry, pop the tray into a freezer for 15 minutes; just don’t let them freeze solid. -
Once set, remove the haystacks from the fridge and gently lift them off the parchment using a thin spatula. Place them on a serving platter, drizzle a thin ribbon of melted butterscotch or extra honey if you like extra shine. And now the fun part. Serve them at room temperature for the best texture; if they’re too cold, the butter can feel waxy.
-
That’s it — you did it. But hold on, I’ve got a few more tricks that’ll take this to another level. Store any leftovers in an airtight container, and they’ll stay chewy and fresh for up to a week. If you’re feeling adventurous, sprinkle a pinch of flaky sea salt on each just before serving for that perfect sweet‑salty pop.
Insider Tricks for Flawless Results
The Temperature Rule Nobody Follows
Never let the butter‑sugar mixture boil vigorously. A gentle simmer ensures the sugar dissolves evenly without caramelizing too quickly. If you notice the mixture bubbling aggressively, lower the heat immediately. I once let it boil, and the result was a bitter, burnt flavor that no amount of extra honey could fix. Keep the temperature steady, and you’ll get that glossy, smooth texture every time.
Why Your Nose Knows Best
Your sense of smell is a secret weapon. When the butter‑sugar blend starts to emit a nutty, caramel aroma, that’s the cue to take it off the heat. If you wait for visual cues alone, you might overshoot and scorch the mixture. Trust that warm, buttery scent; it’s the culinary equivalent of a green light.
The 5‑Minute Rest That Changes Everything
After you fold in the oats and cereal, let the bowl sit for five minutes before adding the butterscotch chips. This short rest allows the dry ingredients to fully absorb the liquid, preventing the final product from being too crumbly. I once skipped this step, and the haystacks fell apart the moment I tried to lift them. Five minutes is all it takes to lock in that perfect texture.
Cold Spoon, Warm Heart
When scooping the mixture onto parchment, use a chilled metal spoon or ice‑cream scoop. The cold metal helps the mixture hold its shape longer, especially if your kitchen is warm. A friend tried using a warm spoon and ended up with flat, spread‑out blobs that never set properly. This tiny tweak makes a massive difference in the final appearance.
The Final Glaze Trick
For an extra glossy finish, lightly brush the tops with a mixture of melted butter and a dash of corn syrup right after they’ve chilled. The glaze adds a subtle shine and a buttery snap when you bite. Okay, ready for the game‑changer? This step is optional but makes the haystacks look restaurant‑ready.
Creative Twists and Variations
This recipe is a playground. Here are some of my favorite ways to switch things up:
Chocolate‑Covered Delight
Swap half of the butterscotch chips for dark chocolate chips, and after chilling, drizzle melted dark chocolate over the tops. The bitter chocolate balances the sweet peanut butter, creating a sophisticated flavor that will impress coffee‑drinking friends.
Spicy Kick
Add a pinch of cayenne pepper or a dash of chili powder to the butter‑sugar mixture. The heat sneaks through the sweet layers, giving an unexpected zing that awakens the palate. Perfect for those who love a sweet‑heat combo.
Tropical Twist
Replace the rolled oats with toasted coconut flakes and add shredded dried pineapple. The coconut adds a fragrant crunch, while the pineapple brings a bright, tangy contrast to the buttery base.
Nut‑Free Version
Use sunflower seed butter instead of peanut butter, and swap chopped peanuts for roasted pumpkin seeds. The flavor profile shifts to a milder, earthy note, but the texture remains satisfying.
Coffee Infusion
Stir in a teaspoon of instant espresso powder with the vanilla extract. The coffee undertones deepen the caramel flavor, making the haystacks perfect for an after‑dinner treat alongside a cup of joe.
Storing and Bringing It Back to Life
Fridge Storage
Place the haystacks in an airtight container lined with parchment paper. They’ll stay fresh for up to seven days. The cool environment keeps the butter firm, preserving that satisfying snap.
Freezer Friendly
If you want to make a big batch, freeze the haystacks individually on a tray, then transfer them to a zip‑top freezer bag. They’ll keep for up to three months. When you’re ready to enjoy them, let them thaw at room temperature for 15 minutes.
Best Reheating Method
To revive a slightly hardened haystack, microwave it for 5‑7 seconds on low power, then add a tiny splash of water (about a teaspoon) and cover loosely with a paper towel. The steam will melt the butter just enough to bring back that soft‑chewy interior while keeping the outer crust crisp.