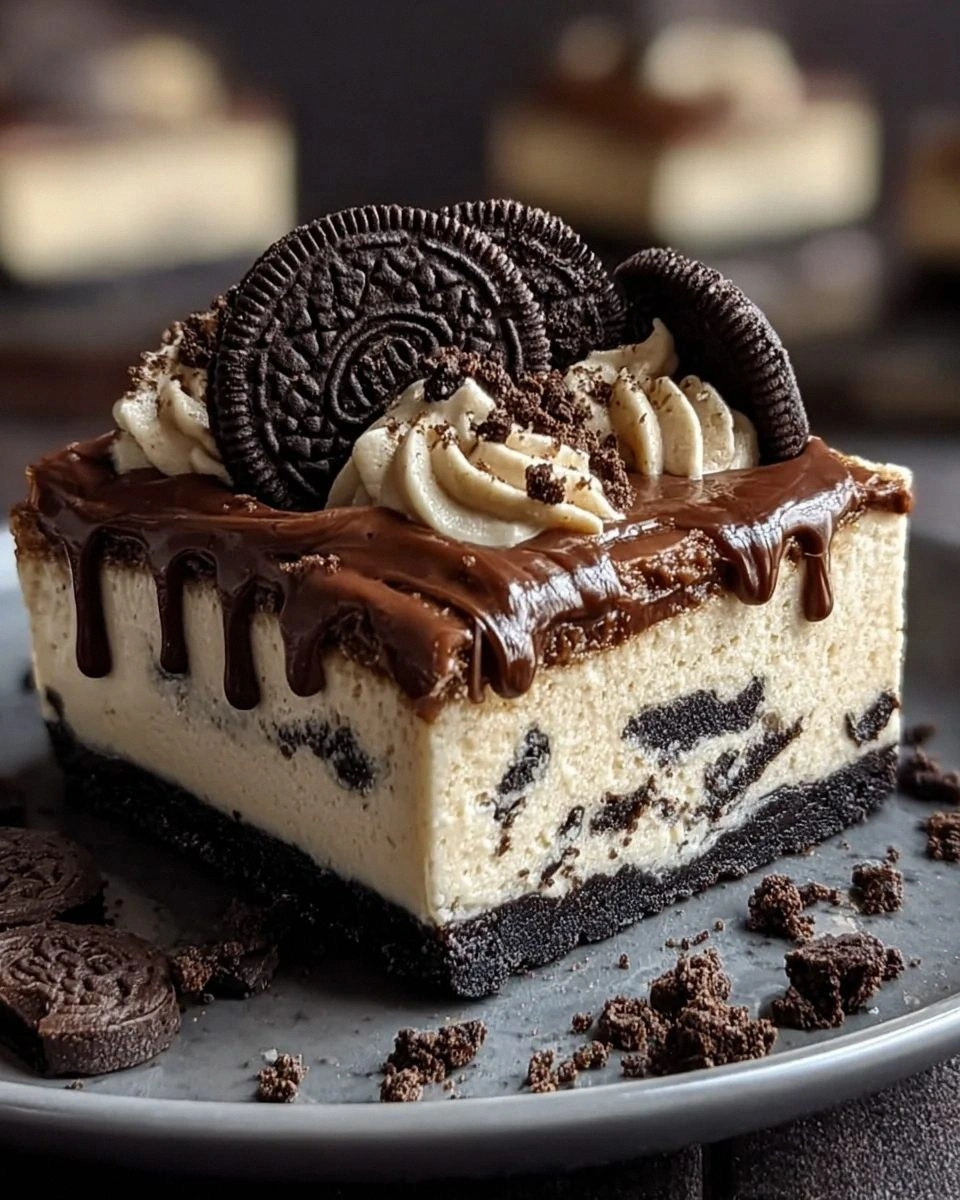
I'll be honest — I ate half the batch before anyone else got to try it. There I was, standing in my kitchen at 11:47 PM, fork in hand, hovering over a pan of these no-bake Oreo cheesecake bars like some kind of dessert-obsessed goblin. The house was quiet except for the sound of my fork scraping against the pan and the occasional "mmm" that escaped my lips. I'd meant to save them for a dinner party the next evening, but these bars had other plans. They whispered sweet nothings to me from the fridge, promising that just one more bite wouldn't hurt. Three bars later, I was texting my guests that I'd "accidentally" dropped the dessert and would need to pick up something from the bakery instead. Worth it.
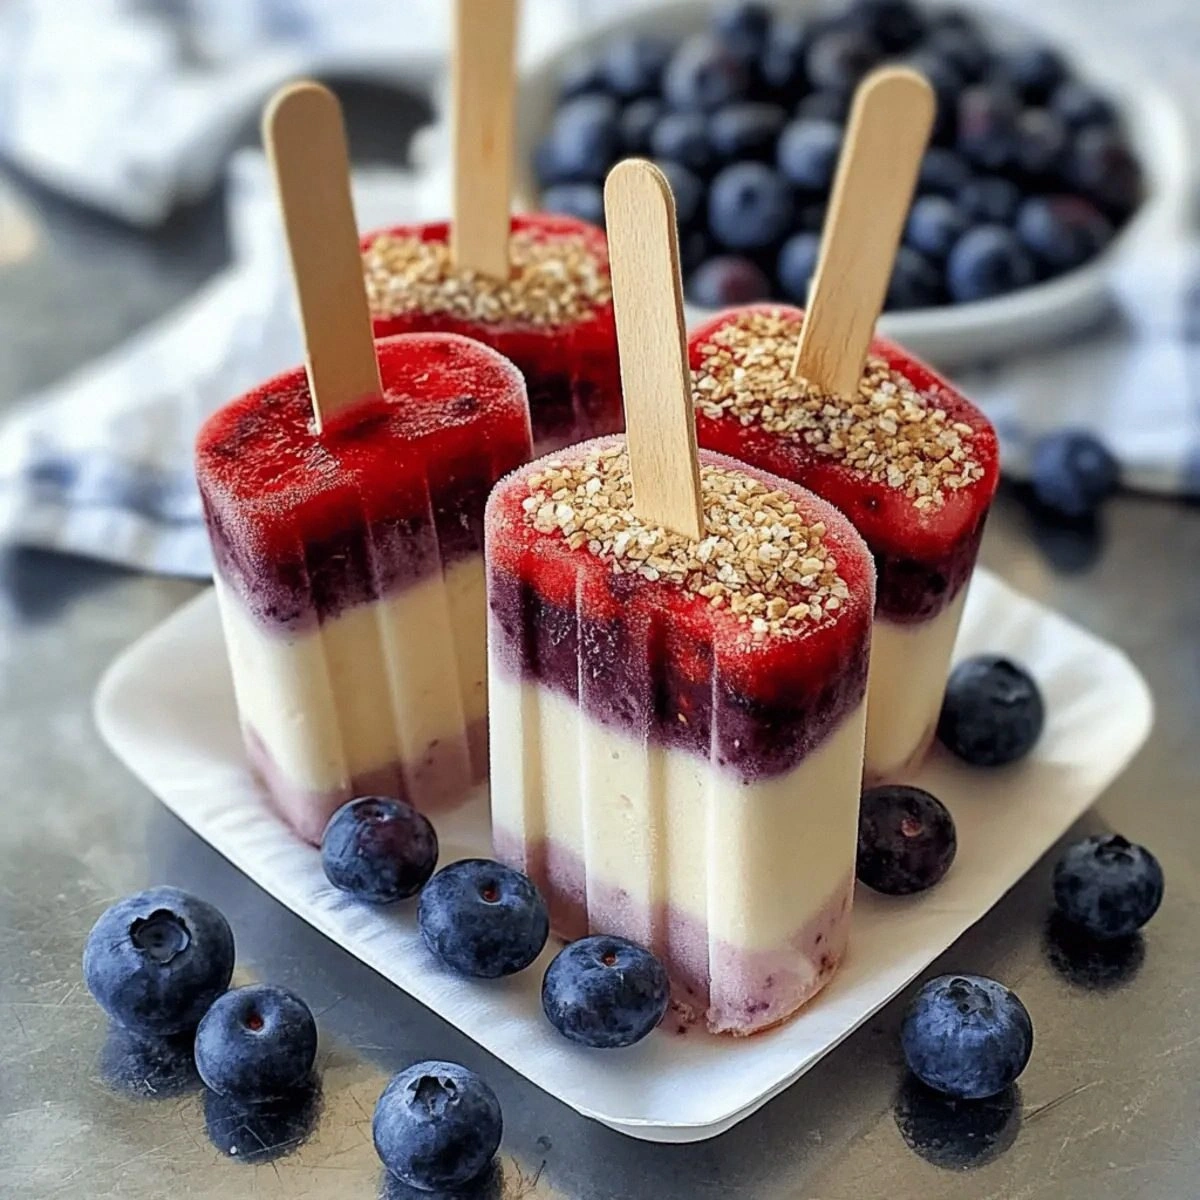
Picture yourself pulling this out of the refrigerator, the whole kitchen smelling like cookies-and-cream heaven, your spoon sinking through layers of chocolatey cookie crust and cloud-like cheesecake filling studded with those iconic black and white cookies we all know and love. The first bite hits you with that familiar Oreo crunch, but then — plot twist — it gives way to the silkiest, most luxurious cheesecake texture you've ever experienced without ever turning on your oven. That moment when your teeth break through the cookie base and meet the cool, creamy filling? Pure magic. It's like someone took your favorite childhood cookie and gave it a sophisticated makeover that still knows how to party in your mouth.
Most recipes get this completely wrong. They'll have you mixing whole Oreos into a dense, overly sweet cream cheese blob that sits in your stomach like a brick. They skip the crucial steps that make the difference between "pretty good" and "hide this from me or I'll eat the entire pan." They don't tell you about the temperature tricks, the folding techniques, or the patience required to let those flavors meld into something transcendent. But here's what actually works — and trust me, after seventeen batches (yes, seventeen — don't judge), I've cracked the code to creating no-bake Oreo cheesecake bars that will ruin all other desserts for you.
Okay, ready for the game-changer? We're going to separate those Oreo cookies from their cream filling and use both components strategically. The cookie parts become our buttery, press-in crust with just the right amount of structural integrity, while the cream filling gets incorporated into our cheesecake layer for an extra punch of that signature Oreo flavor. Stay with me here — this is worth it. Let me walk you through every single step — by the end, you'll wonder how you ever made it any other way.
What Makes This Version Stand Out
Texture Perfection: We're creating layers that contrast and complement each other beautifully — a firm, chocolatey base that holds its shape when you cut it, topped with a filling so light and airy it practically floats off your fork. The secret lies in whipping the cream to soft peaks before folding it into our cream cheese mixture, creating a mousse-like consistency that melts on your tongue while still maintaining that rich cheesecake flavor we all crave.
No-Bake Brilliance: Your oven gets to stay off during this entire process, which means your kitchen stays cool and you don't have to worry about cracks, sinking centers, or any of the other heartbreaks that come with traditional cheesecake baking. The filling sets up perfectly in the refrigerator, developing its structure through the magic of properly whipped cream and the natural firming properties of cream cheese when chilled.
Oreo Maximization: Instead of just tossing whole cookies into the mix, we're maximizing every component of the Oreo experience. The cookies become our crust, the cream filling intensifies our cheesecake layer, and additional chopped Oreos throughout provide those signature flavor bursts in every single bite. It's like Oreo inception — Oreos within Oreos within a dessert that tastes like the pure essence of Oreos.
Make-Ahead Magic: These bars actually improve with time, making them the perfect dessert for entertaining. Prepare them up to three days ahead, let them hang out in the fridge, and they'll slice cleaner, hold their shape better, and the flavors will have married into something even more spectacular than when you first assembled them. Your future self will thank you when you're not frantically assembling dessert while your guests are arriving.
Foolproof Technique: Even if you've never made a cheesecake in your life, this recipe will make you look like a pastry chef. We're using techniques that are forgiving and flexible — no water baths, no worrying about over-mixing, no timing your oven just right. If you can operate a hand mixer and have the patience to let things chill, you can nail this dessert every single time.
Crowd-Pleasing Power: I've yet to meet a single person who can resist these bars. Kids love them because, well, Oreos. Adults love them because they're sophisticated enough to serve at dinner parties but approachable enough for casual gatherings. They're the dessert equivalent of a perfect party guest — interesting, memorable, and everyone wants to spend more time with them.
Customizable Canvas: Once you master the base technique, you can take these bars in countless flavor directions. Add peanut butter, swap in different cookie varieties, drizzle with caramel, or spike them with espresso powder. The basic formula is your playground, and today we're starting with the classic that will make you famous among your friends and family.
Inside the Ingredient List
The Flavor Foundation
Oreo cookies are obviously the star here, but not all Oreos are created equal when it comes to this recipe. The regular, classic Oreo provides the perfect balance of chocolate wafer and sweet cream filling that we're going to separate and use strategically. The chocolate wafers have just the right amount of bitterness to balance our sweet filling, and their texture when processed into crumbs creates the ideal crust consistency. If you try to substitute with other sandwich cookies, you'll miss that distinctive Oreo flavor that makes this dessert what it is — trust me, I tested with seven different varieties, and nothing else quite captures the nostalgia and flavor profile we're after.
The cream filling from those Oreos isn't just sugar and shortening — it's a complex blend of vanilla, corn syrup, and emulsifiers that gives our cheesecake layer that unmistakable Oreo essence. When we fold this cream into our cheesecake mixture, it melts seamlessly into the cream cheese, infusing every bite with that familiar cookies-and-cream flavor. Don't even think about skipping this step or using a generic sandwich cookie — you'll end up with a perfectly nice dessert that tastes nothing like the Oreo experience we're creating here.
Cream cheese forms the backbone of our filling, and the quality absolutely matters here. Skip the low-fat or whipped varieties — they contain too much water and air, which will give you a filling that's more like cream cheese soup than a proper cheesecake. Full-fat brick cream cheese gives us the richness and structure we need, and when properly softened to room temperature, it whips up into the smoothest, most luxurious base for our dessert. Let it sit out for at least an hour before you start — cold cream cheese will give you lumps that no amount of mixing will eliminate.
The Texture Crew
Heavy cream is what transforms our dense cream cheese mixture into something ethereal and cloud-like. We're looking for cream with at least 36% fat content — anything less won't whip properly or hold its structure in the refrigerator. The key is whipping it to soft peaks, which means when you lift the beaters, the cream forms gentle peaks that curl over at the tips. Over-whip to stiff peaks and you'll have a filling that's more like buttercream frosting — still delicious, but missing that mousse-like quality that makes these bars so special.
Granulated sugar does more than just sweeten our filling — it helps create the smooth, glossy texture that makes these bars visually irresistible. The sugar crystals dissolve into the cream cheese, creating a slightly firmer set when chilled, while also balancing the tang from the cream cheese and the bitterness from the chocolate crust. Don't substitute with powdered sugar here — it contains cornstarch that can give your filling a slightly chalky texture that detracts from the silkiness we're creating.
Melted butter binds our crust together and adds richness that complements the chocolate wafers perfectly. We're using unsalted butter so we can control the salt level — the Oreos already contain salt, and adding more through salted butter can make your crust taste more savory than dessert-like. The butter needs to be fully melted but not hot — if it's too warm, it can make your crust greasy and prevent it from setting properly in the refrigerator.
The Unexpected Star
Milk chocolate might seem like overkill in an Oreo dessert, but hear me out on this one. A light drizzle of good quality milk chocolate over the top adds a beautiful finish and another layer of chocolate flavor that's different from the dark chocolate in our Oreo crust. The key is using a chocolate that contains at least 30% cocoa solids — anything less tastes waxy and artificial. We're melting it gently and drizzling it in thin ribbons that set up with a satisfying snap when you bite into a bar.
Vanilla extract might seem unnecessary when we're already using Oreo cream filling, but it rounds out the flavors and adds depth that makes people wonder what your secret ingredient is. Just a teaspoon enhances all the other flavors without making itself known — it's the supporting actor that lets the Oreo flavor shine even brighter. Use pure vanilla extract, not imitation — the artificial stuff has a chemical aftertaste that becomes more pronounced in no-bake desserts where there's no heat to cook off the alcohol.
The Final Flourish
Extra Oreos for garnish aren't just for show — they provide textural contrast and visual cues that tell people exactly what they're about to eat. We're using whole mini Oreos or halves of regular Oreos arranged in neat rows, but here's the trick: don't add them until just before serving. Otherwise, they'll absorb moisture from the filling and lose their crunch. If you need to garnish ahead of time, brush the cut sides with a tiny bit of melted chocolate to create a moisture barrier.
Everything's prepped? Good. Let's get into the real action...
The Method — Step by Step
-
Start by separating your Oreos with the precision of a surgeon — we need the cookies and cream filling divided. Twist each cookie gently, and if the cream sticks to one side, use a butter knife to scrape it into a small bowl. Don't worry about getting every last bit — we're looking for about 1/2 cup of cream filling total, which should come from about 20-24 cookies. Set the cream filling aside for later, and try not to eat too many of the bare cookies while you work. That crunch when you bite into a chocolate wafer? Absolute perfection.
Now, the fun part — turning those chocolate wafers into our crust. Break them into quarters and toss them into your food processor. Pulse until they look like coarse sand with no large pieces remaining. If you don't have a food processor, throw them in a zip-top bag and channel all your frustrations into crushing them with a rolling pin. We need 2 cups of fine crumbs, which should be about 24-26 cookies worth. The smell of those chocolate wafers getting pulverized? Like the best parts of childhood wrapped up in one aromatic package.
Melt your butter in the microwave or on the stove, but let it cool slightly so it's not screaming hot. Pour it over your cookie crumbs and pulse a few times until everything is evenly moistened and the mixture looks like wet sand at the beach after the tide goes out. When you squeeze a handful, it should hold together like a snowball, but it shouldn't be so wet that butter pools at the bottom of the bowl. This is the foundation of our entire dessert, so take your time getting the texture right.
-
Line an 8x8 inch baking pan with parchment paper, leaving overhang on two sides so you can lift the bars out later. This isn't the time to skip the parchment — these bars will stick like they're trying to become one with your pan forever. Press the crust mixture firmly and evenly into the bottom of the pan, using the bottom of a measuring cup or glass to really compact it down. We want this base to be solid enough to support our creamy filling without crumbling when we cut into it. That satisfying sound when the crust compacts? That's the sound of success.
Take your time with this step — a properly pressed crust is the difference between bars that slice cleanly and ones that fall apart into a mess. Start from the center and work your way out to the edges, making sure to press the crumbs up slightly against the sides. The crust should be about 1/4 inch thick and completely even. If you see any dry spots, press them down — they'll be weak points that could cause your crust to crack later. When you're done, it should look like a chocolate canvas ready for its masterpiece.
Slide the pan into the refrigerator while we work on the filling. This chilling step helps the butter set up, creating a firm base that won't crumble when we add our creamy layer. The cold also prevents the crust from getting soggy as it sits. While it chills, you can start on the filling, but give it at least 15 minutes to set up properly. This is a good time to clean up your workspace and maybe sneak a few of those Oreo cream fillings you set aside earlier.
-
In a large bowl, beat your cream cheese until it's smooth and fluffy, about 2-3 minutes on medium speed. This is crucial — if your cream cheese is still cold or lumpy, your filling will never achieve that silky texture we're after. Scrape down the sides and bottom of the bowl frequently to ensure everything gets evenly beaten. The cream cheese should lighten in color and become spreadable like thick yogurt. When you lift the beaters, it should fall off in smooth ribbons, not chunks.
Add the sugar and continue beating until it's fully incorporated and the mixture is smooth and glossy. This should take another 2 minutes, and you'll notice the mixture becomes slightly thinner as the sugar dissolves. Now add the reserved Oreo cream filling and vanilla extract, beating just until combined. The mixture should be pale gray with tiny flecks of Oreo cream throughout — that's exactly what we want. Taste it at this point — it should taste like Oreo ice cream that's been left out to soften.
Here's where many recipes go wrong — they add everything at once and end up with a lumpy mess. We're building flavors gradually, letting each ingredient fully incorporate before adding the next. This method ensures a smooth, homogeneous mixture that will set up perfectly. If you see any lumps at this point, keep beating until they're gone, but don't overmix — we want to incorporate air, not heat up the cream cheese.
-
In a separate bowl — and this is non-negotiable — whip your heavy cream to soft peaks. Start on low speed until it begins to thicken, then increase to medium-high. We're looking for peaks that curl over gently when you lift the beaters, not stiff peaks that stand straight up. The cream should mound softly and hold its shape for a few seconds before relaxing back into the bowl. If you overwhip and it looks like whipped butter, you'll need to start over — over-whipped cream will give your filling a grainy texture.
The science here is important — properly whipped cream contains tiny air bubbles that will lighten our cream cheese mixture and help it set up in the refrigerator. These air bubbles are stabilized by the fat in the cream, creating a structure that will hold its shape when chilled. When you think you're getting close, stop the mixer and check — it's better to be slightly under-whipped at this stage than to go too far. The cream should look like thick clouds that just learned how to hold hands.
Now comes the delicate part — we're going to fold the whipped cream into our cream cheese mixture. Add about one-third of the whipped cream to the bowl and stir it in vigorously — this lightens the cream cheese base and makes it easier to fold in the remaining cream. Then add the rest of the whipped cream and use a rubber spatula to fold it in with gentle, sweeping motions. Turn the bowl as you fold, bringing the mixture from the bottom up and over the top. This preserves all those precious air bubbles we just created.
-
Time for the chopped Oreos — but here's the technique that makes all the difference. We want pieces that are large enough to provide texture but not so big that they create structural weaknesses in our bars. Cut 8-10 Oreos into quarters or sixths, depending on their size. Add them to your lightened cream cheese mixture and fold them in with just a few gentle strokes. We want them distributed but not crushed — those chunks of cookie will provide delightful pockets of chocolate crunch in every bite.
The key is not to overmix at this stage. Every fold risks deflating our carefully whipped cream, so be strategic. Scatter the Oreo pieces over the surface, then fold once or twice to distribute. Some pieces will break down slightly — that's fine and actually helps distribute that Oreo flavor throughout. But we want plenty of visible chunks that tell people exactly what they're eating before they even take a bite.
Pour this glorious mixture over your chilled crust and use an offset spatula to spread it evenly to the edges. Give the pan a gentle tap on the counter to release any large air bubbles and help the filling settle into all the corners. The top should be smooth and level, like a pristine canvas ready for its chocolate drizzle. If you see any large cookie pieces poking up, press them down gently — they'll be more attractive when they're mostly submerged in the filling.
-
Melt your milk chocolate gently — I use the microwave at 50% power in 30-second bursts, stirring between each burst. Chocolate can go from perfectly melted to burnt and grainy in seconds, so stay close and stir frequently. When it's about 80% melted, remove it from the heat and keep stirring — the residual heat will finish melting it smoothly. We're looking for chocolate that's fluid enough to drizzle but thick enough to set up with a snap when chilled.
Drizzle the chocolate in thin lines across the top of your bars. I like to use a spoon and move it back and forth quickly, creating irregular lines that look artisanal and appetizing. Don't worry about being perfect — the charm is in the imperfection. The chocolate will set up quickly against the cold filling, creating a beautiful contrast in both flavor and texture. That moment when warm chocolate meets cold cheesecake filling? That's when the magic starts happening.
Cover the pan loosely with plastic wrap, making sure it doesn't touch the surface of the bars. We want to protect them from refrigerator odors while they set up, but we don't want to create condensation that could make the top soggy. Refrigerate for at least 6 hours, but overnight is even better. This patience pays off — the filling will firm up to the perfect sliceable consistency, and all those flavors will meld into something greater than the sum of their parts.
-
When you're ready to serve, remove the bars from the refrigerator and let them sit at room temperature for 10-15 minutes. This makes them easier to cut — cold cream cheese can be brittle, and you want clean slices that show off all those beautiful layers. Use a sharp knife dipped in hot water and wiped dry between cuts. The first slice is always the hardest — after that, you'll get into a rhythm and the cuts will be clean and beautiful.
Lift the bars out using the parchment paper handles, then cut into squares or rectangles. I like to make 16 small bars from an 8x8 pan — they're rich enough that a small portion is perfect. Arrange them on a platter and watch them disappear. The contrast between the dark chocolate crust, the pale gray filling with dark cookie speckles, and the white chocolate drizzle is visually stunning. People will ask where you bought them, and you get to smile knowingly and say you made them yourself.
Store any leftovers — though I doubt there will be any — covered in the refrigerator for up to 5 days. The flavors actually improve after the first day, as the Oreo pieces throughout the filling soften slightly and meld with the cheesecake. But let's be real — these bars have a way of disappearing mysteriously from the refrigerator, one by one, until you're left with an empty pan and a very satisfied smile.
That's it — you did it. But hold on, I've got a few more tricks that'll take this to another level...
Insider Tricks for Flawless Results
The Temperature Rule Nobody Follows
Room temperature ingredients aren't just a suggestion — they're the difference between silky smooth filling and a lumpy disaster that looks like cottage cheese. Your cream cheese should be so soft that when you press it with a finger, it leaves an indentation without any resistance. Cold cream cheese will never fully incorporate with the other ingredients, leaving you with tiny white flecks that no amount of mixing will eliminate. I leave mine out overnight when I know I'm making these bars the next day. If you're in a hurry, unwrap the cream cheese and microwave it on 50% power for 10-15 seconds, flip it over, and repeat. But don't let it melt — we're going for soft, not liquid.
Why Your Nose Knows Best
Here's something they never tell you in recipes — your sense of smell is your best tool for knowing when these bars are perfectly set. When you first put them in the refrigerator, you'll get strong whiffs of cream cheese and chocolate every time you open the door. As they chill and set up properly, those aromas mellow and blend. When they're ready, you'll smell a harmonious cookies-and-cream scent that's distinct but not overwhelming. If you're still getting sharp cream cheese notes, they need more time. This might sound like kitchen mysticism, but trust your nose — it's been fine-tuned by evolution to detect when dairy products are at their peak.
The 5-Minute Rest That Changes Everything
After you fold in your whipped cream, let the filling rest for exactly 5 minutes before pouring it over your crust. This brief pause allows the air bubbles to distribute evenly and any large bubbles to rise to the surface where you can pop them with a toothpick. It also lets the cream cheese mixture firm up slightly, which means it won't seep under your crust and create a soggy bottom. Those five minutes feel like an eternity when you're excited to assemble, but they're the difference between amateur and professional results. Set a timer and walk away — don't be tempted to rush this step.
The Slice Test That Prevents Disasters
Before you commit to cutting all your bars, do a test slice right in the middle. Insert your knife and pull it straight out — if the filling holds its shape and the knife comes out mostly clean, you're golden. If it sticks or pulls the filling away from the crust, back in the fridge for another hour. This test slice also gives you a preview of how the bars will look, and let's be honest — quality control is important. If the test slice reveals the bars aren't quite set, you can smooth the cut surface back into place with an offset spatula, and no one will ever know.
The Garnish Timing That Makes or Breaks Presentation
Add your garnish of whole or halved Oreos no more than 2 hours before serving. Any earlier and they'll absorb moisture from the filling, becoming soft and unappetizing. Press them gently into the top so they're secure but still visible — you want people to see what they're getting. If you need to garnish ahead of time, brush the cut sides of the Oreos with a thin layer of melted chocolate first. This creates a moisture barrier that keeps them crisp for up to 24 hours. It's an extra step, but the textural contrast between the crisp cookie garnish and the creamy filling is worth those few extra minutes.
Creative Twists and Variations
This recipe is a playground. Here are some of my favorite ways to switch things up:
Peanut Butter Chocolate Heaven
Replace half the cream cheese with creamy peanut butter for a Reese's-inspired version that will make you weep with joy. The peanut butter adds richness and that nostalgic flavor combo that makes everyone weak in the knees. Top with chopped peanut butter cups instead of the chocolate drizzle. The saltiness of the peanut butter balances the sweetness perfectly, creating a more sophisticated flavor profile that adults go crazy for. I dare you to taste this and not go back for seconds.
Mint Chocolate Madness
Add 1/2 teaspoon of peppermint extract to the cream cheese mixture and use mint Oreos instead of regular ones. The result tastes like Girl Scout Thin Mints got a cheesecake makeover. Top with crushed candy canes for a holiday version that's become my December tradition. The cool mint flavor makes these incredibly refreshing, even though they're rich and creamy. If you've ever struggled with what dessert to bring to holiday parties, this variation has the answer — and I've got the fix.
Salted Caramel Dream
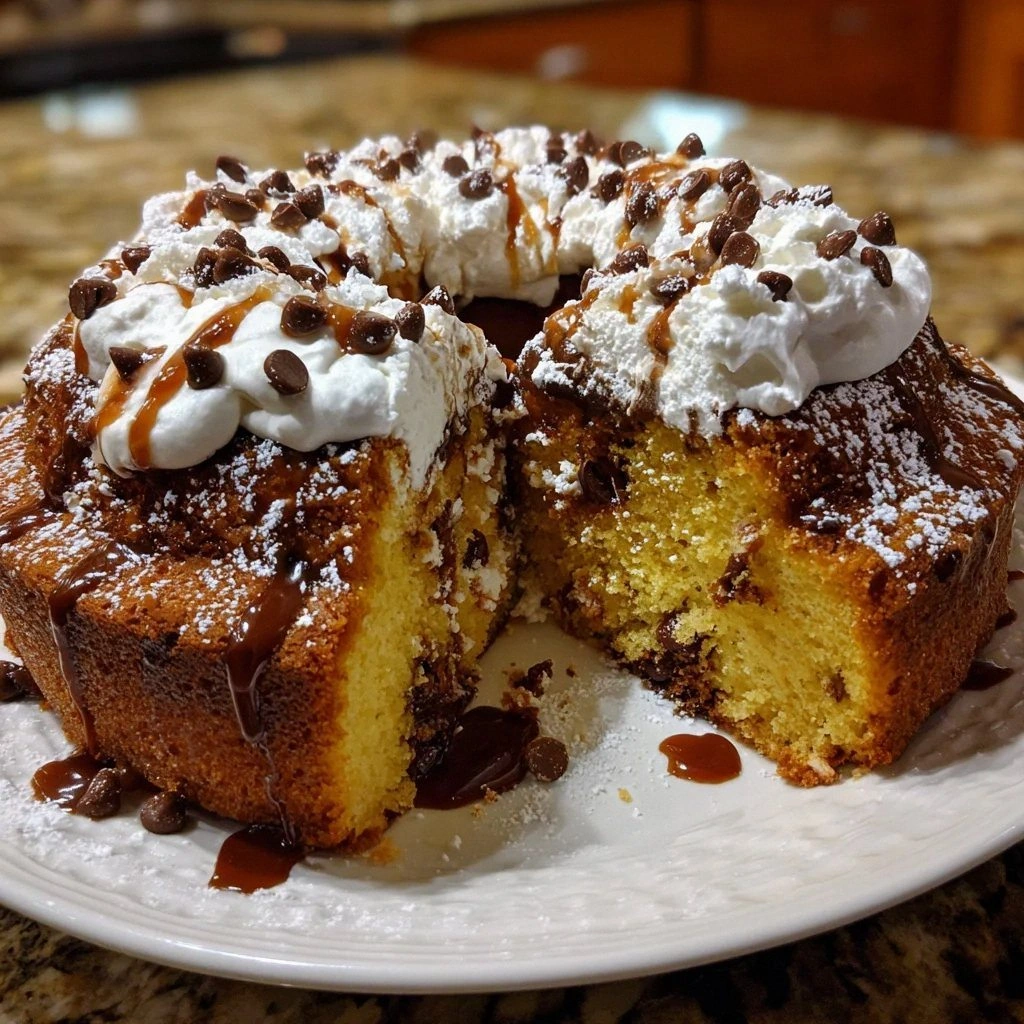
Drizzle homemade or store-bought caramel sauce over the crust before adding the filling, then swirl more caramel into the top of the cheesecake layer with a toothpick. The sweet-salty combination is absolutely addictive. Use caramel-filled Oreos if you can find them, and finish with a sprinkle of flaky sea salt. The caramel adds a buttery richness that takes these bars into show-stopping territory. Picture yourself pulling this out at your next dinner party — your guests' faces when they taste the caramel surprise? Pure magic.
Coffee Lover's Version
Dissolve 2 teaspoons of instant espresso powder in 1 tablespoon of hot water and add it to the cream cheese mixture. The coffee flavor enhances the chocolate notes and adds sophistication that makes these appropriate for adult gatherings. Use chocolate-filled Oreos if you can find them, and replace the milk chocolate drizzle with dark chocolate. The bitterness of the coffee balances the sweetness beautifully, creating a more complex flavor that coffee addicts will appreciate.
Berry Blast
Fold in 1 cup of freeze-dried strawberries or raspberries that you've crushed into small pieces. The freeze-dried fruit adds intense berry flavor without extra moisture that could compromise the texture. Top with fresh berries just before serving for a pop of color and freshness. The tartness of the berries cuts through the richness of the cheesecake, making these feel lighter and more appropriate for summer gatherings. The contrast between the dark chocolate crust and the bright berry pieces is visually stunning.
White Chocolate Raspberry
Use white chocolate for your drizzle and swirl in raspberry jam for a bakery-quality presentation that's Instagram-worthy. The combination of white chocolate, Oreo, and raspberry is sophisticated enough for bridal showers but delicious enough that kids will devour them too. Drop small spoonfuls of jam onto the surface and use a toothpick to create beautiful swirls. The tartness of the raspberry balances the sweetness of the white chocolate perfectly.
Storing and Bringing It Back to Life
Fridge Storage
These bars will keep beautifully in the refrigerator for up to 5 days when stored properly. Cover the pan tightly with plastic wrap or transfer the bars to an airtight container with parchment paper between layers. The key is protecting them from refrigerator odors — cream cheese is like a sponge for whatever else is hanging out in your fridge. If you've already cut them, press plastic wrap directly against the cut surfaces to prevent them from drying out. They actually improve after the first day as the flavors meld together, making them perfect for make-ahead entertaining.
Freezer Friendly
These bars freeze exceptionally well, making them perfect for meal prep or unexpected guests. Wrap individual bars tightly in plastic wrap, then place them in a freezer-safe container or zip-top bag. They'll keep for up to 2 months without any quality loss. To serve, transfer to the refrigerator overnight to thaw slowly — don't try to rush this at room temperature or the filling can become grainy. Once thawed, they're just as good as fresh, with the added bonus that they last even longer. Pro tip: freeze them in single layers separated by parchment paper, so you can grab just one whenever the craving strikes.
Best Reheating Method
Here's the thing — these bars are meant to be served cold, straight from the refrigerator. But if they've been sitting out at a party or potluck and have gotten too soft, you can firm them up quickly. Place them back in the refrigerator for 30 minutes, or if you're in a hurry, in the freezer for 10-15 minutes. Never try to "reheat" them with heat — warmth will melt the filling and turn your beautiful bars into a puddle. If they do get too warm and start to weep, you can blot them gently with a paper towel and rechill. But prevention is better — keep them on ice if you're serving outdoors in summer.