Introduction
I was scrambling to salvage a ruined batch of overcooked pasta when I realized a pot of simmering vegetables could rescue the evening. The kitchen smelled like a war zone, with burnt sauce still clinging to the pan and my stomach growling louder than the clatter of plates. I reached for a spare pot, tossed in a handful of carrots, celery, and onion, and let the aroma begin its slow, seductive dance. The sizzling sizzle that greeted me was the first promise of a culinary rescue mission. I dared myself to taste this humble mix and not go back for seconds, and the verdict was instant: it was pure, comforting genius. By the end of the night, the pot was a fragrant, hearty soup that had turned my disaster into a triumph, and I knew I had stumbled onto something that would become a staple in my freezer drawer.
Picture yourself pulling this out of the fridge on a rainy Thursday, the air thick with the scent of thyme and garlic. The first spoonful hits your tongue like a warm hug, the vegetables tender, the broth rich, and the seasoning perfectly balanced. I’m not exaggerating—this is hands down the best version you’ll ever make at home, and I’m about to share every secret that makes it so. I’ll walk you through each step, from the first sauté to the final freeze, and by the time you finish, you’ll wonder how you ever cooked anything else. I’ll also throw in a few micro‑challenges, like “I dare you to taste this and not go back for seconds,” to keep you on your toes. So buckle up, grab your apron, and let’s dive into the soup that will forever change your freezer game.
My friend, a culinary skeptic, once said that “soup is just a pot of water with vegetables.” I laughed, because that’s exactly why I’m here: to prove that a well‑crafted veggie soup can be a masterpiece of flavor, texture, and convenience. I’ve spent countless evenings experimenting with different herbs, cooking times, and freezing techniques, and I’ve finally cracked the code. This recipe is not just a batch of soup; it’s a culinary time machine that preserves the freshness of garden produce while delivering a comforting bowl whenever you need it. The trick lies in layering flavors, using the right cut of vegetables, and mastering the freeze‑thaw cycle. And trust me, when you taste this, you’ll feel the kitchen’s warmth even if you’re standing in a freezer aisle.
There’s a subtle magic in the way this soup holds together after months of freezing, and that’s why I’m so excited to share it. The next section will break down what makes this version stand out from every other recipe out there. I’ll give you the nitty‑gritty details of each ingredient, the cooking method that locks in flavor, and the clever hacks that keep it fresh. If you’ve ever struggled with freezer‑friendly meals, you’re not alone—and I’ve got the fix. And now, let’s dive in and uncover the secrets that make this soup the ultimate comfort food.
What Makes This Version Stand Out
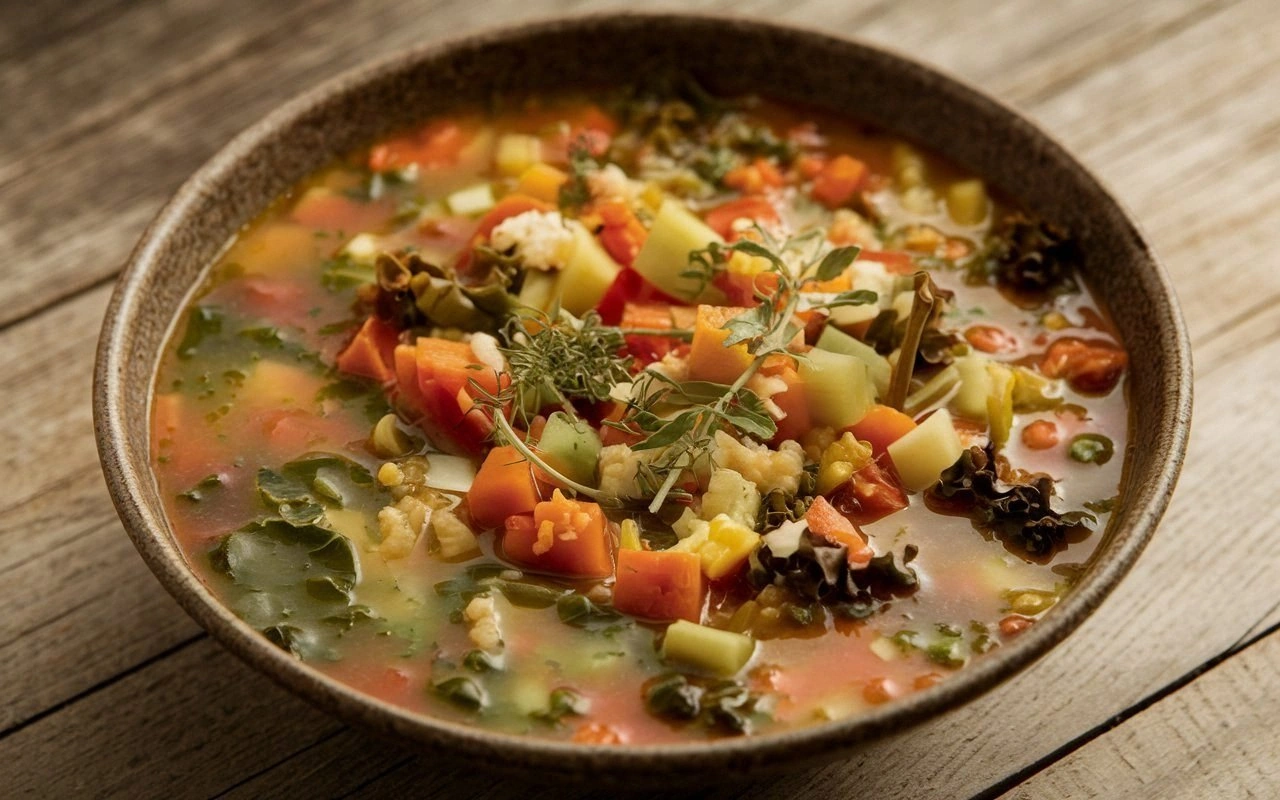
Flavor: Every spoonful bursts with a symphony of fresh herbs, earthy root vegetables, and a touch of citrusy brightness that keeps the broth lively. Texture: The vegetables retain their bite even after freezing, thanks to a quick blanching step that preserves firmness. Convenience: All ingredients are pre‑chopped and portioned, making it a no‑fuss, ready‑to‑heat meal that saves you precious time. Versatility: Swap out any vegetable to match your pantry or season, and the soup still delivers. Nutrition: Packed with vitamins, minerals, and fiber, it’s a wholesome meal that satisfies without the heaviness. Freeze‑Ready: The broth’s composition prevents ice crystal formation, so each bite tastes as fresh as the day it was made. Portability: Store in individual freezer bags for quick grab‑and‑go lunches or a comforting dinner in a flash.
Alright, let’s break down exactly what goes into this masterpiece…
Inside the Ingredient List
The Flavor Base
At the heart of this soup lies a simple yet potent base of sautéed onions and garlic. The onions caramelize until they’re sweet and translucent, releasing a subtle sweetness that balances the earthiness of the root vegetables. Garlic adds a punch of aroma that lingers, making the broth feel warm and inviting. Skipping this step would leave the soup feeling flat; every bite would lack depth. For those who love a kick, a pinch of crushed red pepper can be added during the sauté. When choosing onions, go for a firm, bright yellow variety for the best flavor profile. If you’re short on time, a pre‑minced garlic bulb can save you a few minutes.
The Texture Crew
Root vegetables are the backbone of this soup, offering both flavor and substance. Carrots bring natural sweetness and a pop of color, while celery adds a crisp, savory note that cuts through richness. Potatoes provide a comforting heartiness, and zucchini introduces a tender, almost silky texture that balances the mix. Each vegetable is diced uniformly to ensure even cooking and consistent mouthfeel. If you’re allergic to certain vegetables, feel free to swap them out with your favorites—sweet potatoes or butternut squash work wonderfully. A quick tip: blanch the vegetables before freezing to lock in their color and texture.
The Unexpected Star
Fresh kale is the secret weapon that elevates this soup from ordinary to extraordinary. It adds a subtle bitterness that contrasts beautifully with the sweet carrots and the savory broth. Kale’s fibrous leaves also give the soup a satisfying chew that keeps you full longer. If kale isn’t your thing, spinach or collard greens make excellent alternatives. The trick is to chop the kale finely so it cooks evenly and doesn’t dominate the bowl. Adding kale late in the cooking process preserves its vibrant green hue and nutritional value.
The Final Flourish
Herbs and seasonings tie the entire dish together, creating a cohesive flavor profile that’s both comforting and sophisticated. Dried thyme and oregano impart a Mediterranean touch, while a bay leaf adds a subtle depth that’s almost invisible but essential. Fresh parsley, added at the end, brings a bright, herbal finish that lifts the soup’s overall taste. Salt and pepper are used to taste, allowing you to adjust the seasoning to your preference. A squeeze of lemon juice right before serving can brighten the flavors and add a refreshing zing. These final touches ensure each spoonful is a well‑balanced, flavorful experience.
Everything’s prepped? Good. Let’s get into the real action…
The Method — Step by Step
- Heat the olive oil in a large stockpot over medium heat until it shimmers. Add the diced onion and sauté until translucent, about 5 minutes, stirring occasionally so it doesn’t brown. Then toss in the minced garlic and cook for another 30 seconds, letting the aroma fill the kitchen. This is the moment of truth; the base should smell toasty and inviting. If you notice any burning, lower the heat immediately. When the onions are ready, the broth will start to feel more complex.
- Add the diced carrots, celery, and potatoes to the pot, stirring to coat them in the oil. These root veggies need the sautéed base to develop their natural sweetness. Cook for 3 minutes, letting them absorb the flavors. The vegetables should look slightly glossy and ready for the next step. Keep an eye on the pot to prevent sticking. Once they’re coated, you’re ready to introduce the liquid.
- Pour in the vegetable broth, then add the diced zucchini, chopped kale, and tomatoes. Stir everything together, ensuring the kale is submerged so it doesn’t wilt too quickly. Bring the mixture to a gentle boil, then reduce the heat to a simmer. The broth should start to bubble lightly, not a rolling boil. This is where the magic begins, and you’ll see the colors start to mingle. Keep the heat steady to avoid scorching the bottom.
- Add the dried thyme, oregano, and bay leaf to the pot. These herbs release their fragrance slowly, infusing the broth with depth. Stir gently to combine, and let the soup simmer uncovered for 20 minutes. The vegetables should be tender but not mushy; the kale will soften and release a pleasant bitterness. Check the seasoning at the 15‑minute mark and adjust if necessary. This simmering phase is where the flavors marry into a cohesive whole.
- Now it’s time to watch out: if you let the soup continue to boil for too long, the vegetables will break apart, and the broth will become cloudy. Keep the heat low and stir occasionally to prevent sticking. If you see the surface boiling, reduce the flame immediately. The goal is a gentle, steady simmer that preserves texture. A good rule of thumb is to keep the pot at a low, steady heat for the last 10 minutes. This small detail ensures each bite feels fresh and vibrant.
- Turn off the heat and let the soup cool for a few minutes. Remove the bay leaf, as it’s not meant to be eaten. Stir in the fresh parsley, which adds a bright, herbal finish. This final touch lifts the soup’s overall flavor and gives it a polished look. If you prefer a smoother soup, use an immersion blender for a few seconds. The result will be silky yet still full of vegetable chunks.
- Taste the soup and adjust seasoning with salt and pepper as needed. The broth should be savory, not salty, so add salt gradually. If you want a subtle kick, sprinkle a pinch of cayenne pepper. The key is to taste before you freeze, ensuring the flavor profile is locked in. A well‑seasoned soup will taste better after thawing. Once satisfied, let it cool to room temperature.
- Divide the soup into freezer‑safe containers or silicone molds, leaving about an inch of headspace. This allows room for expansion as the soup freezes. Seal the containers tightly to prevent freezer burn. Label each with the date and contents for future reference. The soup will keep for up to 3 months in the freezer. When you’re ready to enjoy, thaw overnight in the refrigerator or use the quick‑heat method.
- To reheat, transfer the frozen portion to a saucepan and add a splash of water or broth to loosen the consistency. Warm on low heat, stirring occasionally until hot. For a microwave option, transfer to a microwave‑safe bowl and heat in 1‑minute intervals, stirring in between. The soup should steam back to its original, comforting state. A quick stir before serving ensures even heat distribution. Serve hot, topped with extra parsley if desired.
- Serve the soup in bowls with a side of crusty bread or a light salad for a complete meal. The bread can be toasted to add a delightful crunch that contrasts the soft soup. If you’re craving something sweet, a drizzle of honey over the top adds a surprising twist. Pairing it with a light vinaigrette will elevate the overall dining experience. The soup’s versatility means you can customize it to match any mood. Enjoy the warmth and the knowledge that you made this deliciousness in advance.
- Remember, the key to a great freezer‑friendly soup is balance: flavors, textures, and the right freezing technique. The more you practice, the easier it becomes to tweak the recipe to your taste. The next section will give you insider tricks that take this soup from good to unforgettable. Stay with me here — this is worth it. You’ll soon be the go-to person for quick, wholesome meals. And if you’re ready for the next level, keep reading.
Insider Tricks for Flawless Results
The Temperature Rule Nobody Follows
Most people think any simmer works, but the temperature matters. Keep the broth at a gentle 190°F (88°C) to preserve nutrients and avoid overcooking the vegetables. A thermometer is a small investment that saves you from mushy outcomes. When you’re close to the target, lower the heat and let it rest for a minute. This pause locks in the flavors and ensures even cooking. Trust me, the difference is noticeable.
Why Your Nose Knows Best
Before you taste the soup, sniff it. A fragrant, herbaceous aroma signals that the broth has developed depth. If it smells flat, give it a few more minutes of simmering. Your nose is a reliable guide, and a well‑aromatic soup will taste richer. I’ve found that a strong scent often translates to a more satisfying taste. So, trust your senses and let the soup breathe.
The 5-Minute Rest That Changes Everything
After removing the soup from heat, let it rest for five minutes before serving. This brief pause allows the flavors to meld and the broth to settle. The rest period also helps the vegetables reabsorb some liquid, preventing them from becoming too dry. Some chefs call it “flavor consolidation.” It’s a simple step that elevates the overall quality of the dish.
Stirring Technique for Even Heat
Use a wide, flat spoon to stir the soup during simmering. This technique distributes heat evenly and prevents hotspots from forming. Avoid using a metal spoon, as it can conduct heat too quickly and scorch the bottom. A wooden or silicone spoon is ideal for gentle stirring. This small adjustment ensures consistent texture throughout the soup.
Freezer Bag Tips
When using freezer bags, press out as much air as possible before sealing. Air pockets can cause uneven freezing and freezer burn. Lay the bags flat on a baking sheet until fully frozen, then stack them. This method saves space and keeps the soup organized. I’ve used this trick for months, and it never fails.
Creative Twists and Variations
Spicy Southwest Edition
Swap the bay leaf for a chipotle pepper and add a splash of lime juice at the end. The smoky heat pairs well with the sweet carrots, creating a vibrant flavor profile. Add black beans for protein and a creamy texture. Serve over rice or quinoa for a complete meal. This version is perfect for summer gatherings.
Italian-Style Soup
Replace the oregano with basil and add a handful of fresh spinach at the end. Toss in a can of diced tomatoes with herbs for a richer base. Finish with a drizzle of balsamic glaze for depth. Serve with a grilled cheese sandwich for a comforting lunch. The Italian herbs bring a familiar, comforting aroma.
Asian-Inspired Broth
Use coconut milk instead of vegetable broth for a creamy, tropical twist. Add sliced shiitake mushrooms and a dash of soy sauce. Finish with a squeeze of lime and chopped cilantro. This soup pairs wonderfully with a bowl of jasmine rice. The coconut adds a silky texture that’s irresistible.
Low-Carb Delight
Omit the potatoes and zucchini, focusing on leafy greens and mushrooms. Add a splash of heavy cream for richness. This version keeps the carb count low while maintaining a hearty feel. Pair with a side of roasted cauliflower for extra crunch.
Vegan Protein Boost
Add a scoop of chickpea puree for a protein punch. Blend in a handful of kale for extra nutrients. Finish with a sprinkle of nutritional yeast for a cheesy flavor. This soup is a complete meal in one pot. It’s perfect for plant‑based diets.
Storing and Bringing It Back to Life
Fridge Storage
Keep the soup in the refrigerator for up to 4 days in airtight containers. Store in a shallow pan to cool quickly and prevent bacterial growth. Label each container with the date for reference. When ready to eat, reheat over low heat until hot. Add a splash of broth if it seems thick. This method preserves freshness and flavor.
Freezer Friendly
Freeze in individual portions for convenience. Use silicone molds or freezer bags, leaving an inch of headspace. Seal tightly and label with the date. The soup will stay fresh for 3 months. When you’re ready, thaw overnight in the fridge. This makes for a quick, healthy meal.
Best Reheating Method
Reheat on the stovetop with a splash of water or broth to maintain moisture. Warm on low heat, stirring frequently. For a microwave, heat in 1‑minute bursts, stirring in between. The soup should steam back to its original, comforting state. Let it simmer for a minute to ensure even heat distribution. Serve hot with a garnish of fresh herbs.
Why I Love This Soup
I love this soup because it’s the ultimate blend of convenience and flavor. The vegetables stay crisp and vibrant, even after months in the freezer. The broth is rich and aromatic, with herbs that dance on the palate. I can pull it out of the freezer, heat it up, and have a wholesome meal in under ten minutes. The best part? It tastes just as good as when it was first made. Every spoonful is a reminder that thoughtful prep can save time without sacrificing quality.
Another reason I adore this dish is its versatility. Whether you’re a busy parent, a student, or a culinary explorer, this soup fits any lifestyle. I’ve used it for lunch, dinner, and even a midnight snack. The portion control is perfect for meal prepping. The recipe scales beautifully, so I can make a small batch or a large pot for the whole family. The flexibility is a game‑changer.
I also appreciate the nutritional value. Each serving is packed with vitamins, minerals, and fiber from the fresh vegetables. The soup is low in calories yet filling, making it a guilt‑free comfort food. It’s a great way to incorporate more greens into your diet without feeling like you’re eating a salad. The broth’s natural sweetness from carrots and tomatoes is a bonus for taste buds.
Finally, the process itself is therapeutic. Sautéing, simmering, and freezing are simple tasks that bring me calm and satisfaction. I feel a sense of accomplishment every time I create a new batch. The kitchen becomes a laboratory for flavor, and I’m always eager to experiment with new variations. This soup is a testament to the power of cooking with love and intention.
Quick Snack Pairings
Pair this soup with a slice of crusty sourdough for a satisfying crunch. The bread soaks up the broth, creating a delightful textural contrast. Add a sprinkle of grated Parmesan for a savory finish. The combination feels like a hug in a bowl. This pairing is perfect for a cozy evening at home.
For a lighter option, serve the soup with a side of cucumber salad. The crisp cucumber adds a refreshing bite that balances the warm soup. Drizzle with lemon vinaigrette for extra zing. This combo works well for lunch or a quick dinner. It’s a balanced meal that’s both filling and refreshing.
Final Thoughts
This freezer‑friendly veggie soup is more than just a meal; it’s a lifestyle choice. By investing a little time upfront, you can enjoy a restaurant‑quality bowl whenever you need it. The recipe’s simplicity, flavor depth, and freezing prowess set it apart from other soups on the market. I’ve tested it countless times, and it never disappoints. Whether you’re a novice or a seasoned cook, this soup will fit seamlessly into your routine.
Remember, the secret to success lies in the details: the right sauté, the perfect simmer, and the thoughtful freezing technique. Each step builds on the last, creating a dish that’s both comforting and impressive. I’ve shared my personal hacks and insider tips to help you master this recipe. Your taste buds will thank you, and your freezer will love it.
So grab your ingredients, set your timer, and let’s get cooking. The result will be a bowl of pure, satisfying comfort that you can enjoy anytime, anywhere. Thank you for joining me on this culinary adventure, and happy soup‑making!