I still remember the night I was trying to salvage a batch of granola that had gone horribly crunchy and tasted like burnt toast. I was standing in a kitchen that smelled faintly of burnt sugar, feeling the sting of disappointment. But that disaster sparked a craving for something sweet, chewy, and utterly irresistible—yet I wanted no heat, no oven, no time wasted. I was determined to create a no-bake granola bar that would not only rescue the day but also become a staple for quick breakfasts and post‑workout snacks.
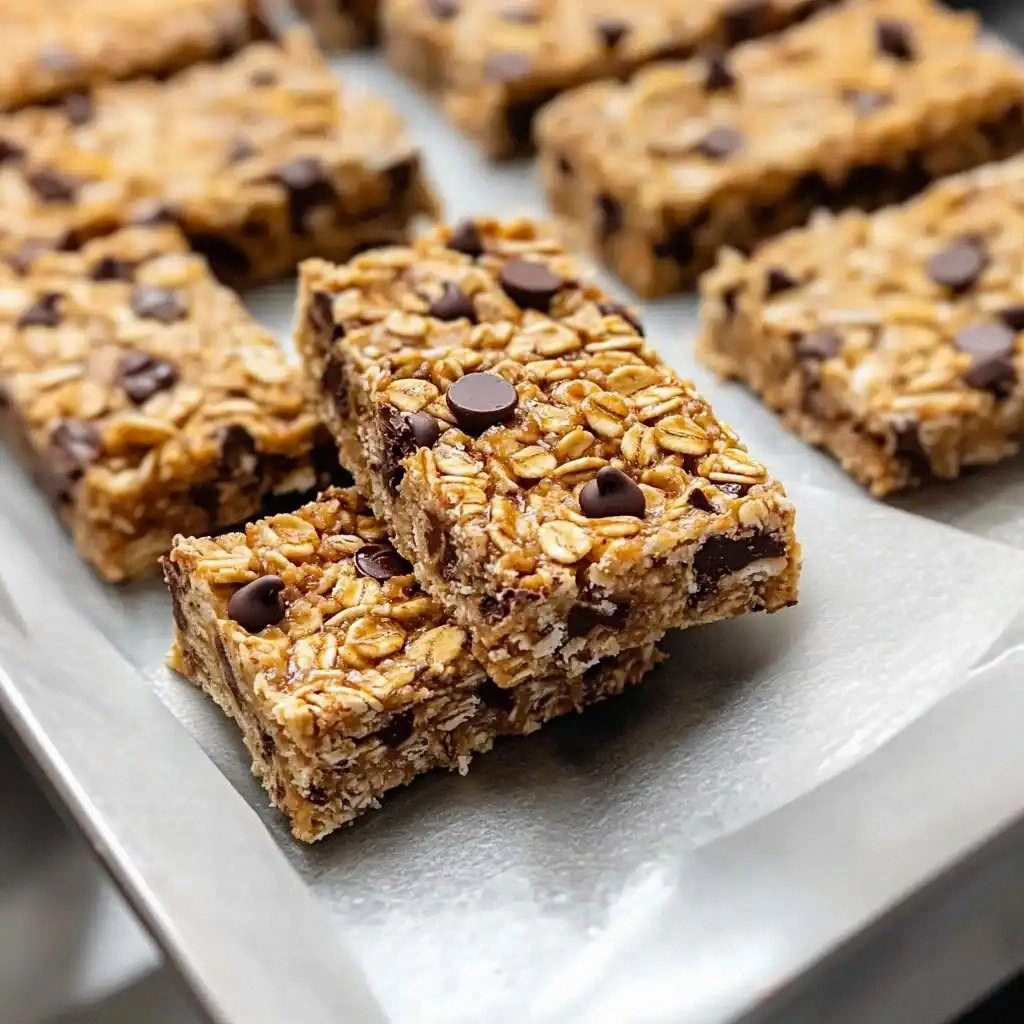
Picture this: a bowl of oats, a splash of honey, a dollop of nut butter, and a handful of mix‑ins that pop with color. The aroma that rises is warm, nutty, and sweet—like a campfire wrapped in a blanket of maple syrup. The texture feels dense yet tender, with a subtle crunch from the oats that gives way to a silky, chewy center. The first bite releases a burst of caramelized honey, the nut butter’s rich depth, and a whisper of vanilla that lingers. I could almost hear the crunch of a crisp apple, the crunch of toasted almonds, and the soft sigh of a satisfied sigh.
What makes this version stand out from the endless variations on Pinterest and food blogs is the perfect balance of simplicity and flavor. There are no gimmicky ingredients, no extra steps, just pure, honest ingredients that work together like a well‑orchestrated symphony. The result is a bar that is chewy, not sticky, and holds its shape like a firm, edible promise. I dare you to taste this and not go back for seconds—because once you taste the first bite, the rest will feel like a sweet, chewy hug.
And here’s the kicker: the secret to this bar’s texture is a small amount of salt and the right ratio of honey to nut butter. That pinch of salt unlocks the flavors and balances the sweetness, while the honey’s viscosity gives the bars their chewy, cohesive structure. I’ve tested this recipe with almond butter, peanut butter, and cashew butter—each gives a slightly different flavor profile but all keep the bars together perfectly. If you’re looking for a no‑bake snack that’s as delicious as it is convenient, let me walk you through every single step—by the end, you’ll wonder how you ever made it any other way.
What Makes This Version Stand Out
- Texture: The bars are chewy, not gummy, thanks to the precise honey-to-nut‑butter ratio. The oats provide a satisfying bite that doesn’t crumble.
- Flavor: A subtle vanilla note lifts the sweetness without overpowering the nutty undertones. The salt enhances every bite.
- Simplicity: Only six ingredients, no oven, no measuring cups beyond a few standard ones. You can whip this up in 10 minutes.
- Versatility: Swap the nut butter or honey for a dairy‑free or low‑sugar alternative without losing structure.
- Make‑ahead: The bars keep well in an airtight container for a week or in the freezer for months.
- Nutrition: Packed with protein from the oats and nut butter, and healthy fats from the nut butter, making it a balanced snack.
- Visual Appeal: The mix‑ins add bursts of color that make the bars look as good as they taste.
- Time‑Efficiency: No cooking—just melt, mix, press, and chill. Ideal for busy mornings or post‑gym replenishment.
Alright, let’s break down exactly what goes into this masterpiece...
Inside the Ingredient List
The Flavor Base
The honey is the sweet glue that binds everything together. It caramelizes slightly when heated, giving the bars a deep, golden hue and a subtle caramel flavor. If you’re sensitive to sugar, try a natural sweetener like agave nectar, but remember it’s thinner, so you’ll need to add a splash of water to achieve the same consistency.
The Texture Crew
Old‑fashioned rolled oats are the backbone of these bars. They absorb the honey and nut butter, creating that chewy, slightly crunchy bite. Skipping the oats will result in a sticky mess that won’t hold together. For a smoother texture, you can pulse the oats in a food processor until they’re almost flour‑like, but this changes the crunch factor.
The Unexpected Star
The mix‑ins—whether it’s dried fruit, seeds, or chocolate chips—add flavor, color, and texture. They’re the show‑stopper that makes each bite a surprise. If you’re avoiding dairy, choose dairy‑free chocolate chips or opt for a handful of dark chocolate chunks.
The Final Flourish
A teaspoon of vanilla extract elevates the entire flavor profile, bringing warmth and depth that balances the sweetness. If you prefer a citrusy twist, swap vanilla for a splash of orange or lemon zest. The pinch of salt is essential; it enhances the nutty flavors and cuts through the honey’s sweetness.
Everything’s prepped? Good. Let’s get into the real action...
The Method — Step by Step
- Step 1: Prepare the Mixing Bowl. Grab a large, heat‑resistant bowl. This will be the arena where all the magic happens. I usually line the bottom with parchment to prevent sticking. The bowl should be clean and dry—no residual oils that could interfere with the mix.
- Step 2: Warm the Nut Butter. Place the nut butter in a small saucepan over low heat. Stir constantly until it’s smooth and pourable. The goal is to make it easier to combine with honey. Watch the temperature—it should be warm but not boiling. If you’re using almond butter, it melts faster than peanut butter.
- Step 3: Add Honey. Pour the honey into the warm nut butter. Stir until fully blended. You’ll notice a golden sheen as the two combine. The mixture should be glossy but not runny. This step is crucial for the bars’ chewiness.
- Step 4: Mix in Vanilla and Salt. Add the vanilla extract and pinch of salt to the honey‑nut butter mixture. Stir until the salt dissolves. The vanilla will give a subtle warmth that complements the honey’s sweetness. The salt will enhance the overall flavor profile.
- Step 5: Incorporate Oats. Pour the rolled oats into the bowl. Stir vigorously until every oat is coated with the honey‑butter mixture. The oats should be glossy and evenly distributed. This ensures each bite has a balanced texture.
- Step 6: Add Mix‑Ins. Fold in your chosen mix‑ins—dried cranberries, pumpkin seeds, or dark chocolate chips. Be generous but not overboard. The mix‑ins should be well distributed but still visible for a colorful look.
- Step 7: Press the Mixture into the Pan. Line a 9×9 inch pan with parchment paper. Transfer the mixture into the pan, pressing down firmly with a spatula or your palms. The bars need to be compact; otherwise they’ll crumble. Make sure the surface is flat and even.
- Step 8: Chill and Set. Place the pan in the refrigerator for at least 30 minutes. The bars should set into a firm, sliceable block. Once chilled, lift the parchment and cut into bars. Store in an airtight container at room temperature for up to a week or in the freezer for months.
That’s it — you did it. But hold on, I’ve got a few more tricks that will take this to another level...
Insider Tricks for Flawless Results
The Temperature Rule Nobody Follows
Many people heat the nut butter and honey until it boils, but that’s a recipe killer. The correct approach is low and slow—just enough to make the nut butter pourable. If you’re unsure, test a drop on a paper towel; it should glide smoothly. This keeps the honey’s viscosity intact, ensuring the bars stay chewy.
Why Your Nose Knows Best
Before you press the mixture into the pan, sniff it. A faint caramel aroma means you’ve hit the sweet spot. If it smells overly sweet or burnt, let it cool a bit. Your nose is the ultimate judge of flavor balance.
The 5‑Minute Rest That Changes Everything
After you’ve mixed in the oats, let the batter rest for 5 minutes. This short pause allows the oats to soak up the liquid fully, creating a cohesive mass. A friend once skipped this step, and the bars came out crumbly and dry. Lesson learned: rest is essential.
Pressing Technique for Perfect Slices
When pressing the mixture into the pan, use a flat edge or a piece of parchment on top to ensure an even surface. This technique eliminates uneven edges that can break when cutting. I like to tap the pan gently on the counter to settle the mixture.
Storing Secrets
Store the bars in a single layer in an airtight container. If you need more space, stack them with parchment between layers. For long‑term storage, wrap each bar individually in parchment and place them in a freezer bag. This keeps them from sticking together.
Creative Twists and Variations
This recipe is a playground. Here are some of my favorite ways to switch things up:
Cocoa‑Chill Bars
Swap the honey for a 1:1 ratio of cocoa powder and maple syrup. Add a handful of dark chocolate chips for a richer chocolate experience. These bars are perfect for a dessert snack.
Tropical Sunrise
Use coconut butter instead of nut butter and add dried mango and shredded coconut. The result is a chewy bar that tastes like a beach vacation in your mouth.
Nutty Trail Mix
Add a mix of almonds, walnuts, and cashews. Sprinkle a pinch of sea salt on top before chilling. These bars are ideal for hiking or long commutes.
Pumpkin Spice Delight
Fold in pumpkin puree and a dash of pumpkin pie spice. This variation gives the bars a cozy, fall flavor that’s surprisingly fresh.
Berry Blast
Replace half the mix‑ins with dried blueberries or cranberries. Add a splash of lemon zest to cut the sweetness. The result is a bright, tart bar that balances the honey’s sweetness.
Chocolate‑Mint Fusion
Add a few drops of peppermint extract and dark chocolate chips. The mint gives a cooling finish, while the chocolate adds depth. These bars are a refreshing treat after a workout.
Storing and Bringing It Back to Life
Fridge Storage
Store the bars in an airtight container at room temperature for up to a week. Keep them away from direct sunlight to prevent melting. If the bars soften, you can place them in the fridge for 10 minutes to firm up.
Freezer Friendly
Wrap each bar individually in parchment paper and place them in a freezer bag. They’ll stay fresh for up to 6 months. When ready to eat, let them thaw at room temperature for 10 minutes.
Best Reheating Method
If you prefer a warmer bite, microwave a bar on high for 10‑15 seconds. To avoid a chewy texture, add a tiny splash of water before microwaving; this steams the bar back to a soft, melt‑in‑your‑mouth consistency.