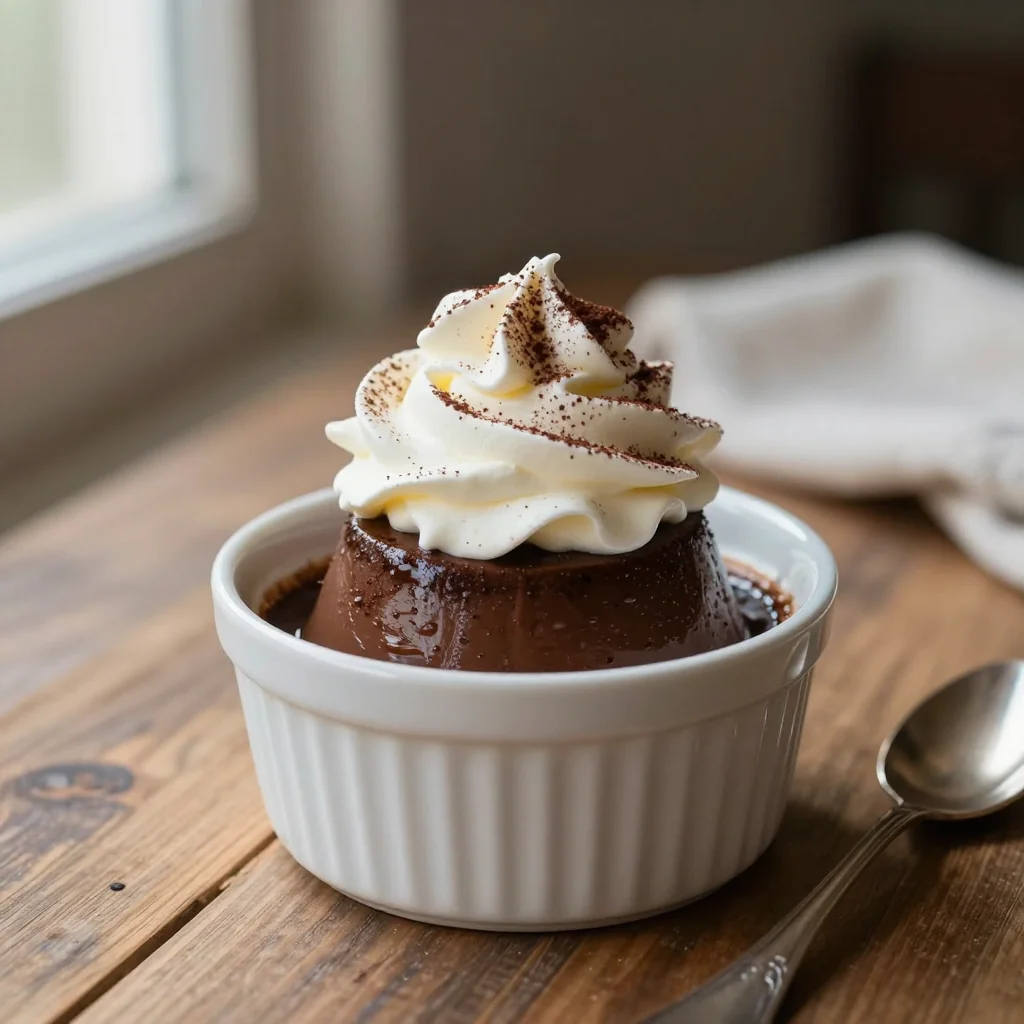
Silky, velvety chocolate pudding crowned with light, airy whipped cream – a timeless indulgence for any season.
There’s a particular kind of magic that happens when you hear the faint hiss of milk simmering and the rich aroma of dark chocolate filling the kitchen. I remember the first time I tasted a silky chocolate pudding at a tiny Parisian café; the way the velvety texture melted on my tongue while a cloud of sweetened whipped cream floated atop felt like a gentle hug on a rainy afternoon. That memory sparked a lifelong love affair with chocolate desserts, and I’ve been on a quest ever since to recreate that perfection at home.
Chocolate pudding, though humble in its origins, has traveled across continents, appearing in everything from classic French bistros to modern American bakeries. Its simple base of milk, chocolate, and a thickening agent allows endless creativity, while the whipped cream topping adds an airy contrast that elevates the whole experience. This recipe pays homage to that tradition while incorporating a few modern twists that guarantee a flawless result every single time.
In this guide, you’ll learn how to balance the deep cocoa intensity with just the right amount of sweetness, how to achieve a flawless glossy sheen, and how to whip cream to airy peaks without over‑beating. I’ll also share the science behind why cornstarch creates that perfect custard texture and how to avoid common pitfalls like grainy pudding or curdled milk.
So, grab your whisk, preheat your patience, and let’s embark on a journey that will transform a simple pantry staple into a show‑stopping dessert that impresses both the eyes and the palate.
🌟 Why This Recipe Will Captivate You
From the first spoonful to the lingering aftertaste, this chocolate pudding delivers a symphony of flavors and textures that keep you coming back for more.
- ✨ Perfectly Balanced Sweetness: The ratio of dark chocolate to sugar ensures a deep cocoa flavor without overwhelming cloyiness, making it suitable for both kids and adults.
- ✨ Silky, Glossy Texture: Cornstarch, when gently whisked into warm milk, creates a smooth, glossy custard that holds its shape beautifully.
- ✨ Foolproof Technique: Step‑by‑step temperature control and timing are explained in detail, so even beginners achieve professional results.
- ✨ Versatile Presentation: Serve in elegant ramekins, glasses, or even mini mason jars – the pudding adapts to any setting.
- ✨ Light, Airy Whipped Cream: A quick whip with powdered sugar adds a subtle sweetness that cuts through the richness of the chocolate.
- ✨ Make‑Ahead Friendly: The pudding can be prepared a day ahead, allowing flavors to meld while saving you time on the day of serving.
🥗 The Ingredients
📝 Complete Ingredient List
For the Chocolate Pudding:
For the Whipped Cream:
🔍 Focus on Key Ingredients
Dark Chocolate (70% cocoa)
Dark chocolate provides the deep, slightly bitter backbone that makes this pudding feel luxurious. Look for chocolate with at least 70% cocoa solids; this ensures a balanced bitterness and a smooth melt. The higher cocoa content also contributes antioxidants, adding a subtle health boost to an indulgent treat.
Whole Milk
Whole milk’s fat content is essential for a creamy mouthfeel. Skimmed or low‑fat milk can cause the pudding to feel thin and may result in a grainy texture. For a dairy‑free version, substitute with oat or almond milk, but be aware that the final texture will be slightly less rich.
Cornstarch
Cornstarch is the thickening hero. When dispersed in a cold liquid and then heated, it gelatinizes, creating that glossy, custard‑like consistency. It’s crucial to whisk it thoroughly with the sugar before adding the hot milk to avoid lumps.
🔄 Quick Substitutions
| If you don’t have... | Use instead... |
|---|---|
| Dark chocolate | Semi‑sweet chocolate (60% cocoa) |
| Cornstarch | All‑purpose flour (use 2× the amount) |
| Heavy cream | Coconut cream (for a dairy‑free option) |
👨🍳 Step‑by‑Step Instructions
Follow these detailed steps to create a flawless chocolate pudding that’s both glossy and airy, topped with cloud‑like whipped cream.
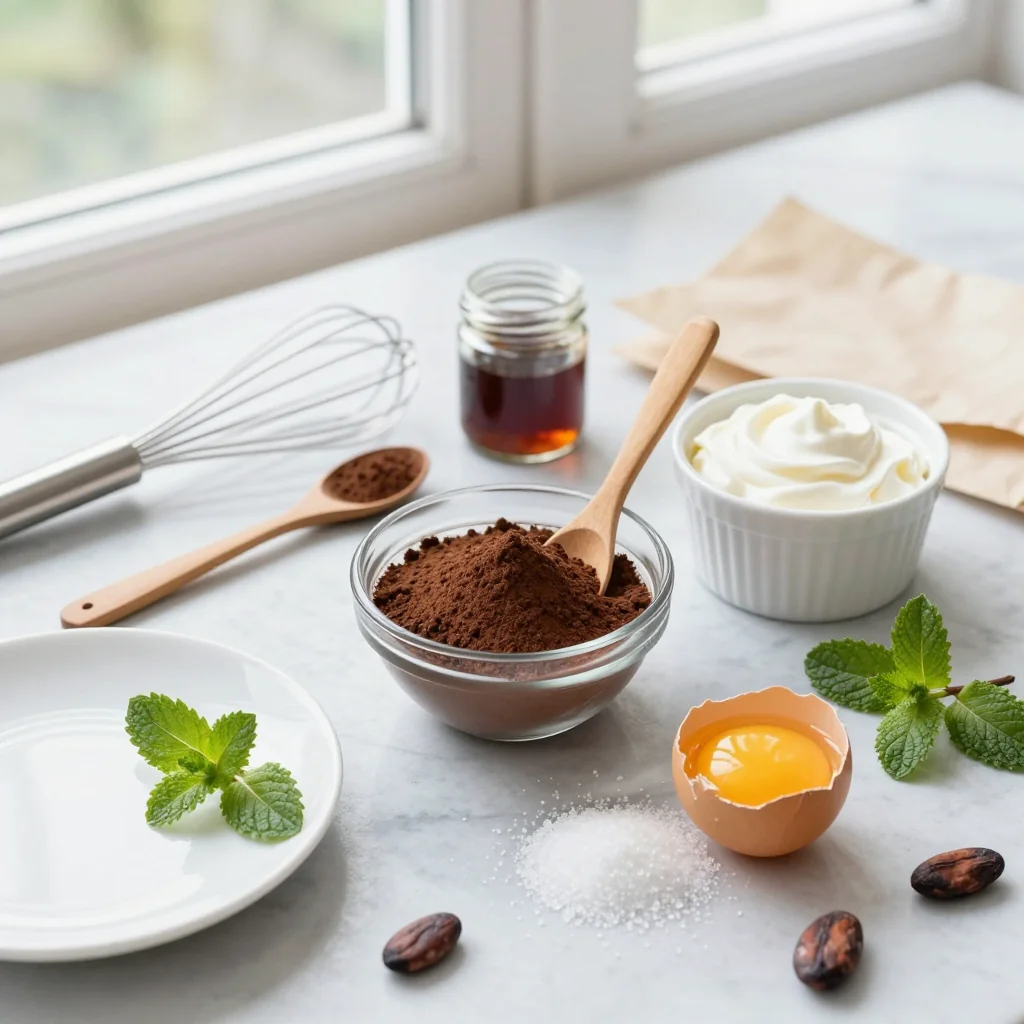
📋 Phase 1: Preparation and Mise en Place
Gather all tools and ingredients before you begin to ensure a smooth workflow.
Measure and Prepare Ingredients
Place the milk in a medium saucepan, and set the chocolate, cornstarch, sugar, egg yolks, and vanilla within easy reach. Using a kitchen scale for the chocolate and milk guarantees precision, while a small bowl for the cornstarch‑sugar mix prevents lumps later on.
Blend Cornstarch and Sugar
In a separate bowl, whisk together the cornstarch and granulated sugar until evenly combined. This dry blend will disperse more evenly when added to the hot milk, ensuring a lump‑free custard.
🔥 Phase 2: Cooking and Assembly
Heat, thicken, and combine the chocolate with the custard base.
Heat Milk and Melt Chocolate
Place the saucepan over medium heat. As the milk begins to steam, add the chopped dark chocolate. Stir continuously with a silicone spatula until the chocolate is completely melted and the mixture is smooth. The temperature should stay around 80 °C (176 °F) – a gentle simmer, not a rolling boil.
Incorporate Cornstarch Mixture
Slowly drizzle the cornstarch‑sugar blend into the hot chocolate‑milk mixture while whisking vigorously. Continue whisking for about 2‑3 minutes; the mixture will thicken and become glossy. This is the point where the pudding starts to achieve its custard‑like body.
Add Egg Yolks and Flavorings
Temper the egg yolks by whisking a small spoonful of the hot mixture into them, then pour the yolk mixture back into the saucepan. Stir constantly for another minute. Finally, add a pinch of salt and the vanilla extract, giving the pudding a final glossy sheen.
✨ Phase 3: Finishing Touches and Plating
Cool the pudding, whip the cream, and assemble the final dessert.
Cool the Pudding
Remove the saucepan from heat and transfer the pudding into individual serving glasses or ramekins. Cover each with a thin layer of plastic wrap placed directly on the surface to prevent a skin from forming. Refrigerate for at least 2 hours, or overnight for deeper flavor development.
Whip the Cream
While the pudding chills, pour the cold heavy cream into a chilled mixing bowl. Add powdered sugar and vanilla extract. Using a hand mixer on medium speed, whip until soft peaks form – the cream should hold its shape but still be slightly fluid, perfect for spreading over the pudding.
Assemble and Garnish
When ready to serve, spoon a generous dollop of whipped cream atop each pudding. For an elegant finish, sprinkle a pinch of sea salt, a few shaved chocolate curls, or a dusting of cocoa powder.
Serve
Present the pudding chilled, accompanied by fresh berries or a crisp shortbread cookie for added texture. The contrast between the cool, dense pudding and the light, airy cream creates a harmonious bite.
💡 Expert Tips and Tricks
🛒 Choosing the Right Ingredients
When selecting chocolate, always read the cocoa percentage; higher percentages give a more robust flavor. Look for chocolate bars rather than chips, as chips often contain stabilizers that can affect meltability. For the milk, fresh, unpasteurized if possible, yields a richer taste, but any high‑quality whole milk works. Finally, use heavy cream with at least 35% fat; lower‑fat creams won’t whip properly and will result in a watery topping.
🔪 Preparation Techniques
Temper the egg yolks slowly to avoid scrambling. Adding a small amount of the hot mixture first raises the yolks’ temperature gradually, creating a smooth emulsion. Also, whisk the cornstarch with sugar before adding to the hot liquid to prevent clumping; a fine, dry slurry disperses evenly and thickens uniformly.
🌡️ Mastering the Cooking Process
Maintain a gentle simmer; high heat can cause the milk proteins to denature, leading to a grainy texture. Use a thermometer if you’re uncertain—aim for 80 °C (176 °F) before adding the thickener. Once thickened, remove from heat immediately to prevent over‑cooking, which can cause the pudding to become rubbery.
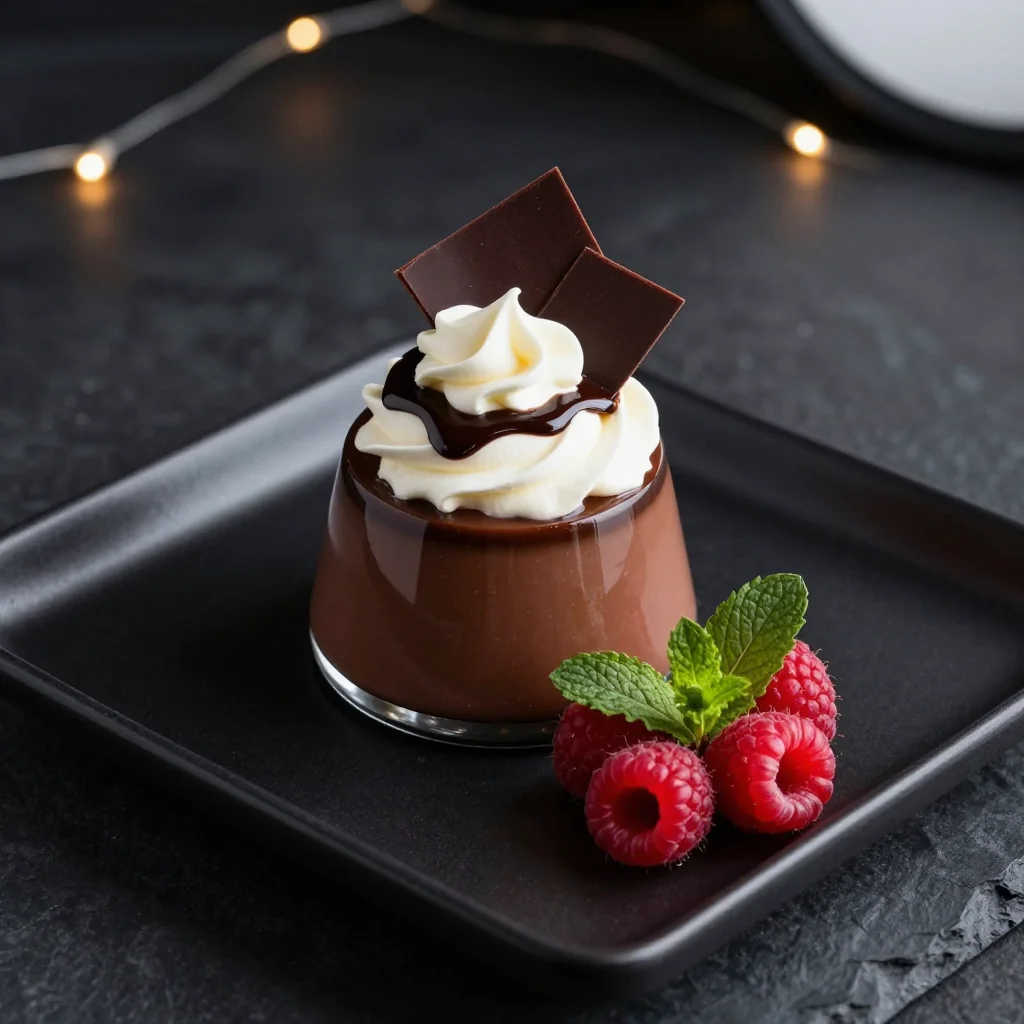
🍽️ Presentation and Service
For a restaurant‑style look, pipe the whipped cream with a star tip and garnish with a single chocolate shard or a drizzle of caramel. Serve in clear glassware to showcase the pudding’s glossy sheen. Pair with a dusting of cocoa powder for visual contrast and a subtle bitter note that balances the sweetness.
🏆 Pro Secrets
Professional chefs rely on precision, science, and a few hidden tricks to elevate a simple dessert into a masterpiece.
- 🎯 Temperature Layering: By heating the milk to just below boiling and then cooling it slightly before adding the chocolate, you preserve the chocolate’s bloom and prevent fat separation, resulting in a smoother mouthfeel.
- 🎯 Double‑Whisk Technique: After the pudding reaches the desired thickness, whisk it once more off the heat for 30 seconds. This introduces tiny air bubbles that give the final set a lighter texture without compromising its glossy finish.
- 🎯 Cream Stabilization: Adding a teaspoon of powdered gelatin dissolved in warm water to the whipped cream ensures it holds peaks longer, especially useful for plating ahead of time.
- 🎯 Flavor Layering: A dash of espresso powder or a splash of orange liqueur can intensify the chocolate flavor without making the pudding taste “coffee‑y” or “boozy.” Use sparingly—just enough to enhance, not dominate.
- 🎯 Serving Temperature: Serve the pudding at 4–6 °C (39–43 °F). Too cold dulls the chocolate’s aroma; too warm makes the whipped cream melt too quickly.
- 🎯 Plate Temperature: Chill the serving glasses for at least 15 minutes before filling. A cold glass keeps the pudding firm longer and prevents condensation from water‑logging the whipped cream.
"Desserts are the poetry of the kitchen; each spoonful should sing." — Chef Dominique Crenn
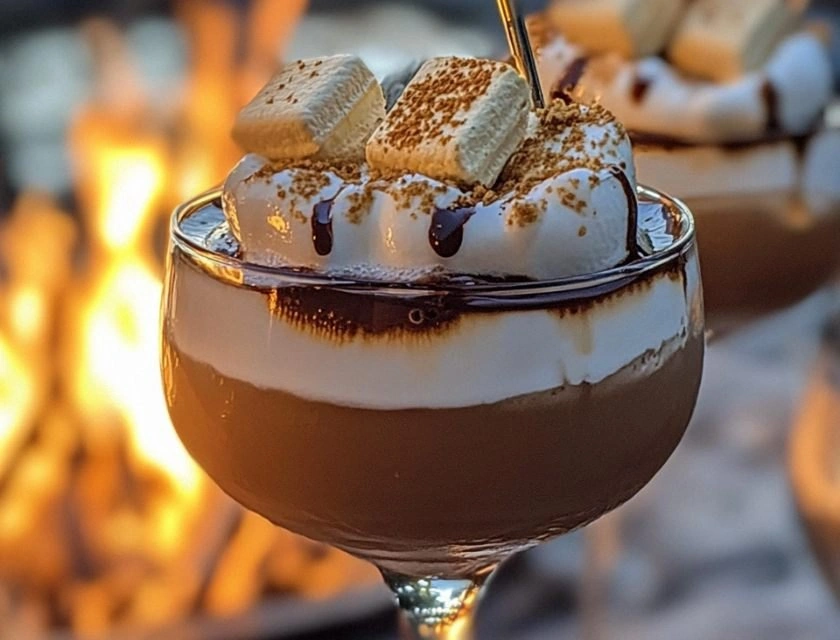
🔄 Variations and Adaptations
The beauty of this pudding lies in its flexibility. Below are several creative twists to suit different dietary needs and flavor preferences.
🥬 Vegetarian / Vegan Version
Replace the dairy components with plant‑based alternatives while keeping the texture intact. Use oat milk (or almond milk) for the base, coconut cream for the topping, and a high‑quality vegan dark chocolate. The cornstarch remains the same, providing the needed thickening power.
- Replace whole milk with 500 ml oat milk.
- Replace heavy cream with 200 ml chilled coconut cream.
- Use vegan dark chocolate (70% cocoa, dairy‑free).
🌶️ Flavor Variations
Experiment with complementary flavors to transform the pudding into a signature dessert.
Spicy Chili Version:
Add ¼ teaspoon of finely ground cayenne pepper to the chocolate mixture for a subtle heat that awakens the palate.
Mediterranean Orange‑Rose Version:
Stir in 1 teaspoon of orange zest and a few drops of rose water after the pudding thickens. Garnish with candied orange peel.
Asian Matcha‑Ginger Version:
Blend 1 teaspoon of matcha powder with the cornstarch and add a pinch of freshly grated ginger for an aromatic twist.
⚠️ Dietary Adaptations
Gluten‑Free:
All ingredients are naturally gluten‑free; just ensure your cornstarch is certified gluten‑free.
Lactose‑Free:
Swap whole milk for lactose‑free milk and heavy cream for lactose‑free coconut cream; the pudding will retain its creaminess.
Low‑Calorie:
Use 250 ml skim milk, 100 g dark chocolate (70% cocoa), and replace heavy cream with 100 ml low‑fat Greek yogurt whipped with a touch of honey.
👶 Kid‑Friendly Version
Reduce the cocoa intensity by using semi‑sweet chocolate (60% cocoa) and add a tablespoon of fruit puree (such as raspberry) to the whipped cream for a natural sweet flavor that appeals to younger palates.
📦 Storage and Reheating
🧊 Storage
Refrigerator:
- Duration: 3 days
- Recommended container: airtight glass jars
- Tip: Place plastic wrap directly on the pudding surface to prevent skin formation.
Freezer:
- Duration: 1 month
- Method: Portion into single‑serve containers, leaving 1 cm headspace.
- Defrosting: Transfer to refrigerator overnight; stir gently before serving.
💡 For best texture, avoid freezing the whipped cream; add fresh whipped cream after reheating.
♨️ Reheating
🔥 Oven (Recommended):
- Preheat to 150 °C (300 °F).
- Cover each ramekin with aluminum foil.
- Heat for 10‑12 minutes, or until the pudding is just warmed through.
- Remove foil and let sit 2 minutes before serving.
⚡ Microwave (Quick):
- Cover with a microwave‑safe lid.
- Heat on medium power for 30‑45 seconds, stir, then continue in 15‑second bursts.
- Stir gently to avoid hot spots.
🍳 Stovetop:
Place the pudding in a saucepan over low heat, stirring constantly until warmed. This method preserves the glossy texture but requires close attention.
🍷 Perfect Pairings
🥗 Side Accompaniments
- Fresh Berries: Raspberries or strawberries add a bright acidity that cuts through the richness.
- Shortbread Cookies: Buttery, crumbly cookies provide a textural contrast.
- Salted Caramel Drizzle: A thin ribbon of salted caramel enhances depth without overwhelming the chocolate.
🍷 Wine & Beverage Pairings
- Ruby Port: Its sweet, fortified character mirrors the pudding’s richness while adding fruity notes.
- Late‑Harvest Riesling: The honeyed acidity balances the chocolate’s bitterness.
- Non‑Alcoholic: Sparkling water with a twist of orange or a chilled hibiscus tea.
🍰 To Complete the Meal
Start with a light citrus salad to awaken the palate, follow with the chocolate pudding as the main dessert, and finish with a small serving of espresso or a mint tea to cleanse the palate.
❓ Frequently Asked Questions
Q: Can I use a different thickener instead of cornstarch?
A: Yes, you can substitute with arrowroot powder (use the same amount) for a slightly more translucent finish, or with tapioca starch (increase by 25%). However, all‑purpose flour will require double the quantity and may result in a less glossy texture.
Q: My pudding turned grainy—what went wrong?
A: Graininess usually occurs when the mixture is overheated or boiled. Keep the temperature just below a boil (80 °C) and remove from heat as soon as it thickens. Using a whisk rather than a spoon helps distribute heat evenly.
Q: How can I make the whipped cream more stable?
A: Chill the bowl and beaters, and add a pinch of cream of tartar or a teaspoon of powdered gelatin dissolved in warm water. Both methods help the cream retain its peaks longer, especially if the dessert sits for a while before serving.
Q: Is it possible to prepare the pudding ahead of time?
A: Absolutely. The pudding improves after a few hours in the fridge as flavors meld. Prepare up to 24 hours in advance, keep covered, and add fresh whipped cream just before serving.
Q: Can I add alcohol for an adult‑only version?
A: A tablespoon of dark rum, bourbon, or orange liqueur can be added with the vanilla extract for a sophisticated twist. Add after the pudding has thickened to preserve the alcohol’s aroma.
Q: What are the best tools for achieving a smooth texture?
A: A stainless‑steel whisk, a silicone spatula, and a digital thermometer are essential. A fine mesh sieve can be used to strain the pudding before chilling, ensuring any stray lumps are removed.
🎉 To Your Kitchen!
Chocolate pudding with whipped cream is more than just a dessert; it’s a celebration of texture, flavor, and the simple joy of creating something elegant from everyday ingredients. By following the precise steps, you’ll achieve a glossy, velvety custard that holds its shape, topped with airy whipped cream that adds a light, refreshing contrast. Whether you serve it at a dinner party, a family gathering, or as a personal treat after a long day, this recipe guarantees smiles and satisfied taste buds.
Don’t hesitate to experiment with the variations, adjust the portion size with our handy calculator, and share your personal twists. Your feedback helps us refine the recipe, and your photos inspire fellow food lovers. Happy cooking, and may every spoonful bring you comfort and delight!
Have you tried this recipe?
Leave a comment and rating below! Share your photos on Instagram with #ChocolatePuddingDelight to be featured on our page.
Chocolate Pudding with Whipped Cream
Silky chocolate pudding topped with light, airy whipped cream – a timeless indulgence.
📝 Ingredients
Chocolate Pudding
Whipped Cream
👨🍳 Instructions
- 1
Measure and set out all ingredients; keep the chocolate chopped and the milk chilled.
- 2
Whisk cornstarch with sugar in a small bowl; set aside.
- 3
Heat milk in a saucepan over medium heat until steaming, then add chocolate and stir until fully melted.
- 4
Gradually whisk the cornstarch‑sugar mixture into the hot chocolate, stirring constantly for 2‑3 minutes until thickened.
- 5
Temper egg yolks with a spoonful of hot mixture, then stir the yolk blend back into the saucepan.
- 6
Remove from heat, add salt and vanilla, then pour into serving dishes; cover with plastic wrap.
- 7
Chill the pudding for at least 2 hours.
- 8
Whip heavy cream with powdered sugar and vanilla until soft peaks form.
- 9
Top each chilled pudding with a generous dollop of whipped cream; garnish as desired.
- 10
Serve immediately, optionally with fresh berries or a shortbread cookie.
🥗 Nutritional Information (per serving)
*Values are estimates based on listed ingredients.
📚 You Might Also Like
Classic Crème Brûlée
Salted Caramel Chocolate Tart
Vanilla Bean Panna Cotta

💬 Comments and Reviews
Leave a Comment
Comments will appear here once readers share their thoughts.