Alright, picture this: a rainy Thursday night, I’m staring at a half‑empty pantry, a stubborn craving for something that feels like a hug and a punch at the same time, and a stubborn old skillet that’s seen better days. I tossed a can of creamed corn into the pot, a jar of shredded beef chili con carne, and a wild idea that would soon become my kitchen’s new obsession. That moment, I dared myself to combine the comfort of a classic chili with the buttery, golden crust of cornbread, all baked into a single, unstoppable pie. I was skeptical, but I’m also the kind of person who believes the best meals are born out of a little chaos and a lot of daring.
The first whiff was nothing short of a fireworks show for the nose: smoky beef mingling with the sweet, buttery scent of melted butter and the earthy whisper of polenta. The kitchen filled with a low, comforting hum as the oven preheated, and the sizzling sound of the chili hitting the pan was like a tiny drumroll announcing the main act. When the mixture hit the skillet, it clung to the sides like velvet, and the anticipation built faster than a toddler on a sugar rush. By the time the cornbread batter was poured over the chili, the whole scene looked like a culinary sunrise—golden edges rising, steam curling like lazy cats, and the promise of a crunchy‑soft symphony waiting to be unleashed.
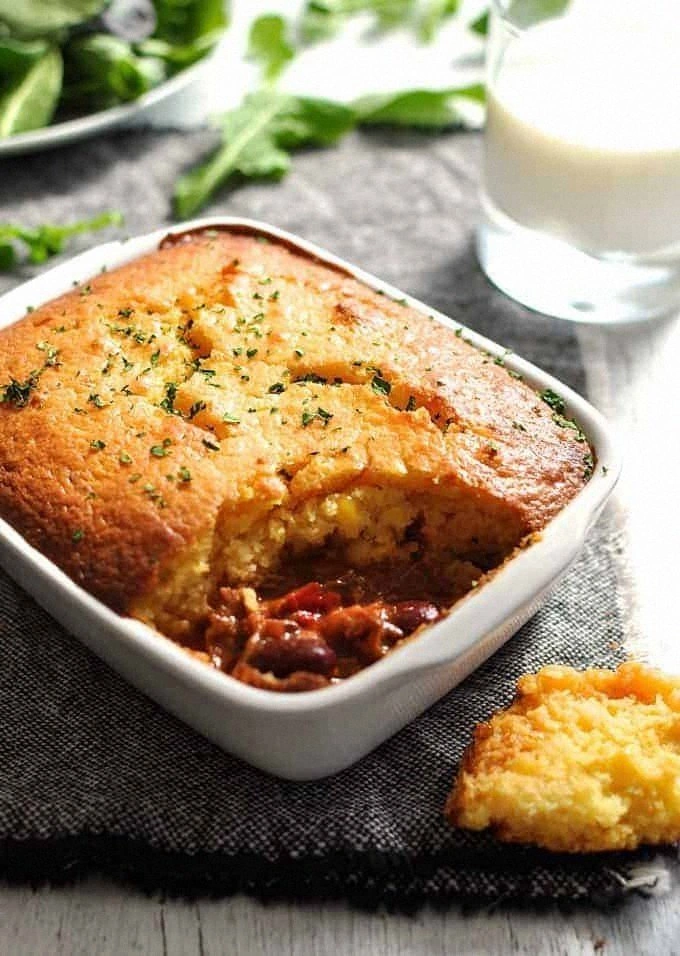
Most chili‑cornbread hybrids out there either drown the beef in a soggy batter or end up with a crust so hard it could double as a doorstop. This version, however, flips the script by layering the chili at the bottom, letting it soak into the crumbly, buttery top, and then baking it to a perfect golden hue that cracks just enough to reveal the molten heart inside. The secret? A dash of fresh parsley that adds a bright, herbaceous lift, and a precise balance of self‑raising flour and cornmeal that creates a texture that’s simultaneously tender, slightly crumbly, and delightfully crisp at the edges. It’s the culinary equivalent of a perfectly timed high‑five—satisfying, surprising, and undeniably rewarding.
I’m about to spill the beans on a technique that most recipes completely miss: the “double‑bake” trick, where you give the crust a quick 5‑minute head start before the full bake. This ensures the top gets that gorgeous, crackly finish without soaking the chili underneath. Trust me, once you try it, you’ll wonder how you ever settled for a soggy bottom. I dare you to taste this and not go back for seconds. Let me walk you through every single step — by the end, you’ll wonder how you ever made it any other way.
What Makes This Version Stand Out
- Flavor Fusion: The beef chili’s smoky depth meets the sweet cornbread’s buttery richness, creating a perfect balance that dances on the palate.
- Texture Triumph: A crisp, golden crust gives way to a moist, cheesy‑like interior that’s as comforting as a warm blanket.
- Simplicity: Only ten ingredients, all pantry‑friendly, and no obscure techniques—just straightforward, delicious cooking.
- Uniqueness: The double‑bake method locks in flavor and prevents sogginess, a trick most recipes overlook.
- Crowd‑Pleaser: It’s hearty enough for a dinner party yet portable enough for a casual game‑day snack.
- Ingredient Quality: Using freshly shredded beef and real creamed corn elevates every bite.
- Cooking Method: Oven‑baked for a hands‑off finish, freeing you to prep sides or enjoy a glass of wine.
- Make‑Ahead Potential: This pie reheats beautifully, making leftovers practically as good as the first serving.
Inside the Ingredient List
The Flavor Base
The star of this pie is the 4 cups of shredded beef chili con carne. This isn’t just any chili; it’s a slow‑cooked, spice‑infused masterpiece that brings smoky depth, a hint of heat, and a meaty richness that forms the backbone of the dish. If you skimp on this, you’ll lose the hearty heart that makes each bite feel like a warm, satisfying hug. Want a shortcut? A high‑quality canned chili can work, but I swear by a homemade batch for that authentic flavor burst.
Next, the 1 cup of canned creamed corn adds a subtle sweetness and a velvety texture that balances the chili’s heat. This ingredient is the secret liaison that ties the savory and sweet notes together, preventing the dish from becoming overly heavy. If you’re looking for a fresher twist, you can swap in frozen corn kernels and a splash of heavy cream, but the canned version saves time and still delivers that creamy mouthfeel.
The Texture Crew
1/2 cup melted butter is the golden glue that binds the crust together and adds a luxurious richness. Butter’s fat content helps create the tender, crumbly interior while also encouraging a beautiful browning on the surface. If you’re dairy‑free, coconut oil can replace butter, though you’ll notice a faint coconut aroma that can be surprisingly pleasant.
1/2 cup polenta / cornmeal contributes that classic cornbread bite—slightly gritty, yet comforting. It adds body and a subtle corn flavor that complements the creamed corn. For a finer texture, you could use fine cornmeal, but the slightly coarse grain gives the pie its signature bite.
1 1/2 cups self‑raising flour provides the lift needed for a light, airy crumb. It works hand‑in‑hand with the cornmeal, ensuring the crust rises just enough without becoming cake‑like. If you only have all‑purpose flour, mix in 2 teaspoons of baking powder per cup to mimic the self‑raising effect.
The Unexpected Star
3 eggs act as the binding agent, pulling everything together into a cohesive batter. They also add a subtle richness that makes the crust less dry and more tender. If you’re avoiding eggs, a mixture of 1 tablespoon of flaxseed meal plus 3 tablespoons of water per egg can substitute, though the texture will be slightly denser.
1 cup milk adds moisture and a creamy backdrop, ensuring the batter stays supple. Whole milk is ideal for richness, but a low‑fat version works if you’re watching calories. For a dairy‑free version, almond or oat milk can step in without compromising the flavor too much.
1/2 cup sugar subtly sweetens the crust, offsetting the chili’s spice. It’s not a dessert, but that gentle sweetness is what makes the top crust a perfect contrast to the savory interior. Feel free to reduce to 1/3 cup if you prefer a less sweet finish.
The Final Flourish
1 tbsp fresh parsley is the finishing touch, adding a pop of fresh, herbaceous brightness that lifts the whole dish. Sprinkle it on after baking for a burst of color and a hint of garden‑fresh flavor. If parsley isn’t your thing, cilantro or chives can work, but parsley stays true to the classic comfort vibe.
1/4 tsp salt enhances every flavor, ensuring nothing tastes flat. A pinch too much can overwhelm, so stick to the precise measurement. For a twist, a pinch of smoked paprika can replace part of the salt, adding an extra smoky note.
Everything's prepped? Good. Let's get into the real action...
The Method — Step by Step
Preheat your oven to 375°F (190°C). While the oven warms, melt 1/2 cup of butter in a saucepan over low heat, letting it turn a golden amber without browning. Once melted, set it aside to cool just enough that it doesn’t scramble the eggs later. This is the moment of truth, where the butter’s aroma starts to whisper promises of a buttery crust.
In a large skillet, add the 4 cups of shredded beef chili con carne and let it simmer on medium heat for about 5 minutes, stirring occasionally. You’ll hear that comforting sigh as the chili thickens, and the edges will begin to pull away from the pan. Watch Out: If the chili starts to stick, splash in a splash of water to deglaze—no one wants a burnt bottom.
Watch Out: Over‑cooking the chili can dry it out, leaving the pie with a dry center. Keep it just simmered, not reduced to a paste.While the chili simmers, whisk together 3 eggs, 1 cup of milk, and the melted butter in a mixing bowl. The mixture should look glossy and slightly frothy—if it looks too thick, add a splash more milk. This is where the batter starts to come alive, and the scent of butter mingles with the faint eggy perfume.
Kitchen Hack: Use a fork instead of a whisk for a quicker, less aerated mix—this helps keep the crust tender rather than cake‑like.Combine the dry ingredients: 1 1/2 cups self‑raising flour, 1/2 cup polenta, 1/2 cup sugar, and 1/4 tsp salt in a separate bowl. Give them a good whisk to ensure even distribution. The sugar will dissolve slightly when the batter meets the wet mix, creating a caramelized edge during baking.
Gradually fold the dry mixture into the wet egg‑butter blend, stirring just until you see a uniform batter. Over‑mixing will develop gluten, making the crust tough—so stop as soon as you no longer see flour pockets. At this point, the batter should have a thick but pourable consistency, like a smooth pancake batter.
Stir in 1 cup of canned creamed corn and the fresh parsley, folding gently so the corn stays in little pockets. The parsley adds a bright, herbaceous note that cuts through the richness, while the corn introduces sweet bursts that will surprise every bite.
Now comes the double‑bake trick: lightly grease a 9‑inch cast‑iron skillet or a deep baking dish, then spoon the simmered chili into the bottom, spreading it evenly. Place the skillet in the oven for a quick 5‑minute head start—this dries the top layer just enough to prevent sogginess later. While the chili gets its mini‑spa, preheat a second oven rack for the final bake.
Watch Out: Do not over‑bake the chili in this step; 5 minutes is enough to set the base without drying it out.After the quick pre‑bake, pull the skillet out, pour the batter over the hot chili, and smooth the top with a spatula. The batter should start to rise immediately as it meets the hot chili, creating a lovely “puff” effect. Slide the skillet back into the oven and bake for 25‑30 minutes, or until the top is a deep golden‑brown and a toothpick inserted in the center comes out clean.
When the crust is perfectly browned and the edges start to pull away from the pan, remove the pie and let it rest for 10 minutes. This rest period lets the flavors meld and the interior set, so you can slice cleanly without the pie collapsing. Serve warm, garnished with a sprinkle of extra parsley if you like, and watch as your guests dive in, eyes widening at that gorgeous, crusty top.
That's it — you did it. But hold on, I've got a few more tricks that'll take this to another level...
Insider Tricks for Flawless Results
The Temperature Rule Nobody Follows
Most home cooks set the oven to a generic 350°F and call it a day. The truth? A hotter oven (375°F) gives the crust that rapid rise and caramelization, while the interior stays moist. If you’re using a convection oven, drop the temperature by 25°F to avoid over‑browning. Trust me—this tiny tweak makes the difference between “good” and “wow‑factor.”
Why Your Nose Knows Best
When the crust turns a deep amber and you catch that buttery, nutty aroma, you’re at the perfect finish point. Don’t rely solely on a timer; let your senses guide you. If the scent is strong but the color is still pale, give it another 2‑3 minutes. The nose is an underrated kitchen tool that never lies.
The 5‑Minute Rest That Changes Everything
Most recipes tell you to serve immediately, but letting the pie rest for ten minutes after baking allows the steam to redistribute, preventing a soggy center. This short pause also lets the flavors meld, making each bite more harmonious. I once sliced it right away and the crust crumbled—lesson learned.
Butter Boost for a Golden Crown
Brush the top with a tablespoon of melted butter halfway through baking, and you’ll get a glossy, crackly crown that looks like it belongs in a bakery. This extra butter also adds a rich flavor boost that makes the crust taste like a buttery dream.
The Secret of the Fresh Parsley Finish
Adding fresh parsley after baking, not before, preserves its bright green color and fresh flavor. If you fold it in earlier, the heat wilts the leaves, turning them brown and bitter. Sprinkle a generous handful right before serving for that pop of color and herbaceous zing.
Creative Twists and Variations
This recipe is a playground. Here are some of my favorite ways to switch things up:
Southwest Veggie Upgrade
Swap the shredded beef for a medley of black beans, diced zucchini, and roasted red peppers. Add a teaspoon of cumin and a splash of lime juice for a fresh, vegetarian spin that still delivers that hearty texture.
Cheesy Overload
Stir in 1 cup of shredded sharp cheddar into the batter before baking. The cheese melts into the crust, creating pockets of gooey goodness that stretch with every slice.
Spicy Inferno
Increase the heat by adding 1 diced jalapeño and a teaspoon of smoked chipotle powder to the chili. The result is a smoky, fiery bite that’ll make you reach for a glass of milk.
Sweet Corn Delight
Replace half of the creamed corn with fresh corn kernels and a drizzle of honey. The subtle sweetness pairs beautifully with the savory chili, creating a balanced flavor profile.
Herbaceous Garden
Add a handful of chopped fresh cilantro and a sprinkle of thyme to the batter. The herbs infuse the crust with an aromatic lift, making the dish feel lighter and more spring‑like.
Storing and Bringing It Back to Life
Fridge Storage
Allow the pie to cool completely, then wrap it tightly in foil or store in an airtight container. It will keep fresh for up to 4 days. When ready to eat, reheat in a 350°F oven for 15 minutes, covered with foil to retain moisture.
Freezer Friendly
Slice the pie into individual portions, wrap each piece in parchment paper, then place in a freezer‑safe bag. Freeze for up to 3 months. To reheat, bake frozen slices at 375°F for 20‑25 minutes, adding a splash of water to the pan to create steam and prevent drying.
Best Reheating Method
For the crispiest crust, reheat on a pre‑heated cast‑iron skillet over medium heat, adding a tablespoon of water and covering for the first minute. The steam revives the interior while the skillet restores that golden crunch on the top.