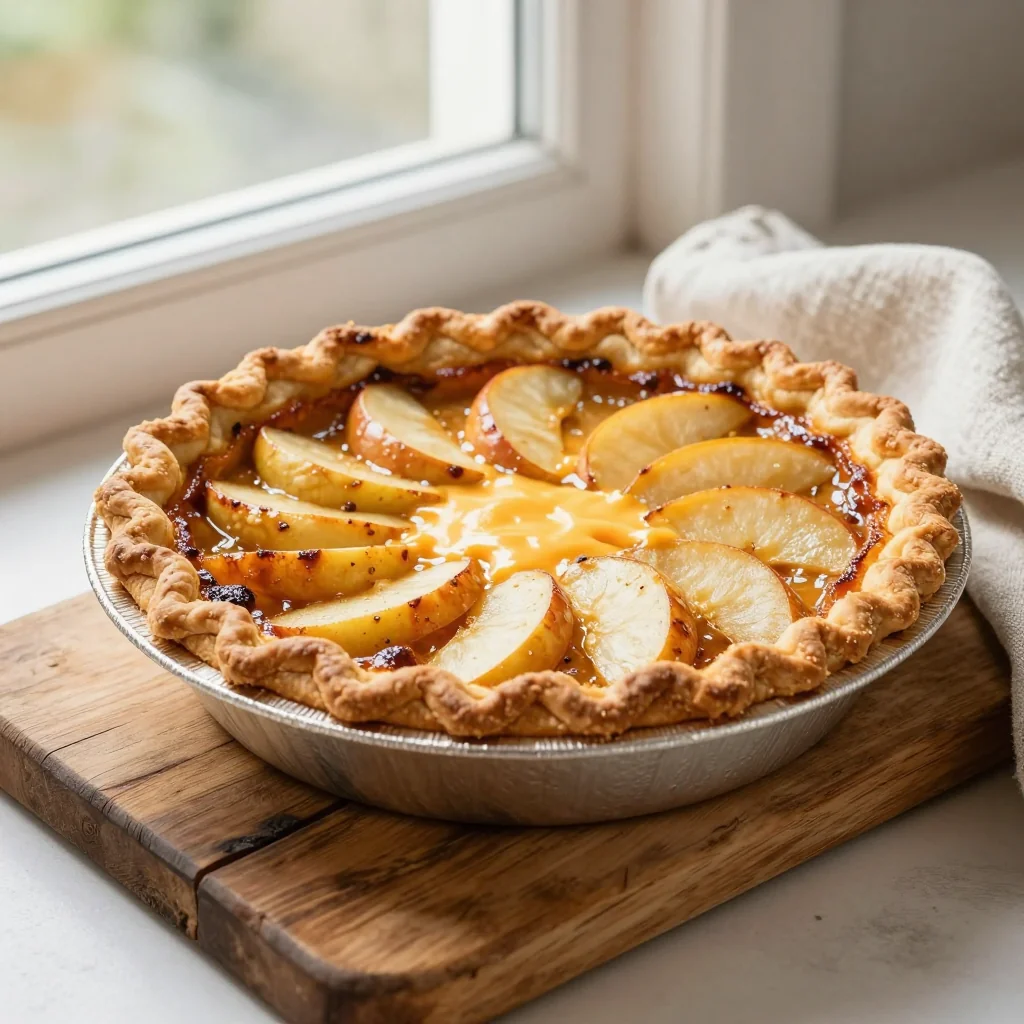
A nostalgic classic reimagined with a sharp cheddar crust that adds a savory surprise to every bite.
There’s a particular magic that happens when a familiar dessert meets an unexpected savory element. I first tasted this apple pie at a small countryside bakery in Vermont, where the baker whispered that the secret was a pinch of sharp cheddar folded into the crust. The moment I bit into the buttery, flaky base, the tangy cheese melted into the caramelized apple filling, creating a harmonious balance of sweet and salty that lingered on my palate.
Apple pie has long been an emblem of comfort food in American kitchens, tracing its roots back to colonial times when settlers combined European pastry techniques with the abundant orchards of the New World. This version pays homage to that heritage while pushing the boundaries with a cheddar crust that adds depth, richness, and a subtle bite that elevates the whole experience.
In this article, you’ll learn how to craft a perfectly flaky cheddar crust, how to select the ideal apples for the filling, and the science behind achieving a glossy, caramelized top. I’ll also share troubleshooting tips, variations for dietary needs, and expert tricks that professional bakers use to ensure a flawless result every time.
So roll up your sleeves, preheat your oven, and let’s embark on a culinary adventure that will make your next family gathering unforgettable.
🌟 Why This Recipe Will Captivate You
From the first aroma to the final bite, this apple pie with cheddar cheese crust offers a symphony of flavors that will keep you coming back for more.
- ✨ Balanced Sweet‑Savory Contrast: The sharpness of aged cheddar cuts through the sweetness of caramelized apples, creating a sophisticated flavor profile that feels both familiar and exciting.
- ✨ Irresistibly Flaky Texture: By chilling the butter and using ice‑water dough, the crust achieves a buttery, layered crumb that melts in your mouth while holding the filling securely.
- ✨ Versatile Presentation: Whether you serve it warm with a scoop of vanilla ice cream or let it cool to a room‑temperature slice, the pie looks stunning on any table.
- ✨ Simple Ingredient List: All components are pantry‑friendly, requiring only fresh apples, basic spices, and a modest amount of cheddar cheese.
- ✨ Nutrient‑Boosted Apples: Apples bring fiber, vitamin C, and antioxidants, making this dessert a slightly healthier indulgence.
- ✨ Crowd‑Pleaser for All Ages: The subtle cheese note intrigues adult palates while the sweet apple filling satisfies children’s cravings.
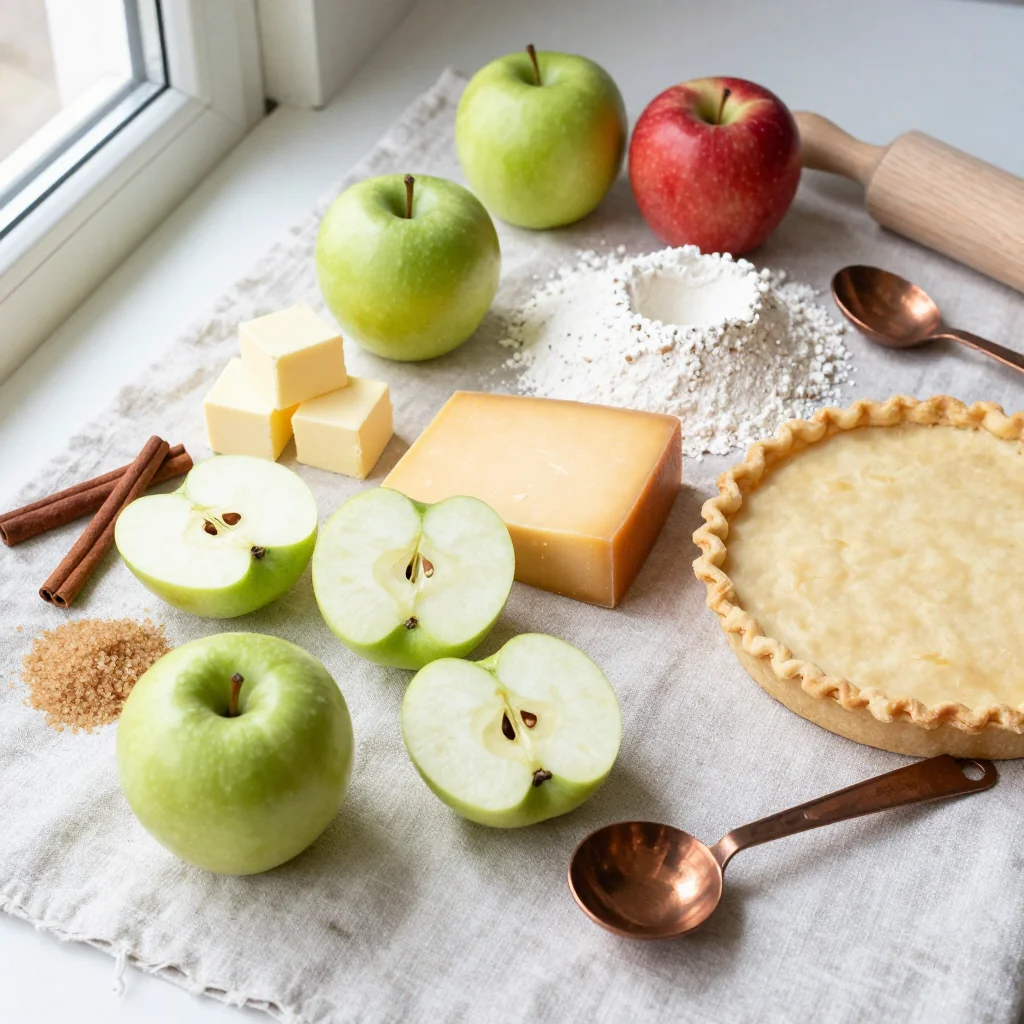
🥗 Ingredients
📝 Complete Ingredient List
For the Cheddar Crust:
For the Apple Filling:
For the Egg Glaze:
🔍 Focus on Key Ingredients
Sharp Cheddar Cheese
The cheddar provides a savory backbone that contrasts with the sweet apples. Choose a cheese aged at least 12 months for a deep, slightly nutty flavor. Grating it finely ensures even distribution throughout the dough, preventing pockets of cheese that could melt unevenly.
Granny Smith Apples
These tart apples hold their shape during baking, preventing a soggy bottom. Their bright acidity balances the richness of the crust and the sugar, creating a harmonious flavor profile. If unavailable, a mix of Honeycrisp and Braeburn works well.
Brown Sugar
Brown sugar adds moisture and a caramel depth that white sugar alone cannot achieve. Its molasses content also contributes a subtle hint of bitterness that rounds out the overall sweetness.
🔄 Quick Substitutions
| If you don’t have... | Use instead... |
|---|---|
| Sharp cheddar | Gruyère or aged Gouda |
| All‑purpose flour | Whole‑wheat pastry flour (use 1:1) |
| Brown sugar | Dark muscovado sugar |
👨🍳 Step‑by‑Step Instructions
Follow these detailed steps to achieve a perfectly flaky crust, a luscious apple filling, and a golden, glossy finish.
📋 Phase 1: Preparing the Cheddar Crust
This phase focuses on creating a cold, buttery dough that incorporates shredded cheddar for flavor.
Combine Dry Ingredients
In a large mixing bowl, whisk together 1.5 cups of all‑purpose flour, 0.5 tsp salt, and the shredded cheddar cheese. The cheese should be evenly distributed to avoid clumping, which can cause uneven browning during baking.
Incorporate the Butter
Add the cold, cubed butter to the flour mixture. Using your fingertips, quickly rub the butter into the flour until the mixture resembles coarse crumbs with some pea‑size pieces. The key is to keep the butter cold; this creates steam pockets that lead to flakiness.
Add Ice‑Cold Water
Drizzle 4‑5 tbsp of ice‑cold water over the mixture, stirring gently with a fork until the dough just comes together. It should feel moist but not sticky. If needed, add an extra teaspoon of water.
🔥 Phase 2: Preparing the Apple Filling & Assembling
Now we’ll create the sweet, spiced apple mixture and combine it with the crust.
Prepare the Apples
In a separate bowl, toss the sliced apples with 1 tbsp lemon juice, 1 tsp cinnamon, 0.25 tsp nutmeg, 100 g brown sugar, 30 g granulated sugar, and 15 g flour. The flour helps to thicken the juices as the apples bake, preventing a soggy bottom.
Chill the Dough
Flatten the dough into a disc, wrap it in plastic wrap, and refrigerate for at least 30 minutes. This resting period relaxes gluten and firms the butter, essential for a flaky result.
Roll Out the Crust
On a lightly floured surface, roll the chilled dough into a 12‑inch circle. Transfer it gently to a 9‑inch pie pan, allowing the excess to hang over the edges. Fold the overhang under to create a neat rim.
Fill the Pie
Pour the apple mixture into the crust, spreading it evenly. Dot the top with small pats of butter (optional) for extra richness.
Apply Egg Glaze
Whisk together the beaten egg and 1 tbsp milk. Brush the glaze over the exposed crust edges. This will give the pie a golden, glossy finish once baked.
✨ Phase 3: Baking, Finishing, and Serving
The final phase transforms the assembled pie into a fragrant, caramel‑brown masterpiece.
Bake the Pie
Preheat the oven to 200 °C (390 °F). Place the pie on the middle rack and bake for 20 minutes. Then reduce the temperature to 180 °C (350 °F) and continue baking for an additional 25‑30 minutes, or until the crust is deep golden and the apple filling bubbles through the vents.
Cool Slightly
Allow the pie to rest for 15 minutes before slicing. This rest period lets the filling set, making for cleaner slices and preventing the juices from spilling out.
Serve
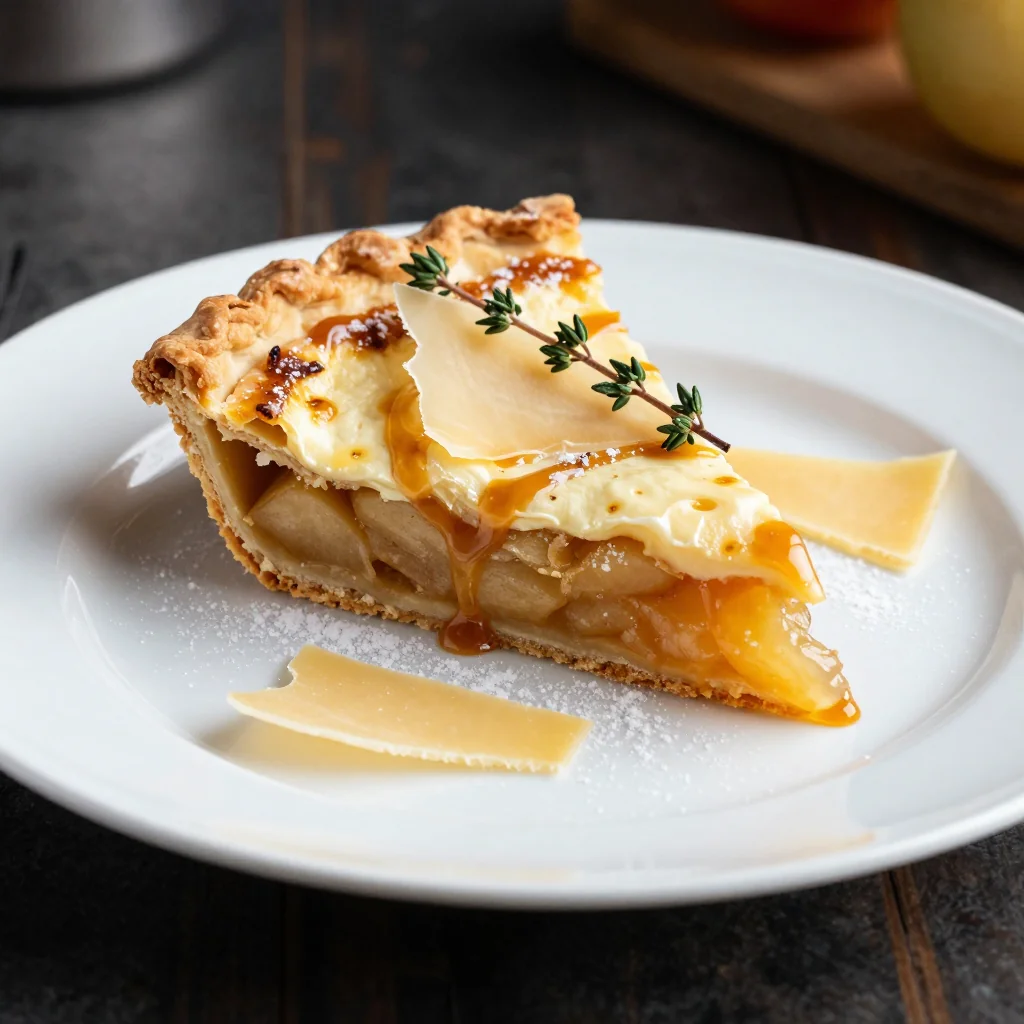
Serve warm, optionally topped with a dollop of vanilla‑bean ice cream or a drizzle of caramel sauce. The cheese crust pairs beautifully with the sweet apples, creating a memorable finish.
💡 Expert Tips & Tricks
🛒 Choosing the Best Ingredients
When shopping for apples, look for firm, unblemished fruit with a bright, glossy skin. For cheddar, a block of cheese is preferable to pre‑shredded varieties, which often contain anti‑caking agents that can affect texture. Butter should be unsalted and at its coldest; keep it in the freezer for a few minutes if your kitchen is warm.
🔪 Preparation Techniques
Use a sharp chef’s knife to slice apples uniformly, about 1/8‑inch thick. Uniform slices ensure even cooking and prevent some pieces from becoming mushy while others remain undercooked. Keep the dough chilled at every stage; even a few minutes on a warm countertop can compromise flakiness.
🌡️ Mastering the Bake
The initial high temperature creates steam, which lifts the crust and creates layers. After the first 20 minutes, lowering the heat allows the interior to cook through without over‑browning the crust. Use a pie shield or foil to protect the edges if they darken too fast.
🍽️ Presentation & Service
Dust the top with a light sprinkling of powdered sugar for visual contrast. Serve slices on a wooden board with a small ramekin of vanilla ice cream on the side. A garnish of fresh mint leaves adds a pop of color and a subtle aromatic note.
🏆 Pro Tips
Elevate your pie from home‑cooked comfort to restaurant‑level brilliance with these professional insights.
- 🎯 Temperature‑Controlled Butter: Cut the butter into tiny cubes and flash‑freeze them for 10 minutes. The smaller the butter pieces, the more steam they release, creating distinct layers in the crust.
- 🎯 Steam‑Infused Baking: Place a shallow pan of water on the lower rack of the oven while baking. The added humidity prevents the crust from drying out, resulting in a tender, buttery texture.
- 🎯 Even Caramelization: Sprinkle a thin layer of granulated sugar over the apple filling before baking. As it melts, it forms a glossy, caramelized surface that adds depth and a slight crunch.
- 🎯 Precision Cutting: Use a serrated pie slicer that cuts straight down without twisting. This technique preserves the integrity of the crust and prevents it from crumbling.
- 🎯 Flavor Layering: Add a splash of Calvados or brandy to the apple mixture for an adult‑only version. The alcohol evaporates during baking, leaving behind a nuanced, warm flavor.
- 🎯 Resting for Texture: After baking, let the pie cool on a wire rack for 20 minutes before serving. This allows the steam to escape, preventing a soggy bottom and ensuring a crisp base.
“A perfect pie is a balance of science and soul; the crust should sing, the filling should dance, and together they tell a story.” — Thomas Keller
🔄 Variations & Adaptations
This versatile recipe invites endless creativity. Below are several ways to tailor it to different tastes, dietary needs, and occasions.
🥬 Vegetarian/Vegan Version
Swap the butter for a plant‑based solid margarine and replace the cheddar with a sharp vegan cheese (such as Violife Sharp Cheddar). Use a flax‑egg (1 tbsp ground flaxseed + 3 tbsp water) in place of the egg glaze, and substitute milk with oat or almond milk.
- Vegan butter: 115 g, chilled and cubed
- Vegan sharp cheddar: 25 g, shredded
- Flax‑egg: 1 tbsp ground flaxseed mixed with 3 tbsp water, let sit 5 minutes
🌶️ Flavor Variations
Adjust the flavor profile by incorporating complementary ingredients. Below are three exciting twists.
Spicy Version
Add ½ tsp cayenne pepper to the apple mixture and a pinch of smoked paprika to the crust. The heat accentuates the sweetness of the apples while the smoked notes echo the cheddar.
Mediterranean Version
Mix 2 tbsp chopped fresh rosemary into the crust dough and drizzle a tablespoon of honey over the apples before baking. The herbaceous aroma pairs beautifully with the sharp cheese.
Asian‑Inspired Version
Incorporate 1 tsp grated fresh ginger and a splash of soy sauce (1 tsp) into the apple filling. Top the crust with toasted sesame seeds before glazing for a nutty finish.
⚠️ Dietary Adaptations
Gluten‑Free
Replace all‑purpose flour with a 1:1 gluten‑free flour blend (e.g., King Arthur Gluten‑Free Measure‑For‑Measure). Add 1 tsp xanthan gum to improve elasticity.
Lactose‑Free
Use lactose‑free butter and a lactose‑free sharp cheddar alternative (such as a mature dairy‑free cheese). Ensure the egg glaze uses lactose‑free milk.
Low‑Calorie
Reduce the sugar by half, replace butter with a blend of 70 % butter and 30 % unsweetened applesauce, and use low‑fat cheese. This cuts calories while preserving flavor.
👶 Family/Children Friendly
For picky eaters, omit the cheddar and use a milder cheese like mozzarella, which melts smoothly without a strong flavor. Add a drizzle of maple syrup on top after baking for extra sweetness that children love.
📦 Storage & Reheating
🧊 Storage
Refrigerator
- Duration: 3‑4 days
- Container: Airtight glass or plastic container
- Tip: Place a piece of parchment paper directly on the cut surface to prevent moisture loss.
Freezer
- Duration: Up to 2 months
- Method: Wrap the entire pie tightly in plastic wrap, then in aluminum foil.
- Defrosting: Transfer to the refrigerator overnight, then reheat as described below.
💡 For best texture, reheat from frozen using the oven method; microwaving can make the crust soggy.
♨️ Reheating
🔥 Oven (Recommended)
- Preheat to 180 °C (350 °F).
- Cover the pie loosely with aluminum foil.
- Heat for 15‑20 minutes if refrigerated, or 30‑35 minutes if frozen.
- Remove foil and continue for 5 minutes to crisp the crust.
⚡ Microwave (Quick)
- Place a slice on a microwave‑safe plate.
- Cover with a microwave‑safe lid or vented plastic wrap.
- Heat on medium power for 45‑60 seconds, then check and repeat if necessary.
🍳 Skillet
For a single slice, heat a non‑stick skillet over medium‑low heat, add a splash of water, and cover for 3‑4 minutes to steam the filling, then uncover to crisp the bottom for another 2 minutes.
🍷 Perfect Pairings
🥗 Side Dishes
- Arugula Salad with Lemon Vinaigrette: The peppery arugula cuts through the richness of the crust, while the citrus brightens the palate.
- Roasted Sweet Potatoes: Their natural sweetness echoes the apples, creating a harmonious flavor loop.
- Caramelized Brussels Sprouts: The slight bitterness pairs well with the sharp cheddar notes.
🍷 Wine & Beverage Pairings
- Riesling (Off‑dry): Its bright acidity and subtle sweetness mirror the apple’s tartness while complementing the cheese.
- Pinot Noir: Light‑bodied red with soft tannins that won’t overwhelm the delicate flavors.
- Non‑Alcoholic: Sparkling apple cider served chilled adds a festive fizz.
🍰 Complementary Courses
Begin with a light citrus‑based starter such as a grapefruit and honey salad, follow the pie with a dollop of vanilla bean ice cream, and finish with a simple almond biscotti for a crunchy contrast.
❓ Frequently Asked Questions
Q: Can I use a different type of cheese for the crust?
A: Absolutely. Aged Gruyère, sharp provolone, or even a smoked cheddar will each bring a unique flavor. Just ensure the cheese is grated finely so it integrates smoothly into the dough.
Q: How do I prevent the bottom crust from becoming soggy?
A: Pre‑bake (blind bake) the crust for 10 minutes before adding the filling, and make sure the apple mixture isn’t overly watery. Toss the apples with flour, which absorbs excess juice during baking.
Q: What if I don’t have a pie pan?
A: A 9‑inch springform pan works well, or you can use a deep‑dish casserole dish and adjust the baking time slightly (increase by 5‑10 minutes).
Q: My crust turned out tough—what went wrong?
A: Over‑mixing or letting the butter warm up too much can develop gluten, leading to a tough crust. Keep everything cold, handle the dough minimally, and rest it in the refrigerator before rolling.
Q: Can I make this pie ahead of time?
A: Yes. Assemble the pie up to the glazing step, cover tightly, and refrigerate for up to 24 hours. Bake when ready; you may need an extra 5‑10 minutes of baking time.
Q: How do I adjust the recipe for a larger pie (12‑inch pan)?
A: Increase all ingredients by roughly 1.5×. Adjust baking time by adding 10‑15 minutes, and ensure the crust edges are well‑protected with foil if they brown too quickly.
🎉 To Your Oven!
This Apple Pie with Cheddar Cheese Crust marries tradition with a daring twist, delivering a dessert that feels both nostalgic and novel. The combination of a buttery, cheese‑infused crust and a caramel‑kissed apple filling makes each bite a celebration of texture and flavor. Whether you’re serving it for a holiday gathering, a weekend family dinner, or a quiet evening treat, this pie is sure to impress.
Remember, the secret lies in keeping everything cold, respecting the dough’s resting time, and balancing the sweet‑savory elements. Experiment with the suggested variations, share your personal tweaks, and let the aroma of baked apples and melted cheddar fill your kitchen.
Have you tried this recipe?
Leave a comment and rating below! Share your photos on Instagram with #CheddarApplePie to be featured on our blog.
Apple Pie with Cheddar Cheese Crust
A classic apple pie reinvented with a sharp cheddar crust for a sweet‑savory masterpiece.
📝 Ingredients
Cheddar Crust
Apple Filling
Egg Glaze
👨🍳 Instructions
- 1
Combine flour, salt, and shredded cheddar in a bowl; whisk to distribute evenly.
- 2
Cut cold butter into the flour mixture until it resembles coarse crumbs.
- 3
Add ice‑cold water gradually, mixing until the dough just comes together.
- 4
Shape dough into a disc, wrap, and chill for 30 minutes.
- 5
Roll dough to a 12‑inch circle, fit into a 9‑inch pie pan, and trim edges.
- 6
Toss sliced apples with lemon juice, sugars, flour, cinnamon, nutmeg, and a pinch of salt.
- 7
Fill crust with apple mixture, dot with butter if desired.
- 8
Brush egg‑milk glaze over crust edges.
- 9
Bake at 200 °C for 20 minutes, then reduce to 180 °C and bake 25‑30 minutes until golden.
- 10
Cool 15 minutes, slice, and serve warm with ice cream or caramel sauce.
🥗 Nutrition (per serving)
*Nutritional values are estimates based on standard ingredient data.
📚 You Might Also Like
Pumpkin Cheddar Pie
Pear Gorgonzola Tart
Blueberry Cheddar Crumble
💬 Comments & Reviews
Leave a Comment
No comments yet. Be the first to share your thoughts!