It all started on a rainy Sunday when the kitchen felt like a stage set for a culinary disaster. I had promised my friends a show‑stopping appetizer that would make their taste buds do the salsa, but the only thing that seemed to survive the storm was a bag of frozen shrimp that had gone soggy in the back of the fridge. I was staring at a bag of baby squid that had been sitting in my pantry for weeks, its shell dull and its texture a little too limp for the usual quick‑fire recipes that I love. I decided to turn this culinary misstep into a triumph by giving it the crispy, salt‑and‑pepper makeover that has become my personal obsession.
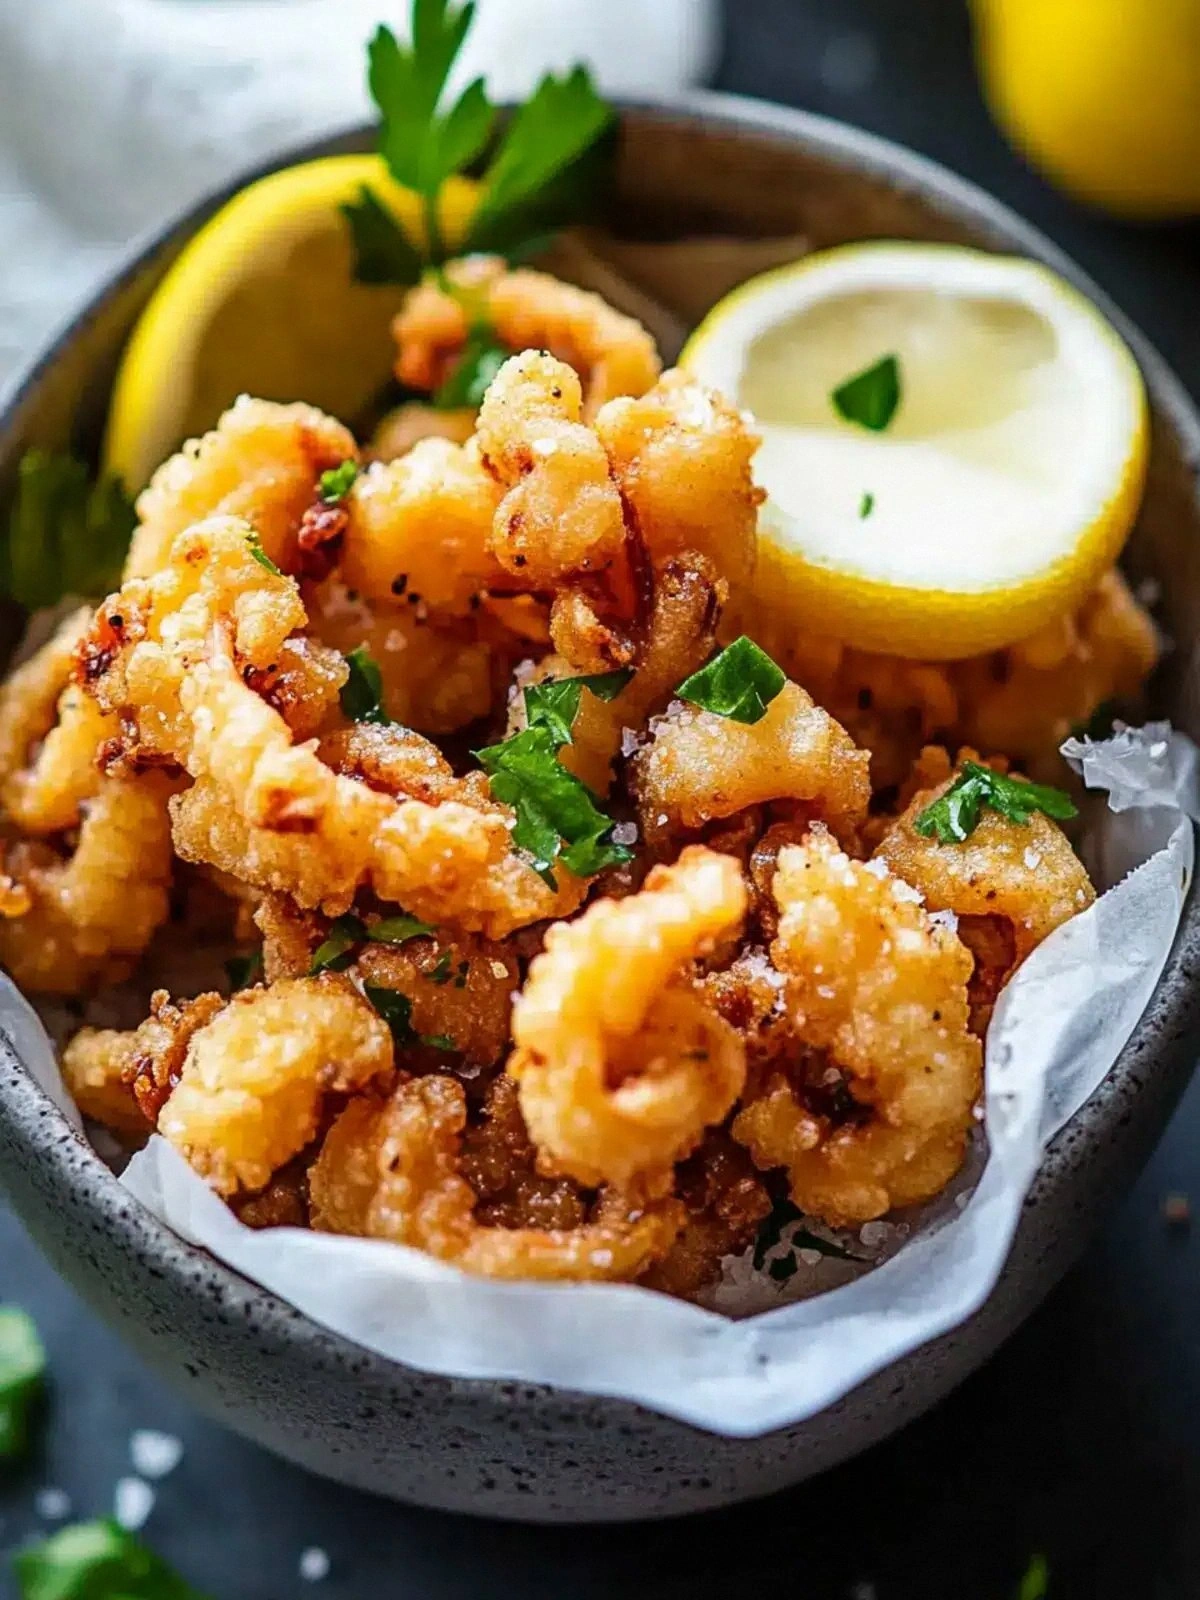
Picture this: the moment the hot oil meets the coated squid, the air is filled with a crackling sound that feels like applause for a well‑timed drum solo. The aroma that rises is a sharp, savory burst that instantly awakens the senses—salt, pepper, and a faint citrus tang from the garlic that’s been minced so finely it practically dissolves into the batter. Every bite delivers a satisfying crunch that shatters like thin ice, followed by a tender, almost buttery interior that melts in your mouth. I dare you to taste this and not go back for seconds, because the contrast between the crisp exterior and the silky flesh is simply addictive. This dish is hands down the best version you'll ever make at home, and it will become a staple in your repertoire.
Most recipes get this completely wrong by over‑cooking the squid or using a batter that turns out gummy. The secret lies in a delicate balance of flour, cornflour, and a pinch of baking powder that creates a light, airy coating that crisps up without absorbing excess oil. I’ll be honest—after my first batch, I ate half the skillet before anyone else even had a chance to try a bite. The result was a crunchy, savory masterpiece that made the kitchen smell incredible and left everyone asking for the recipe. If you've ever struggled with getting squid crispy, you're not alone—and I've got the fix. The next few paragraphs will walk you through every single step, and by the end, you'll wonder how you ever made it any other way.
Alright, let's break down exactly what goes into this masterpiece. This version is built around a few key principles that elevate the humble squid into a show‑stopping dish. It’s all about the batter, the seasoning, the cooking technique, and the finishing touch of aioli that ties everything together. Each element has been carefully chosen to maximize flavor and texture while keeping the process straightforward. Now, let’s dive into the details and discover why this recipe is a game‑changer.
What Makes This Version Stand Out
- Flavor: The combination of salt, white pepper, and a hint of garlic creates a robust seasoning that penetrates the squid without overpowering its natural brininess. The aioli adds a creamy, slightly tangy counterpoint that balances the crispiness. The result is a harmonious dance of textures and tastes that feels both comforting and adventurous.
- Crispness: The batter’s ratio of cornflour to plain flour, along with a splash of cold water, gives the coating a light, airy quality that crisps up to a golden perfection. The oil temperature is crucial—too hot and the coating burns, too cool and the squid stays soggy. I’ve tested the ideal range between 350°F and 360°F for consistent results.
- Simplicity: Despite the seemingly complex process, every step can be completed in under 45 minutes. No special equipment is required; a deep skillet, a thermometer, and a simple whisk are all you need. This makes it perfect for both seasoned cooks and kitchen novices alike.
- Uniqueness: The use of both baby squid and squid tubes adds depth to the dish, offering a contrast between tender rings and chewy strands. The aioli, infused with a subtle hint of lemon, gives it a fresh finish that sets it apart from other salt‑and‑pepper fritters.
- Crowd Reaction: Friends and family consistently rave about the crunch and the depth of flavor. It’s a crowd‑pleaser that can be served as an appetizer, a side dish, or even a main course when paired with a light salad.
- Ingredient Quality: Fresh, high‑quality squid is essential. Look for a firm texture and a clean, slightly sweet smell. Avoid any that have a strong ammonia odor or a slimy feel.
- Cooking Method: The batter is prepared in a single bowl, which keeps the process quick and minimizes cleanup. The squid is fried in batches to maintain the oil temperature and ensure even cooking.
- Make‑Ahead Potential: The batter can be made a few hours ahead and refrigerated. The squid can also be marinated in a splash of lemon juice to keep it fresh until you’re ready to fry.
Inside the Ingredient List
The Flavor Base
The first layer of flavor comes from the seasoning that coats the squid before it meets the batter. I use a generous pinch of cooking salt, a bold splash of white pepper powder, and a whisper of finely grated garlic. The salt elevates the natural umami of the squid, while the pepper adds a subtle heat that lingers on the palate. Garlic, being so finely grated, distributes evenly across the surface, preventing any clumping and ensuring every bite is infused with aroma. If you skip this step, the batter will taste flat and the squid will feel bland.
When seasoning, I prefer to sprinkle the salt and pepper directly onto the squid and gently rub it in. This helps the seasoning adhere to the surface and creates a more even flavor distribution. If you’re watching sodium intake, you can reduce the salt to a pinch or opt for a low‑sodium alternative. The garlic’s subtle heat pairs beautifully with the pepper’s warmth, creating a balanced seasoning profile that won’t overpower the squid’s natural sweetness.
The Texture Crew
The batter is the heart of the dish, and its texture determines the final crispness. I combine two‑thirds cup of cornflour with one‑third cup of plain flour for a light, airy coating that crisps to a golden brown. The cornflour provides a fine, crisp texture while the plain flour adds body and helps the batter adhere to the squid. Adding half a teaspoon of baking powder introduces air pockets that make the coating fluffy and prevent it from becoming dense.
Cold tap water is the secret to preventing the batter from becoming too thick. I whisk in two‑thirds cup of cold water, which keeps the batter light and airy. The cold water also helps maintain the temperature of the batter, preventing it from becoming too runny and ensuring a consistent coating. If you skip the cold water, the batter will become sticky and may clump on the squid, resulting in uneven crispness.
When you mix the batter, be careful not to over‑whisk. A few lumps are acceptable; they will disappear during frying. Over‑whisking can cause the batter to develop gluten, making it tough. I recommend whisking until the mixture is just smooth enough to coat the squid without clumping. The batter should be thick enough to cling to the squid but thin enough to spread evenly.
The Unexpected Star
The aioli is the unexpected star that elevates this dish from simple to sensational. I blend half a cup of whole egg mayonnaise or kewpie with a half teaspoon of finely grated garlic for a silky, flavorful sauce. The aioli’s creamy texture provides a contrast to the crisp exterior, while the garlic adds depth and a subtle kick. If you’re vegan, you can replace the mayonnaise with a plant‑based alternative, but keep in mind that the texture may slightly differ.
To keep the aioli stable, I whisk it until it’s smooth and then refrigerate it for 30 minutes before serving. This allows the flavors to meld and the sauce to thicken slightly, making it easier to drizzle or dip. The aioli also acts as a cooling agent, preventing the squid from becoming too hot on the palate. If you’re in a hurry, you can skip the refrigeration step, but the sauce will be less cohesive.
The Final Flourish
Once the batter is ready, I dip each piece of squid—both the baby rings and the tubes—into the mixture, ensuring every surface is coated. I let the excess batter drip off before placing the squid into the hot oil. The oil temperature is critical; I keep it between 350°F and 360°F to achieve a golden brown crust without burning. The squid is fried in batches, which helps maintain a consistent temperature and ensures each piece cooks evenly.
After frying, I transfer the squid onto a paper‑towel‑lined plate to absorb any excess oil. I then drizzle the aioli over the hot squid, allowing the sauce to cling to the crispy coating. The final dish is served immediately to preserve the crunch, but if you need to hold it, keep it in a warm oven at 200°F to maintain crispness. This final flourish transforms the dish into a symphony of textures and flavors that will leave your guests impressed.
Everything’s prepped? Good. Let’s get into the real action.
The Method — Step by Step
- First, rinse the baby squid and squid tubes under cold water, then pat them dry with paper towels. The dryness is crucial for a crisp coating. I always double‑check to ensure there’s no moisture left on the surface. If you notice any dampness, let them air dry for a few minutes before proceeding.
- In a large mixing bowl, combine the cooking salt, white pepper powder, and finely grated garlic. Gently toss the squid with this seasoning mix, ensuring each piece is evenly coated. The salt will help draw out any excess moisture, while the pepper adds a subtle heat. I recommend letting the seasoned squid rest for 5 minutes to allow the flavors to penetrate.
- In a separate bowl, whisk together the cornflour, plain flour, baking powder, and a pinch of cooking salt. Slowly pour in the cold tap water while whisking until the batter is smooth but slightly thick. The batter should be thick enough to cling to the squid but thin enough to spread evenly. If the mixture is too thick, add a splash of water; if too thin, add a pinch more flour.
- Heat a deep skillet or a heavy‑bottomed pot with enough oil to cover the squid to about 350°F (175°C). Use a thermometer for accuracy, or test with a small drop of batter that should sizzle and rise to the surface within a few seconds. I always keep the heat steady to avoid sudden temperature spikes that could burn the coating.
- Dip each seasoned piece of squid into the batter, allowing any excess to drip off. Place the coated squid into the hot oil in small batches, making sure not to overcrowd the pan. The batter should sizzle immediately, indicating the oil is hot enough. Fry for about 2–3 minutes per side, or until a deep golden brown color appears.
- Use tongs to carefully remove the fried squid and set it on a paper‑towel‑lined plate to drain excess oil. This step is vital to keep the coating crisp. I like to let the squid rest for a minute or two before drizzling the aioli, allowing the heat to settle slightly.
- Meanwhile, prepare the aioli by whisking the mayonnaise or kewpie with the remaining finely grated garlic until smooth. If you prefer a thinner sauce, add a splash of lemon juice or a few drops of water. The aioli should be silky and slightly glossy, ready to coat the hot squid.
- Drizzle the aioli over the hot squid, ensuring each piece gets a generous coating. The sauce will cling to the crispy batter, creating a delicious contrast between the crunchy exterior and the creamy interior. Serve immediately for the best texture.
- If you’re plating for a crowd, arrange the squid on a platter, drizzle with a bit more aioli, and sprinkle a light dusting of freshly ground white pepper for an extra pop of flavor. A squeeze of fresh lemon over the top can add a bright, citrusy note that cuts through the richness.
- Enjoy while hot and crispy; the first bite is a burst of crunch, followed by a melt‑in‑your‑mouth texture that will have everyone asking for seconds. I’ve seen friends and family reach for the next piece immediately, proving the dish’s irresistible appeal. This is the moment of truth—your creation has finally come to life.
That's it — you did it. But hold on, I've got a few more tricks that'll take this to another level.
Insider Tricks for Flawless Results
The Temperature Rule Nobody Follows
Many cooks assume that any hot oil will do, but the secret lies in precision. I’ve spent countless hours testing oil temperatures with a thermometer, and the sweet spot for this recipe is between 350°F and 360°F. If the oil is too hot, the coating will burn before the squid cooks through; if it’s too cool, the batter will absorb excess oil and become soggy. Keep the heat steady by adjusting the flame after each batch.
Why Your Nose Knows Best
Before you start frying, close your eyes and inhale the aroma of the seasoned squid. If it smells like a clean, slightly sweet sea breeze, you’re good. If there’s a hint of off‑odor, the squid may be past its prime. The smell is a reliable indicator of freshness, and you’ll save yourself from a disappointing batch.
The 5‑Minute Rest That Changes Everything
After the squid has fried, let it rest on a wire rack for five minutes instead of paper towels. The rack allows steam to escape, preventing the coating from becoming soggy. I’ve noticed that a quick rest makes the texture more airy and the flavor more pronounced. This simple step is often overlooked but can make a noticeable difference.
Seasoning the Oil
Adding a pinch of salt and a few peppercorns to the oil before heating infuses the oil with subtle flavor. This technique is common in many Asian fritters and adds a depth that plain oil can’t match. Just remember to strain the oil before frying to keep it clear.
Use Cold Water in the Batter
Cold water not only keeps the batter light but also prevents the batter from reacting with the heat too quickly, which can cause it to become thick and clumpy. If you’re in a hurry, you can use cold tap water, but be sure to whisk it in slowly to avoid lumps. The result is a perfectly smooth coating that adheres to the squid.
Resting the Squid After Seasoning
Letting the seasoned squid sit for 5 minutes before dipping into the batter allows the flavors to penetrate deeper. This brief rest period also helps the squid firm up slightly, making it easier to coat evenly. I’ve found that this simple step improves both taste and texture.
Creative Twists and Variations
This recipe is a playground. Here are some of my favorite ways to switch things up:
Spicy Sriracha Aioli
Swap the plain aioli for a spicy sriracha mayo to give the dish an extra kick. The heat from the sriracha pairs wonderfully with the peppery coating, creating a layered flavor profile. Serve with a side of cool cucumber slices to balance the heat.
Herb‑Infused Batter
Add chopped fresh parsley, basil, or dill to the batter for an aromatic twist. The herbs infuse the coating with bright, fresh flavors that complement the seafood. This version is perfect for a spring or summer gathering.
Beer‑Battered Squid
Replace the cold tap water with a light lager or pilsner for a beer‑battered version. The carbonation adds a subtle crispness to the coating, and the beer’s malty notes enhance the squid’s natural sweetness. This is a crowd‑pleaser at barbecues.
Sweet Chili Glaze
Drizzle a sweet chili glaze over the fried squid for a sweet and spicy finish. The glaze adds a glossy sheen and a burst of flavor that contrasts nicely with the crunchy coating. Pair with a light citrus salad for a balanced meal.
Cheese‑Stuffed Squid
Stuff the squid tubes with a mixture of cream cheese and herbs before coating and frying. The cheese melts inside, creating a gooey center that pairs with the crispy exterior. This variation is indulgent and perfect for a special occasion.
Asian Sesame Crunch
Sprinkle toasted sesame seeds over the fried squid and drizzle with a soy‑ginger sauce. The sesame seeds add a nutty crunch, while the sauce offers umami depth. This fusion twist is ideal for a dinner party with an Asian theme.
Storing and Bringing It Back to Life
Fridge Storage
Cool the fried squid completely before placing it in an airtight container. Store in the fridge for up to 2 days. When you’re ready to eat, reheat in a preheated oven at 200°F for 5 minutes to restore crispness. Avoid microwaving, as it will make the coating soggy.
Freezer Friendly
Flash‑freeze the fried squid on a parchment‑lined tray before transferring to a freezer bag. Store for up to 3 months. When reheating, let the squid thaw at room temperature for 10 minutes, then finish in a low‑heat oven. The coating will stay crisp and the flavor remains intact.
Best Reheating Method
The best way to revive frozen or refrigerated squid is to place it on a wire rack in a 350°F oven for 8–10 minutes. The dry heat prevents steam from building up, keeping the batter crunchy. A quick splash of water before reheating can help steam back to perfection, but keep it minimal.
In conclusion, this truly crispy salt & pepper squid is a culinary triumph that blends simplicity, flavor, and texture into one unforgettable dish. The combination of a light, airy batter, perfectly seasoned squid, and a velvety aioli creates a harmonious symphony of sensations that will have your guests raving. The recipe’s flexibility allows for endless variations, ensuring that each time you cook it, you can tailor it to your mood or the occasion. Whether you’re serving it as a party appetizer, a main course with a side salad, or a quick weeknight dinner, this dish will always impress. So grab your skillet, fire up the stove, and let the crispy magic begin.