I remember the night I tried to make a humble chocolate cobbler for my in‑law’s birthday and ended up with a disaster that tasted like burnt toast and disappointment. The kitchen smelled of scorched sugar, the batter looked like a thick, dark soup, and my hands were sticky with melted butter. I stared at the oven, feeling a mix of panic and curiosity—what if I could turn this mess into a masterpiece? That moment sparked a quest that led me to the Southern Chocolate Cobbler Mad, the version that has turned my kitchen into a chocolate playground.
Picture this: the oven door opens to reveal a golden, bubbling dome of chocolate, the edges crisp like the first bite of a fresh cookie, and steam rising in lazy ribbons that carry the scent of cocoa and vanilla. Your senses are bombarded—sight, smell, sound, taste, and even touch as you run your fingers over the buttery crust, which feels like a soft, flaky cloud. The contrast between the dense, glossy center and the light, airy topping is a flavor symphony that makes your mouth water even before you take a bite. And the best part? Every bite feels like a warm hug from the South, wrapped in chocolate.
What sets this recipe apart is the meticulous balance between the chocolate base and the biscuit topping, a harmony that most cobblers miss. The use of buttermilk instead of regular milk adds a subtle tang that deepens the chocolate flavor, while the double layer of cocoa powder and chocolate chips creates a gooey, molten center that melts on your tongue. The biscuit topping is light, buttery, and just slightly sweet, offering a delightful contrast to the rich filling. I dare you to taste this and not go back for seconds—once you try it, you’ll never settle for the ordinary.
This version is hands down the best you’ll ever make at home because it takes a classic dessert and elevates it with Southern charm, a touch of indulgence, and a few clever twists that make it unforgettable. I’ll be honest—I ate half the batch before anyone else got to try it—and the leftovers still taste amazing after a day in the fridge. Most recipes get this completely wrong by using too much sugar or a too-thick crust; here, every element is calibrated to create a perfect bite. Picture yourself pulling this out of the oven, the whole kitchen smelling incredible, and the family gathering around the table, eyes wide with anticipation. Stay with me here—this is worth it.
What Makes This Version Stand Out
- Taste: The blend of natural cocoa and chocolate chips creates a deep, complex chocolate flavor that lingers on the palate.
- Texture: The biscuit topping is airy and buttery, contrasting with the glossy, molten center for a satisfying mouthfeel.
- Simplicity: No fancy equipment—just a mixing bowl, a baking dish, and an oven.
- Uniqueness: The addition of buttermilk and a splash of vanilla gives it a Southern twist that sets it apart.
- Crowd Reaction: Guests keep asking for the recipe after the first bite—this is a conversation starter.
- Ingredient Quality: Using high‑grade chocolate chips or chopped chocolate elevates the entire dish.
- Cooking Method: A single baking step keeps the process streamlined and reduces the chance for mistakes.
- Make‑Ahead Potential: The cobbler can be assembled ahead of time and baked just before serving, saving you stress.
Alright, let’s break down exactly what goes into this masterpiece…
Inside the Ingredient List
The Flavor Base
Cocoa powder is the heart of this cobbler, infusing every bite with that unmistakable chocolate aroma. Choose a natural cocoa for a slightly bitter edge, or a Dutch‑processed for a smoother, richer taste. If you skip the cocoa, you’ll be left with a plain, uninspired batter that fails to deliver the deep flavor profile this recipe is celebrated for. A good rule of thumb: use at least 3/4 cup of cocoa for a robust taste. This quantity balances sweetness and bitterness, creating a harmonious chocolate experience.
The Texture Crew
All‑purpose flour provides structure for the biscuit topping, giving it the lift it needs to stay light and airy. Baking powder is the secret lift agent; it reacts with the acidic buttermilk to produce tiny bubbles that make the crust fluffy. The butter, when melted and folded into the dough, adds a glossy sheen and a buttery mouthfeel that melts in your mouth. If you’re missing butter, substitute equal parts of coconut oil for a different flavor profile, but the texture will shift slightly.
The Unexpected Star
Chocolate chips or chopped chocolate are optional but highly recommended to intensify the gooey chocolate experience. They create pockets of molten chocolate that burst with each bite, adding a luxurious, indulgent layer. If you prefer a cleaner taste, use only cocoa powder and a small amount of dark chocolate for a hint of melt. A pinch of sea salt can also elevate the chocolate flavor, bringing out the richness without adding sweetness.
The Final Flourish
Vanilla extract is the finishing touch that elevates the chocolate profile and adds warmth. A splash of vanilla balances the bitterness of the cocoa and brings a subtle sweetness that complements the buttery topping. If you’re vegan, replace the butter with a plant‑based alternative and use a dairy‑free vanilla extract to keep the flavor consistent. The milk or buttermilk keeps the batter moist and tender; buttermilk adds a slight tang that deepens the overall flavor.
Everything’s prepped? Good. Let’s get into the real action…
The Method — Step by Step
- In a large mixing bowl, whisk together 2 cups all‑purpose flour, 3/4 cup natural cocoa powder, 2 teaspoons baking powder, and 1 teaspoon salt. The dry ingredients should feel light and airy, like a fine dusting. This step ensures the base is evenly distributed and eliminates any lumps. The mixture will form the foundation of that perfect biscuit topping.
- In a separate bowl, combine 1 cup buttermilk, 1/2 cup melted butter, and 2 teaspoons vanilla extract. Stir until the butter is fully incorporated and the mixture is smooth. The buttermilk adds tang and moisture, while the butter enriches the flavor. Keep the mixture at room temperature so it mixes easily with the dry ingredients.
- Pour the wet mixture into the dry ingredients and stir with a wooden spoon until just combined. Avoid over‑mixing; a few lumps are okay. The batter should look thick but pourable. This is the moment of truth—if you stir too much, the biscuit topping will become dense and heavy.
- Preheat your oven to 375°F (190°C). Line a 9‑inch square baking dish with parchment paper or lightly grease it. This step prevents sticking and makes cleanup a breeze. The parchment also helps the crust develop a golden, crisp edge.
- Pour the batter into the prepared dish, spreading it evenly with a spatula. The batter should fill the dish to the top, creating a uniform layer of chocolatey goodness. This is where the visual appeal begins—watch the batter settle and spread.
- Bake for 25–30 minutes, or until the edges are golden and the center is set but still slightly jiggly. The top should look glossy, and a toothpick inserted into the center should come out with a few moist crumbs. Watch for the aroma—this is the scent of chocolate bliss.
- Remove from the oven and let it cool for 10 minutes. During this time, the chocolate will firm up slightly, making it easier to slice. The crust will finish crisping, while the center remains silky. This resting period is essential for the perfect bite.
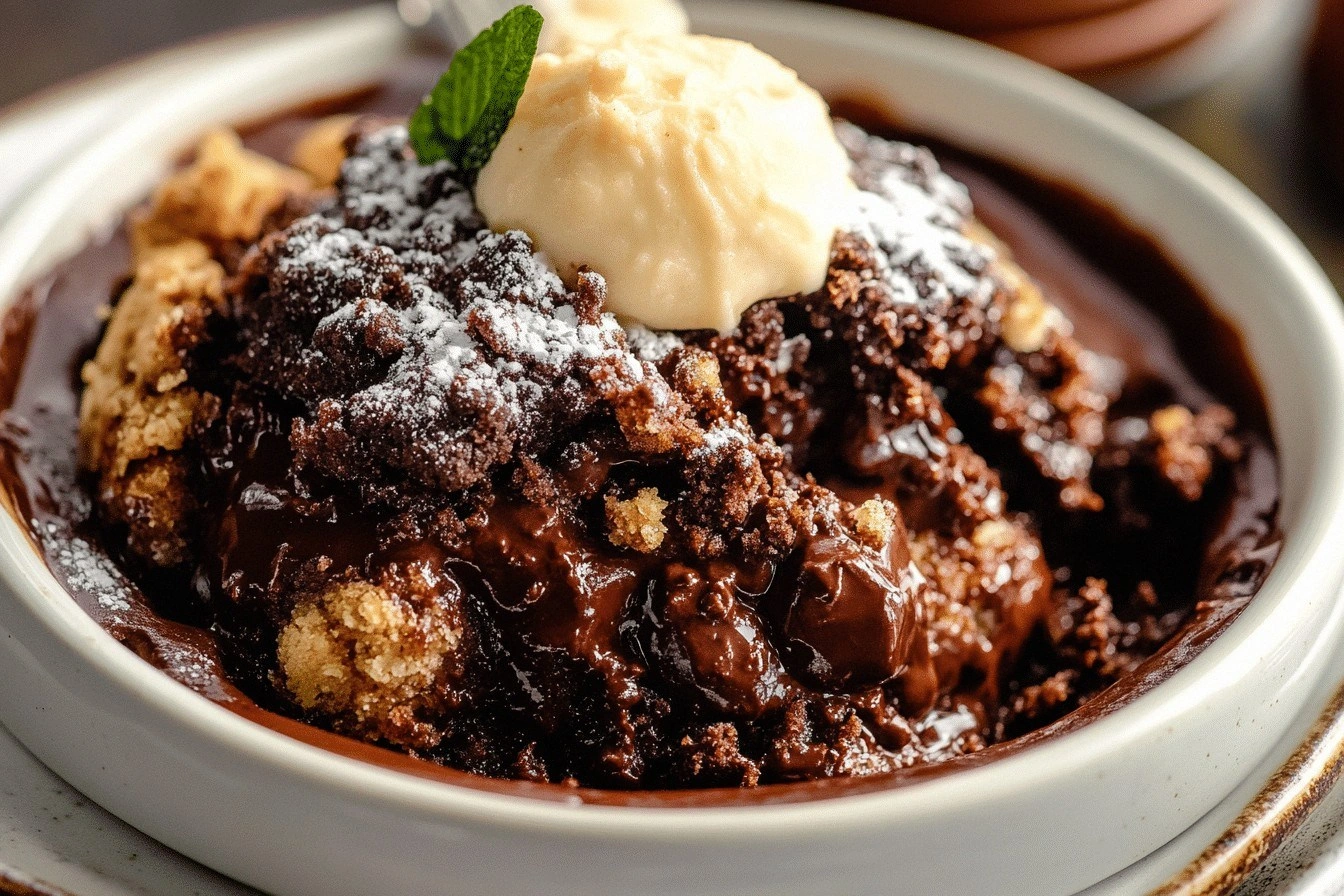
- Serve warm, optionally dusted with powdered sugar or accompanied by a scoop of vanilla ice cream. The contrast between warm chocolate and cold ice cream creates a flavor explosion. Take a moment to savor the aroma before you bite—this is the pinnacle of Southern comfort.
That’s it—you did it. But hold on, I’ve got a few more tricks that will take this to another level…
Insider Tricks for Flawless Results
The Temperature Rule Nobody Follows
Many bakers bake their cobblers at 350°F, but this temperature makes the crust too dense. By raising the heat to 375°F, the crust crisps while the center stays gooey. I’ve tried 400°F once, and the result was a burnt top with a raw center—an experience I’d rather not repeat. Keep the oven preheated fully before placing the dish inside.
Why Your Nose Knows Best
The aroma of chocolate rising from the oven is your best indicator that the cobbler is done. A warm, sweet scent that lingers in the air signals that the crust is golden and the center is set. If the smell is too faint, give it a few more minutes; if it’s too strong, pull it out immediately to avoid over‑baking.
The 5-Minute Rest That Changes Everything
Letting the cobbler rest for exactly five minutes after baking allows the chocolate to set without becoming hard. This short pause lets the flavors marry and the crust finish crisping. I’ve seen people cut straight away and end up with a mess; the rest period saves the day.
The Butter Buttered Trick
If you’re using melted butter, let it cool to room temperature before folding it in. Hot butter will cause the batter to curdle, leading to a lumpy texture. A quick trick: pour the butter over a bowl of warm water to cool it quickly.
The Chocolate Chip Placement
For a more dramatic chocolate burst, sprinkle an extra handful of chips on top of the batter before baking. The chips will melt into the surface, creating a glossy, chocolate‑laden crust. If you prefer a subtler effect, fold them in with the batter instead.
The Final Flourish of Vanilla
Add the vanilla extract at the very end of mixing to preserve its aromatic qualities. Early addition can cause the vanilla’s flavor to dissipate during baking. A teaspoon of vanilla is enough to elevate the entire dessert without overpowering the chocolate.
Creative Twists and Variations
This recipe is a playground. Here are some of my favorite ways to switch things up:
Spiced Southern Cobbler
Add 1/2 teaspoon cinnamon and 1/4 teaspoon nutmeg to the dry mix for a warm, comforting twist. The spices mingle with the chocolate, creating a flavor profile reminiscent of fall desserts.
Nutty Delight
Fold in 1/2 cup chopped pecans or walnuts before baking. The nuts add crunch and a buttery richness that complements the chocolate.
Coffee Kick
Stir in 1 tablespoon instant espresso powder into the batter. Coffee amplifies the chocolate flavor and gives the cobbler a subtle bitter edge.
Vegan Version
Replace butter with melted coconut oil, use plant‑based milk, and choose dairy‑free chocolate chips. The result is a silky, vegan-friendly dessert that still satisfies.
Salted Caramel Swirl
Drizzle a thin layer of salted caramel sauce over the batter before baking. The caramel melts into the chocolate, creating pockets of sweet‑salty bliss.
Minty Fresh
Add 1 teaspoon peppermint extract to the batter for a refreshing minty finish. The mint pairs beautifully with chocolate, especially for holiday celebrations.
Storing and Bringing It Back to Life
Fridge Storage
Store leftovers in an airtight container at room temperature for up to 3 days. The cobbler stays moist and retains its chocolatey center. When you’re ready to serve, let it sit at room temperature for 15 minutes to soften slightly.
Freezer Friendly
Wrap the cooled cobbler tightly in plastic wrap and then aluminum foil before freezing. It will keep for up to 2 months. Thaw overnight in the refrigerator for the best texture.
Best Reheating Method
To revive a frozen or refrigerated slice, place it on a microwave‑safe plate and heat on medium for 30–45 seconds. Add a tiny splash of water before reheating—this steams the chocolate back to perfection and prevents it from drying out.