The first time I stumbled into this recipe, I was standing in the middle of a kitchen that looked like a war zone. A bag of Rice Krispies had exploded across the counter, chocolate chips were scattered like confetti, and my trusty jar of peanut butter had turned into a sticky, gooey mess. I had just promised my friends a batch of cookies that would make their taste buds dance, and I was about to make a disaster. The moment the coffee brewed, its rich aroma filled the room, turning the chaos into a promise of something delicious.
Picture this: a steaming mug of freshly brewed coffee, the sound of chocolate chips sizzling as they melt, and the crunch of Rice Krispies that crackles like a winter snowstorm. The scent of vanilla lingers in the air, a subtle whisper that hints at depth. My fingers are sticky, but the anticipation is electric. I can already taste the first bite—sweet, nutty, with a bold coffee kick that wakes the senses.
What makes this version stand out is that it takes the classic no-bake cookie and turns it into a coffee-infused, crunchy masterpiece that feels like a dessert and a snack all at once. I dared myself to taste it and not go back for seconds, and I was right—there's a second wave of flavor that lingers like a good espresso shot. The coffee isn't just an afterthought; it's the star that elevates every bite. The result is a cookie that feels both comforting and adventurous.
And here's the kicker: you don't even need an oven or a stove. All the magic happens in a bowl, with a gentle heat source, and a dash of patience. I promise you, by the end of this guide, you'll wonder how you ever made any other version of these cookies. Let me walk you through every single step—by the end, you'll wonder how you ever made it any other way.
What Makes This Version Stand Out
- Flavor: The coffee infusion gives the cookies a deep, robust flavor that pairs perfectly with the sweetness of chocolate and honey. The vanilla extract adds a subtle warmth that balances the bitterness of the coffee.
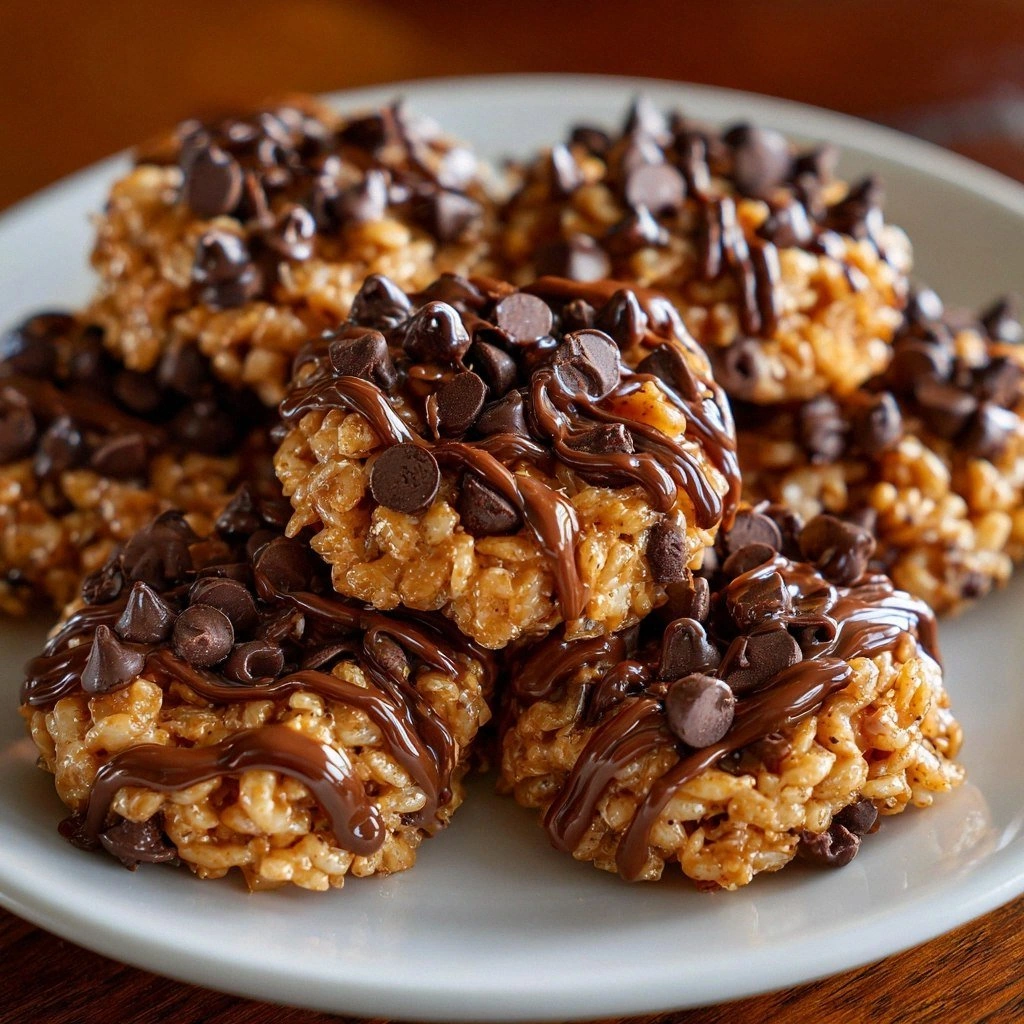
- Texture: The combination of Rice Krispies and melted chocolate creates a delightful crunch that shatters like thin ice, while the peanut butter gives a creamy bite that holds everything together.
- Simplicity: No baking, no measuring, just a few ingredients that most kitchens already stock. The recipe is a quick 5‑minute prep that yields an instant treat.
- Uniqueness: Few no‑bake cookies incorporate coffee in a way that feels both indulgent and refreshing. The coffee isn’t just a flavor—it's a component that changes the entire profile.
- Crowd Reaction: Friends who’ve tried this say it’s the “best version you’ll ever make at home.” The cookies are perfect for parties, office breaks, or a quick dessert after dinner.
- Ingredient Quality: Using high‑quality chocolate chips and peanut butter ensures a richer taste and better texture. The coffee should be freshly brewed for maximum aroma.
- Make‑Ahead Potential: These cookies can be made in advance and stored in an airtight container for up to a week. The crunch stays fresh when you’re ready to serve.
Alright, let's break down exactly what goes into this masterpiece…
Inside the Ingredient List
The Crunch Crew
Rice Krispies are the backbone of these cookies, delivering the signature crunch that makes each bite satisfyingly crisp. They absorb the melted chocolate and honey, forming a firm structure that holds the mixture together. If you skip them, the cookies will collapse and lose their iconic texture. For a gluten‑free version, look for certified gluten‑free Rice Krispies or puffed rice flakes.
Chocolate Chips bring a rich, sweet depth that contrasts with the coffee’s slight bitterness. They melt into a glossy coating that clings to the Rice Krispies, creating a chocolatey shell. If you prefer dark chocolate, switch to 70% cacao chips for a more intense flavor. The key is to use chips that melt smoothly; avoid chocolate bars that contain added butter, as they can become greasy.
Peanut Butter is the binder that gives these cookies their chewy interior. It’s both creamy and slightly salty, balancing the sweetness of honey and chocolate. The smooth texture of peanut butter allows it to melt with the coffee and honey, forming a cohesive base. If you’re vegan, consider a natural peanut butter with no added oils or sweeteners.
The Sweetener
Honey is the natural sweetener that not only adds flavor but also helps the cookies set. Its viscous nature ensures the mixture stays together without the need for flour or starch. Honey also has a subtle floral note that complements the coffee aroma. If you prefer a lighter sweetness, try maple syrup, but be aware it will alter the flavor profile.
Vanilla Extract is a small but mighty ingredient that amplifies the overall taste. It rounds out the coffee’s sharpness and adds a fragrant warmth. A single teaspoon is enough to elevate the entire cookie. For a more pronounced vanilla taste, you can use vanilla bean paste or extract from a vanilla bean pod.
The Unexpected Star
Brewed Coffee isn’t just a flavor enhancer; it’s a flavor enhancer that brings depth and aroma. Freshly brewed, it adds a bold, slightly bitter undertone that balances the sweetness of honey and chocolate. The coffee should be brewed strong—about 1 cup of coffee per 4 servings—to ensure the flavor stands out. If you’re sensitive to caffeine, use decaf or a mild roast.
Everything's prepped? Good. Let's get into the real action…
The Method — Step by Step
- Start by brewing a strong cup of coffee—about 1 cup for the entire batch. Let it cool slightly; you want it warm enough to melt the peanut butter but not hot enough to scorch the honey.
- In a medium saucepan, combine the peanut butter, honey, and the warm coffee. Heat over low heat, stirring constantly, until the mixture is smooth and glossy. The coffee should give the mixture a subtle sheen.
- Add the vanilla extract to the saucepan, then stir until fully incorporated. The aroma of vanilla should mingle with the coffee, creating a fragrant base. This is the moment of truth—your mixture should be silky, not grainy.
- Remove the saucepan from the heat and let the mixture sit for 30 seconds to cool slightly. This pause allows the flavors to meld together without cooking the ingredients further.
- Gently fold in the Rice Krispies and chocolate chips until the mixture is evenly coated. The Rice Krispies should be fully enveloped, and the chocolate chips should be distributed evenly. The mixture should have a sticky, thick consistency.
- Using a small cookie scoop or spoon, drop spoonfuls onto a parchment-lined tray. Press lightly to flatten the cookies slightly, creating a bite‑size treat. The cookies should be about 1.5 inches in diameter.
- Place the tray in the refrigerator for at least 30 minutes to allow the cookies to set. The cooling process gives the cookies a firmer bite and lets the flavors settle. After chilling, remove the cookies and let them sit at room temperature for 10 minutes before serving.
- Serve immediately or store in an airtight container. The cookies keep their crunch for up to a week when refrigerated. If you notice any moisture buildup, a quick 5‑minute microwave burst can revive their crispness.
That's it — you did it. But hold on, I've got a few more tricks that'll take this to another level…
Insider Tricks for Flawless Results
The Temperature Rule Nobody Follows
The key to a silky base is maintaining the right temperature. If the mixture gets too hot, the peanut butter can separate, causing a greasy texture. Conversely, if it’s too cold, the honey won’t dissolve properly, leaving a grainy bite. I recommend using a digital thermometer—aim for 140°F to 150°F. This small step eliminates the guesswork and guarantees a perfect consistency.
Why Your Nose Knows Best
Your nose is a reliable judge of flavor balance. As soon as the coffee and chocolate start to mingle, you’ll notice a subtle shift in aroma. If the coffee smell is too faint, add an extra splash of brewed coffee. If it’s overpowering, a dash of vanilla or a pinch of sea salt can help mellow it. Trust your olfactory sense to tweak the flavor profile on the spot.
The 5‑Minute Rest That Changes Everything
After folding in the Rice Krispies, let the mixture rest for exactly five minutes before forming the cookies. This pause allows the rice to absorb the liquid, ensuring the cookies hold together. It also gives the chocolate chips a chance to soften slightly, creating a melt‑in‑your‑mouth center. Skipping this step often results in crumbly cookies.
The Secret of the Crunch
For an extra crunch, lightly toast the Rice Krispies in a dry skillet for two minutes before adding them. The toasted flavor adds depth, and the slight crispness stays even after chilling. This simple tweak elevates the overall texture and gives the cookies a more complex bite.
The Chill‑and‑Serve Trick
If you’re serving these cookies at a party, chill them in the fridge for an hour before the event. When the cookies are cold, they hold their shape better, and the coffee flavor becomes more pronounced. Keep them in a sealed container to avoid them absorbing any odors from the fridge.
Creative Twists and Variations
This recipe is a playground. Here are some of my favorite ways to switch things up:
Nutty Banana Crunch
Replace half of the peanut butter with mashed ripe banana for a naturally sweet, tropical twist. Add chopped walnuts for extra crunch. The banana adds a subtle caramel flavor that pairs beautifully with the coffee.
Dark Chocolate Espresso
Swap the standard chocolate chips for dark chocolate chips (70% cacao) and add a splash of espresso instead of regular coffee. The result is a bittersweet, sophisticated cookie that feels like a dessert bar.
Maple‑Honey Fusion
Use maple syrup instead of honey for a different sweet profile. Pair it with a drizzle of pure maple on top after chilling for an extra glaze. The maple’s caramel notes complement the coffee’s boldness.
Coconut‑Infused Delight
Stir in shredded coconut with the Rice Krispies for a tropical aroma. Add a pinch of coconut oil to the base mixture to enhance the coconut flavor. The cookies will have a chewy, coconut‑rich center.
Spiced Cinnamon Surprise
Add a teaspoon of ground cinnamon and a pinch of nutmeg to the base mixture. The warm spices give the cookies an autumnal feel. Serve with a dollop of whipped cream for a decadent treat.
Storing and Bringing It Back to Life
Fridge Storage
Place the cookies in an airtight container or a zip‑lock bag. Store them in the refrigerator for up to one week. The cool temperature keeps the cookies firm and prevents the peanut butter from becoming too soft.
Freezer Friendly
For longer storage, wrap each cookie individually in parchment paper and place them in a freezer bag. Freeze for up to three months. When ready to eat, thaw at room temperature for 10 minutes before serving.
Best Reheating Method
If the cookies become soggy after storage, pop them in a 300°F oven for 2 minutes to revive their crunch. Alternatively, microwave them in 10‑second bursts until warm, then place them on a parchment sheet for a quick crisp‑up. Adding a tiny splash of water before reheating creates steam that restores the cookies’ original texture.