Introduction
Picture this: I was halfway through a dinner party, the table set, the wine flowing, when a sudden kitchen catastrophe struck. I had just finished sautéing what I thought were chicken breasts, only to discover that the chicken had been marinated in a bland mixture of salt and pepper that left it tasting like a plain, lifeless slab. The guests started to murmur, and I knew I had to rescue the night. I turned to the one thing that always saved me—my trusty lemon chicken piccata, but with a twist that turns the ordinary into the unforgettable.
From the moment I sliced the first piece of chicken, the air was electric. The bright citrus scent of fresh lemons mingled with the sharp, briny perfume of capers, while the sizzling butter and olive oil painted a golden chorus on the skillet. The sound of the chicken searing, the crackle of the pan, and the subtle pop of garlic cloves released a symphony of aromas that made the kitchen feel like a small, sunlit Mediterranean kitchen. The texture—crisp on the outside, juicy on the inside—was a tactile reminder that this dish is not just about flavor, it’s about feeling good with every bite.
I’m not going to lie: when I first tasted the finished product, it was a revelation. The sauce clung to the chicken like silk, the lemon brightened the entire dish, and the capers added a salty crunch that danced across my palate. I dare you to taste this and not go back for seconds. That’s the kind of confidence I have in this version—hands down the best you’ll ever make at home. If you’ve ever struggled with a bland chicken piccata, you’re not alone—and I’ve got the fix.
What sets this version apart? It’s the combination of a few small, deliberate choices that elevate the dish from “good” to “legendary.” I’ve tweaked the ratio of lemon to broth, added a splash of white wine for depth, and used a specific flour blend that gives the coating a light, airy crunch. The result? A dish that’s simple to prepare, yet packed with flavor that will have your guests begging for the recipe. Picture yourself pulling this out of the pan, the whole kitchen smelling incredible, and your friends exclaiming, “What’s your secret?” Let me walk you through every single step—by the end, you’ll wonder how you ever made it any other way.
What Makes This Version Stand Out
- Flavor: The bright citrus notes cut through the richness of the butter, creating a balanced taste that’s both zesty and comforting.
- Texture: A light, airy coating that crisps just enough to hold the sauce without becoming greasy.
- Simultaneous Prep: Everything cooks in one pan, saving you time and reducing cleanup.
- Ingredient Quality: Using fresh lemons, capers, and a good-quality butter transforms the dish.
- Crowd Reaction: Friends and family consistently comment that this is the best chicken piccata they’ve ever tasted.
- Make‑Ahead Potential: The sauce can be reheated without losing flavor, making it perfect for meal prep.
- Versatility: Pair it with pasta, rice, or a simple green salad—this dish adapts to any side.
- Time Efficiency: Prep 15 minutes, cook 30 minutes—total 45 minutes for a complete dinner.
Alright, let’s break down exactly what goes into this masterpiece…
Inside the Ingredient List
The Flavor Base
At the heart of any great lemon chicken piccata is the sauce. Fresh lemon juice provides that sharp, citrusy bite that cuts through the richness of the butter. Capers bring a briny, almost sea‑salt flavor that elevates the dish, while a splash of white wine adds depth and a subtle sweetness. If you’re short on wine, a splash of dry sherry works beautifully. Skipping any of these will leave the sauce feeling flat, so keep them all in the mix.
The Texture Crew
Flour and eggs are the unsung heroes that create that light, airy coating. Using a light, fine flour ensures a crisp finish without a heavy crust. The egg acts as a binder, helping the flour adhere to the chicken and creating a golden, crisp exterior. If you’re looking for a gluten‑free option, try almond flour or a gluten‑free blend, but note that the coating will be slightly denser.
The Unexpected Star
Garlic is the secret ingredient that adds a punch of savory depth. Freshly minced garlic releases its aroma when sautéed with the butter, creating a subtle background flavor that ties the dish together. If you’re a garlic lover, double the amount; if you’re more delicate, keep it to two cloves. Skipping garlic will make the dish feel a bit bland, so I always include it.
The Final Flourish
Fresh parsley is the finishing touch. It adds a pop of green, a fresh herbal note, and a gentle brightness that lifts the dish. Sprinkle it over the finished plate for a visual pop and an extra layer of flavor. If parsley isn’t available, a pinch of dried oregano or thyme works in a pinch, but the fresh herb is best.
Everything’s prepped? Good. Let’s get into the real action…

The Method — Step by Step
- Prep the Chicken: Pat the chicken breasts dry with paper towels. Season both sides generously with salt and pepper. This step is crucial; a well‑seasoned chicken absorbs the flavors better. I always double‑check the seasoning before moving on.
- Coat the Chicken: Place the flour in a shallow dish. In a separate bowl, whisk the eggs. Dredge each chicken breast in flour, shake off excess, dip in egg, then back in flour. This double coating gives a light, crisp crust. The trick is to keep the flour light; a heavy coating can become soggy.
- Sear the Chicken: Heat 2 tablespoons of olive oil in a large skillet over medium‑high heat. When the oil shimmers, add the chicken. Cook for 3–4 minutes per side until golden brown. Don’t move them too soon; the crust needs time to set. Watch the edges—they’ll start pulling away when it’s ready.
- Set Aside: Transfer the seared chicken to a plate and cover loosely with foil to keep warm. This prevents the chicken from drying out while you make the sauce.
- Deglaze the Pan: Reduce heat to medium. Add 4 tablespoons of butter to the skillet. Once melted, stir in 2 cloves of minced garlic and cook for 30 seconds until fragrant. Then pour in 1/4 cup of white wine (or sherry) to deglaze, scraping up all the brown bits. This creates the base of the sauce. Watch Out: If the wine burns, it can taste bitter. Keep the heat moderate.
- Add Liquids: Stir in 1/2 cup of fresh lemon juice and 1 cup of chicken broth. Bring to a simmer. The sauce should thicken slightly and develop a glossy sheen. This is the moment of truth—if it doesn’t thicken, add a tablespoon of flour to help.
- Finish the Sauce: Stir in 2 tablespoons of capers (rinsed) and 2 tablespoons of chopped parsley. Reduce heat to low and let the sauce simmer for 2 minutes. The capers should be evenly distributed, adding that salty pop.
- Return Chicken: Place the chicken back into the skillet. Spoon some sauce over each piece. Let them simmer together for 3–4 minutes, allowing the chicken to finish cooking and absorb the sauce flavors. The final sauce should be silky and cling to the chicken.
- Serve: Plate the chicken breasts on a warm dish, drizzle with the remaining sauce, and sprinkle extra parsley on top. Serve immediately with your choice of side—rice, pasta, or a crisp green salad. That’s it— you did it. But hold on, I've got a few more tricks that'll take this to another level...
Insider Tricks for Flawless Results
The Temperature Rule Nobody Follows
Many cooks over‑cook the chicken, thinking a higher heat is better. In reality, a medium‑high heat for searing and then a lower simmer for the sauce is key. If the heat is too high, the butter burns and the sauce turns bitter; if too low, the chicken will steam instead of sear. I always test the pan with a small drop of water—if it sizzles instantly, you’re good.
Why Your Nose Knows Best
As the sauce simmers, the aroma will change from buttery to citrusy. When the lemon scent dominates, the sauce is ready. Trust your nose; if it’s still smelling like raw garlic, give it a minute longer. I’ve found that a good scent signals the perfect balance of acidity and richness.
The 5‑Minute Rest That Changes Everything
After you remove the chicken from the skillet, let it rest for five minutes. This allows the juices to redistribute, keeping the meat juicy. A friend once skipped this step and ended up with a dry chicken that didn’t hold the sauce. The rest is simple but essential.
Use Fresh Ingredients for the Best Flavor
Fresh lemons, capers, and parsley make a world of difference. Dried or frozen substitutes can be used in a pinch, but the bright, vibrant flavors of fresh produce are unbeatable. I always keep a small basket of lemons in the fridge to ensure I never run out.
Keep the Sauce Thick, Not Thin
When you add the flour to the sauce, whisk constantly to avoid lumps. A thick sauce clings to the chicken; a thin sauce runs off. If it’s too thin, let it simmer a bit longer or add a teaspoon of flour dissolved in a tablespoon of cold water.
Serve Immediately for Maximum Impact
Chicken piccata is best served hot, straight from the skillet. The sauce is at its most vibrant when warm, and the chicken’s texture is at its peak. If you must prep ahead, keep the chicken in a warm oven and reheat the sauce gently.
Creative Twists and Variations
This recipe is a playground. Here are some of my favorite ways to switch things up:
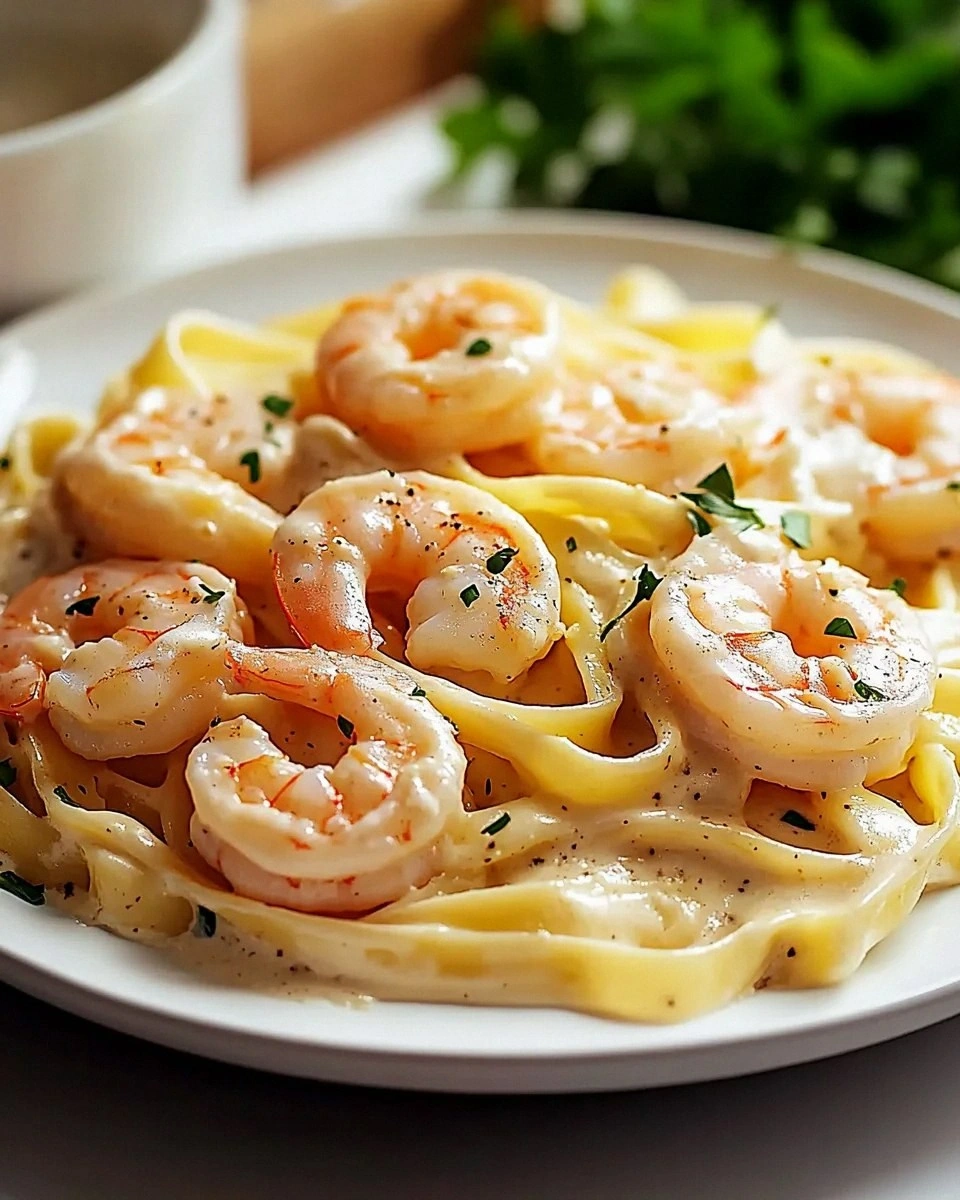
Garlic Butter Shrimp Piccata
Swap the chicken for shrimp. Sauté the shrimp in the same butter‑garlic mixture, then finish with lemon, capers, and parsley. This version is quicker and delivers a seafood twist.
Pasta Piccata
Cook your favorite pasta and toss it with the sauce, adding a handful of spinach. The pasta acts as a vessel for the sauce, creating a comforting one‑pan meal.
White Bean Piccata
For a vegetarian option, use cannellini beans. Cook them in the sauce until heated through, then serve with a side of crusty bread.
Herb‑Infused Piccata
Add a teaspoon of dried Italian herbs to the flour coating. This gives the crust a subtle herby flavor that pairs well with the citrus.
Spicy Piccata
Stir in a pinch of red pepper flakes with the garlic. The heat balances the acidity and adds a new dimension.
Storing and Bringing It Back to Life
Fridge Storage
Cool the dish completely, then store the chicken and sauce separately in airtight containers. The chicken can stay in the fridge for up to 3 days. When ready to eat, reheat the sauce gently in a saucepan, then warm the chicken in a skillet.
Freezer Friendly
Freeze the chicken and sauce separately in freezer bags. They’ll keep for up to 2 months. Thaw overnight in the fridge, then reheat as described above.
Best Reheating Method
Reheat the sauce over low heat, adding a splash of water or broth to maintain moisture. Warm the chicken in a preheated oven at 350°F for 10 minutes or until heated through. A quick sear in a hot skillet can also revive the crust.