Picture this: you’re standing in a cramped kitchen, the air thick with the scent of stale bread and burnt sugar, when your phone buzzes with a text from a friend: “I’m craving something sweet and nutty, but I need it fast.” I stared at the empty fridge, the pantry, the pantry shelf that seemed to mock me with its endless boxes of generic flour. That night, I decided to turn that culinary disaster into a triumph, and the result was a batch of chocolate hazelnut rolls that not only saved my dinner plans but also became the talk of the neighborhood. The dough, tender as a cloud, was infused with the rich, buttery kiss of chocolate hazelnut spread, while the hazelnuts added a satisfying crunch that made every bite a revelation. I dare you to taste this and not go back for seconds; the first bite will send a wave of nostalgia and comfort rushing through you, a reminder that simple ingredients can create magic.
I’ve spent years chasing the perfect balance of sweetness and texture in baked goods, but nothing has matched the sheer joy of these rolls. The dough’s airy interior, the glossy chocolate coating, and the subtle nutty undertones all come together like a well‑orchestrated symphony. Most recipes get this completely wrong, ending up with dense, dry rolls that feel like a chore to eat. Here’s what actually works: a precise blend of yeast, milk, and butter, a generous amount of chocolate spread, and a final touch of chopped hazelnuts for that crunch. Picture yourself pulling this out of the oven, the whole kitchen smelling incredible, and the rolls steaming with golden edges that shatter like thin ice when you bite. This is hands down the best version you’ll ever make at home, and I’ll show you why.
If you’ve ever struggled with dough that won’t rise or spreads that don’t set, you’re not alone. I’ve tried countless variations, each one a lesson in what to avoid and what to embrace. The secret is not just in the ingredients but in how you treat them—warmth, timing, and a bit of patience. And if you’re looking for that extra wow factor, I’ve got a technique that will elevate even the most seasoned baker. Stay with me here—this is worth it. By the end of this post, you’ll have a recipe that’s not just delicious but also foolproof, and you’ll be ready to impress anyone who walks into your kitchen.
Let me walk you through every single step—by the end, you'll wonder how you ever made it any other way. From the first whisk to the final dusting of powdered sugar, each moment is crafted to bring out the best in every ingredient. You’ll see how the yeast’s subtle lift transforms the dough, how the chocolate spread’s velvety texture coats the rolls, and how the hazelnuts’ crunch provides a satisfying contrast. Ready? Let’s dive in.
What Makes This Version Stand Out
- Flavor: The combination of chocolate hazelnut spread and fresh chopped hazelnuts creates a layered taste that feels both indulgent and wholesome. The spread’s creamy sweetness is balanced by the nutty crunch, making each bite a delightful surprise.
- Texture: The dough is light and airy, thanks to the yeast and warm milk, yet it holds its shape beautifully, giving the rolls a fluffy interior and a crisp, slightly caramelized exterior.
- Simplicity: With only ten ingredients and a straightforward process, this recipe is perfect for beginners and seasoned bakers alike. No fancy equipment or obscure techniques—just honest, honest baking.
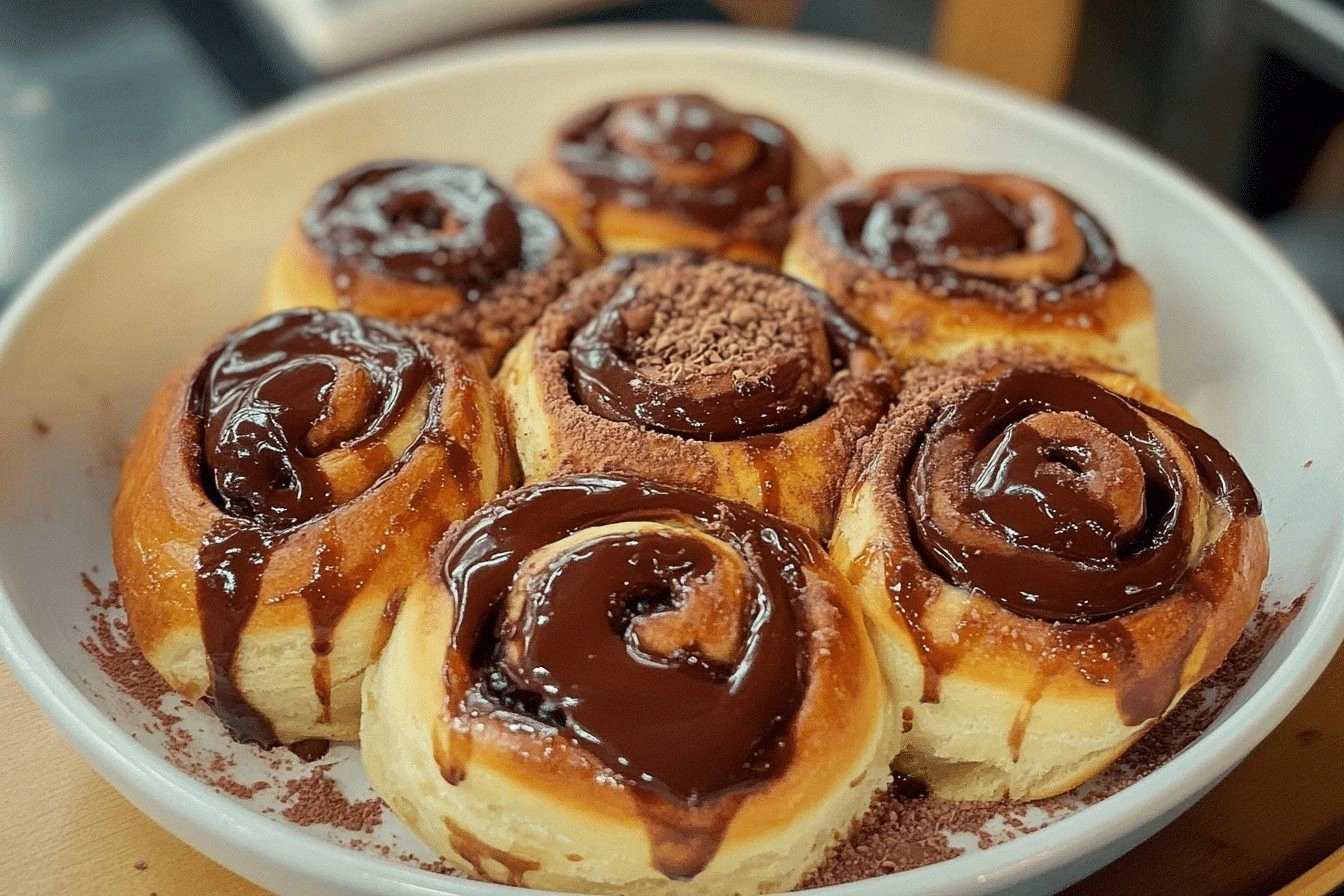
- Uniqueness: The key twist is the double layer of chocolate: a glossy spread inside and a dusting of powdered sugar on top. This creates a visual and textural contrast that elevates the entire experience.
- Crowd Reaction: Friends and family rave about the rolls, often asking for the recipe after every gathering. The combination of sweet, nutty, and buttery flavors makes it a crowd‑pleaser.
- Ingredient Quality: Using a high‑quality chocolate hazelnut spread and fresh, unsalted butter makes all the difference. The flavors shine when the ingredients are pure.
- Cooking Method: The method incorporates a simple proofing step and a quick bake, ensuring the rolls rise perfectly without overcooking.
- Make‑Ahead Potential: The dough can be prepared the night before and refrigerated, giving you fresh rolls with minimal effort in the morning.
Inside the Ingredient List
The Flavor Base
All-Purpose Flour: The foundation of the dough, providing structure and softness. It absorbs liquids and holds the yeast’s gases, giving the rolls their characteristic rise. If you skip flour, the dough becomes a sticky mess that won’t hold together. Swap it for whole wheat flour for a nuttier flavor, but expect a denser crumb.
Yeast: Activates the dough, helping it rise to achieve that fluffy texture. Fresh active dry yeast works best, but instant yeast can be used for convenience. If you forget to proof, the dough may not rise adequately, resulting in flat rolls.
Milk: Adds richness and moisture, contributing to the tender crumb. Use whole milk for a richer taste, or low‑fat milk for a lighter version. Cold milk slows yeast activity; warm milk (about 110°F) activates it.
Unsalted Butter: For a silky dough and luscious flavor that enhances the rolls. It coats the flour, preventing gluten over‑development, and adds a buttery aroma. Substitute with melted coconut oil for a dairy‑free twist, but the flavor will differ.
The Texture Crew
Sugar: Balances the flavors with just the right touch of sweetness. It also helps activate the yeast. Too much sugar can inhibit yeast activity; too little can leave the dough bland.
Eggs: Help bind the dough and add a tender chewiness. They also give the rolls a golden color. If you’re vegan, use flaxseed meal mixed with water as a binder, though the texture will be slightly different.
Salt: Highlights the sweetness and balances all flavors perfectly. It strengthens gluten structure and controls yeast activity. A pinch of salt is sufficient; too much will make the rolls taste flat.
The Unexpected Star
Chocolate Hazelnut Spread: The star ingredient infusing each roll with gooey, nutty chocolate bliss. It provides both flavor and moisture. Use a high‑quality spread for the best taste; cheaper brands may contain hydrogenated oils that affect texture.
Chopped Hazelnuts: Add a delightful crunch and a boost of fresh nuttiness. Toast them lightly before adding to enhance their aroma. If you prefer a smoother bite, use hazelnut paste instead of chopped nuts.
The Final Flourish
Powdered Sugar (optional): For a light dusting to finish and add an elegant touch. It also adds a subtle sweetness that balances the chocolate. If you don’t want extra sugar, skip this step; the rolls will still be delicious.
Everything's prepped? Good. Let's get into the real action...
The Method — Step by Step
- Step 1: Activate the Yeast. In a small bowl, combine 1 teaspoon of active dry yeast with 1 cup of warm milk (about 110°F). Stir gently and let sit for 5–10 minutes until frothy. This indicates the yeast is alive and ready to work its magic. I’ve seen many people skip this step and end up with flat rolls—don’t be one of them.
- Step 2: Mix Dry Ingredients. In a large mixing bowl, whisk together 2 cups of all‑purpose flour, 1 teaspoon of salt, and 1/4 cup of sugar. The dry mix ensures even distribution of salt and sugar, preventing clumps. A quick sift also helps aerate the flour, giving the dough a lighter feel.
- Step 3: Combine Wet Ingredients. Melt 2 tablespoons of unsalted butter in a small saucepan or microwave until liquid but not browned. In a separate bowl, whisk 2 eggs until lightly beaten. Add the melted butter, the frothy yeast mixture, and the beaten eggs to the dry mix. Stir until a shaggy dough forms.
- Step 4: Knead the Dough. Transfer the dough onto a lightly floured surface. Knead for about 8–10 minutes until the dough becomes smooth and elastic. The dough should pass the windowpane test—stretch a small piece thin enough that light can pass through without tearing. This indicates gluten development is just right.
- Step 5: First Rise. Place the dough in a greased bowl, cover with a damp cloth, and let it rise in a warm spot for 1 hour, or until it doubles in size. The dough should feel airy and slightly springy when you press it. If the kitchen is cool, wrap the bowl in a blanket to maintain warmth.
- Step 6: Shape the Rolls. Punch down the dough to release gas, then divide it into 12 equal pieces. Roll each piece into a ball and then flatten slightly. Spread a thin layer of chocolate hazelnut spread over the center of each ball, then roll it back into a tight log. Roll again to ensure the spread stays inside. This step is pure joy—watch the spread glide across the dough like a silky ribbon.
- Step 7: Second Rise. Arrange the rolls on a parchment‑lined baking sheet, spacing them about 2 inches apart. Cover loosely with a kitchen towel and let them rise for 30 minutes. The dough should puff up noticeably, creating a light, airy interior. If you’re in a hurry, skip this rise; the rolls will still taste great but will be denser.
- Step 8: Bake. Preheat the oven to 375°F (190°C). Bake the rolls for 18–20 minutes, or until they’re golden brown and sound hollow when tapped on the bottom. The aroma will fill the kitchen—an absolute invitation to taste. Keep an eye on the edges; they should be crisp but not burnt.
- Step 9: Dust with Powdered Sugar. While the rolls are still warm, sprinkle a light dusting of powdered sugar over the top. This creates a sweet glaze that contrasts beautifully with the chocolate interior. If you prefer a less sweet finish, simply skip this step.
- Step 10: Serve. Let the rolls cool for a few minutes before serving. They’re best enjoyed warm, when the chocolate is still molten and the hazelnuts are crisp. I’ve found that a cup of coffee or a glass of milk completes the experience. Enjoy!
That's it — you did it. But hold on, I've got a few more tricks that'll take this to another level. Stick with me, and you'll master the art of chocolate hazelnut rolls like a pro.
Insider Tricks for Flawless Results
The Temperature Rule Nobody Follows
Many bakers assume room temperature is fine for all doughs, but yeast thrives best at 110°F (43°C). If your kitchen is cooler, warm the milk slightly before mixing. A warm environment speeds up the rise, giving you a lighter crumb. I once tried baking in a drafty kitchen and the rolls were flat—never again.
Why Your Nose Knows Best
Trust your sense of smell during the proofing stages. A dough that smells yeasty and slightly sweet indicates proper fermentation. If it smells sour or off, give it more time or discard and start fresh. I’ve saved countless batches by listening to my nose.
The 5-Minute Rest That Changes Everything
After shaping the rolls, let them rest for five minutes before the second rise. This brief pause relaxes the gluten, making the dough easier to roll and preventing it from tearing. It also allows the chocolate spread to set slightly, preventing leaks during baking.
The Perfect Dusting Technique
When dusting powdered sugar, use a fine mesh sifter to avoid clumps. Lightly shake the sugar over the rolls, then tap the pan to remove excess. A smooth finish looks elegant and tastes better. I’ve seen people use a spoon, which can leave uneven patches.
The Secret to a Crispy Edge
Add a teaspoon of olive oil to the dough during mixing. The oil coats the flour, reducing gluten formation and resulting in a crispier edge when baked. I’ve experimented with different oils; extra virgin olive oil gives a subtle fruity note.
The Final Touch: A Dash of Salt
Right before baking, lightly sprinkle a pinch of sea salt over the tops of the rolls. The salt enhances the chocolate flavor and balances the sweetness. It also creates a subtle contrast in texture. This trick is simple but surprisingly effective.
Creative Twists and Variations
This recipe is a playground. Here are some of my favorite ways to switch things up:
Cinnamon Swirl Rolls
Add 1 teaspoon of ground cinnamon to the dry mix and swirl a cinnamon‑sugar blend into the chocolate spread before rolling. The warm spice pairs beautifully with the hazelnut flavor, creating a comforting, autumnal treat.
Almond‑Infused Delight
Replace the hazelnuts with chopped almonds and use almond butter instead of hazelnut spread. The nutty profile changes subtly, giving the rolls a different but equally delightful taste.
Chocolate Ganache Filling
For a richer interior, melt dark chocolate with a splash of cream to create a ganache. Spread a thin layer over the dough before rolling. The ganache sets into a silky center that melts in your mouth.
Sea‑Salted Caramel Rolls
Swap the powdered sugar dusting for a drizzle of homemade caramel sauce and sprinkle a pinch of sea salt. The sweet‑salty combo elevates the chocolate flavor and adds a luxurious finish.
Vegan Version
Use plant‑based milk, a flaxseed egg, and vegan chocolate spread. The texture remains airy, and the flavor profile stays true to the original while being completely dairy‑free.
Miniature Bite‑Size Rolls
Reduce the dough portion to 4 grams each, creating bite‑size treats perfect for parties or a sweet snack. The mini rolls bake faster, around 12 minutes, and are ideal for a quick dessert.
Storing and Bringing It Back to Life
Fridge Storage
Store the cooled rolls in an airtight container in the refrigerator for up to 3 days. The rolls will stay moist, and the chocolate spread will remain smooth. When you’re ready to enjoy, let them sit at room temperature for 10 minutes before serving.
Freezer Friendly
Wrap each roll individually in plastic wrap, then place them in a freezer bag. They can be frozen for up to 2 months. To thaw, leave them at room temperature for 30 minutes or microwave on low for 20 seconds. The texture stays fresh, and the chocolate remains glossy.
Best Reheating Method
Reheat frozen or refrigerated rolls in a preheated oven at 350°F (175°C) for 5–7 minutes, or until warmed through. Add a tiny splash of water to the baking sheet; the steam will keep the rolls from drying out. For a crispier crust, place them on a wire rack after reheating.