I remember the night the kitchen exploded in a splash of chocolatey chaos. A half‑filled pot of hot cocoa had turned into a molten mess, and I was left staring at the blackened stove with a guilty grin. That disaster turned into a dare from my friend: “Make a hot cocoa that looks like it’s from a haunted house.” I took the challenge, grabbed my trusty mini marshmallows, and the rest is a story of culinary ghosts and sweet victory.
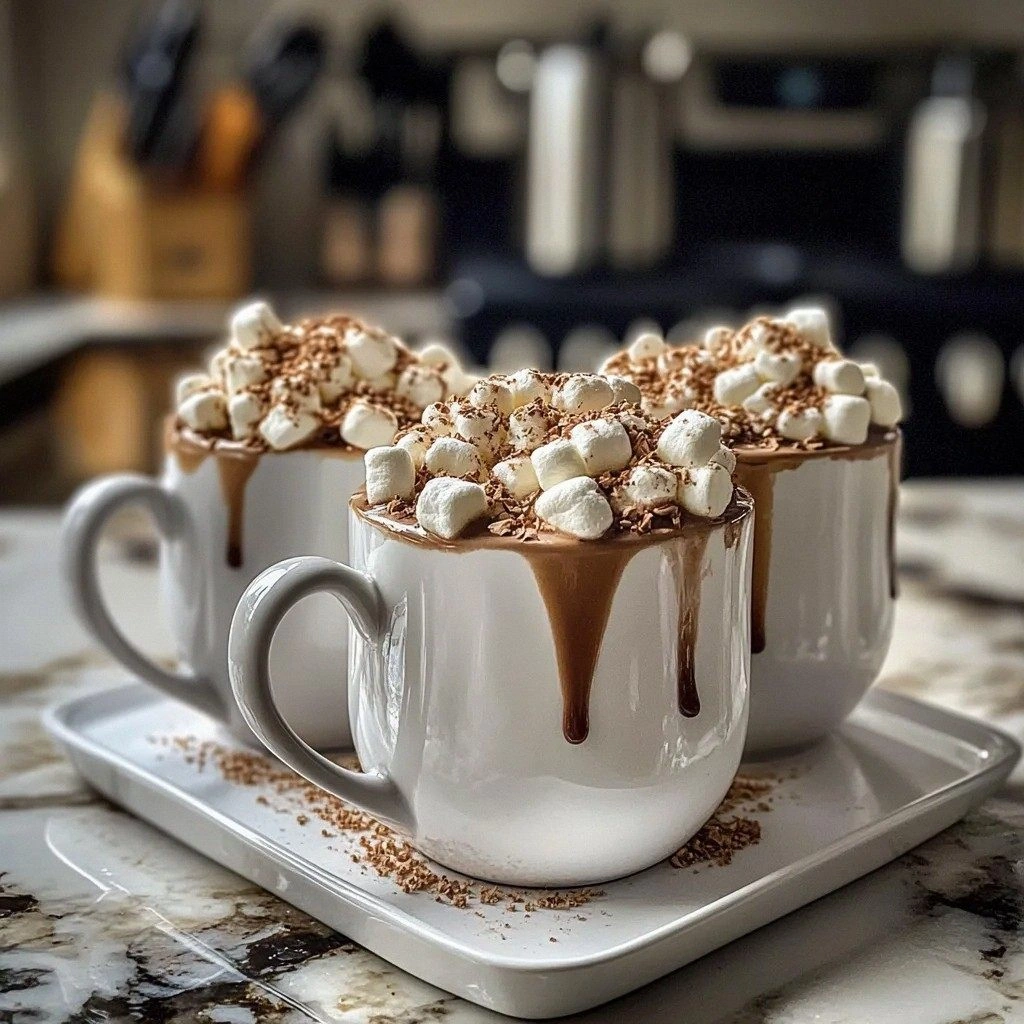
Picture this: a steaming mug, the air thick with vanilla and cocoa, the faint crackle of melting chocolate. The marshmallows rise like translucent snowflakes, each one a tiny vessel ready to hold a spooky face. I could almost hear the whisper of the kitchen fan, the hiss of the chocolate as it begins to bubble, and the gentle clink of the spoon against the mug. The scent is a rich, velvety blend that pulls you closer, and the sight of the dark, glossy coating on the marshmallows makes you want to taste the eeriness.
What makes this version stand out is the way the flavors dance together. The mini marshmallows aren’t just fluffy fluff; they’re a sweet, airy canvas that absorbs the chocolate’s depth. The white chocolate chips melt into a silky coating that gives the ghosts a ghostly glow, while the black food coloring turns the faces from ordinary to ominous. The edible eyes add a pop of color and a touch of whimsy that turns every sip into a playful ritual. If you’ve ever made a plain hot cocoa, you’ll find this one a step beyond, a confection that feels like a secret spell in a mug.
I dare you to taste this and not go back for seconds. The first sip is a warm, chocolatey hug that’s followed by a subtle crunch from the marshmallow. The second sip is a revelation— the creamy white chocolate coating melts into a velvety glaze that coats your tongue. The third sip is a reminder of how simple ingredients can become extraordinary when mixed with a little imagination. By the time you finish, you’ll be craving the next batch, and the kitchen will smell like a haunted library of cocoa.
If you’ve ever struggled with making hot cocoa that feels special, you’re not alone—and I’ve got the fix. The key lies in the layering: first the chocolate base, then the marshmallow ghosts, and finally the edible eyes. This is hands down the best version you’ll ever make at home. Picture yourself pulling this out of the oven, the whole kitchen smelling incredible, and friends gathering around to watch the ghosts come to life. The moment you pour the last drop, the mug becomes a portal to a sweet, spooky adventure.
Let me walk you through every single step—by the end, you'll wonder how you ever made it any other way. The journey from raw ingredients to a steaming mug of haunted cocoa is filled with tiny tricks and big surprises. I’ll share my favorite hacks, the best way to avoid common pitfalls, and how to keep the ghosts fresh for days. Ready to turn your kitchen into a cauldron of flavor? Let’s dive in.
What Makes This Version Stand Out
- Taste: The combination of semi‑sweet chocolate chips and creamy white chocolate creates a layered flavor that’s both rich and light. The black food coloring adds a subtle bitterness that balances the sweetness, giving the drink a depth that’s often missing in standard recipes. The result is a cocoa that satisfies both sweet cravings and chocolate aficionados.
- Texture: The mini marshmallows provide a soft, airy bite that melts in your mouth, while the white chocolate coating adds a silky sheen. The contrast between the fluffy marshmallow and the glossy coating feels like a dance of textures on your palate. It’s a sensory experience that elevates the simple act of sipping hot cocoa.
- Simplicity: All you need are pantry staples and a few creative twists. No complex techniques, just melt, mix, and garnish. This recipe is perfect for beginners who want a wow factor without a steep learning curve.
- Uniqueness: The spooky ghost faces are a visual treat that turns a regular drink into a conversation starter. The edible eyes and black food coloring give it a theatrical flair that’s ideal for themed parties or cozy movie nights.
- Crowd Reaction: Guests instantly notice the playful presentation and are drawn to the idea of creating their own ghosts. The interactive element makes the drink a shared experience, perfect for family gatherings or friends’ get‑togethers.
- Ingredient Quality: Using high‑quality chocolate chips ensures a smooth melt and a deep chocolate flavor. The mini marshmallows should be fresh for maximum fluffiness, and the white chocolate chips add a creamy contrast that’s essential for the ghostly coating.
Inside the Ingredient List
The Flavor Base
Mini marshmallows are the core of this recipe, providing a sweet, airy canvas that absorbs the chocolate’s depth. They’re also the reason the drink feels light, despite the rich chocolate. If you skip them, the cocoa becomes dense and lacks the playful texture that makes it memorable. Choosing a fresh batch ensures maximum fluffiness and a pleasant mouthfeel.
The Texture Crew
Chocolate chips bring a robust cocoa flavor that coats the mug and the marshmallows. White chocolate chips melt into a silky coating, giving the ghosts a translucent glow. Together, they create a layered texture that feels both decadent and comforting. Swapping chocolate chips for dark chocolate gives a deeper, bittersweet note that some adventurous palates love.
The Unexpected Star
Black food coloring is the secret weapon that turns ordinary faces into spooky spectacles. A few drops are enough to darken the coating without overpowering the chocolate’s sweetness. If you’re hesitant, start with a pinch and build up until you achieve the desired hue. This small addition transforms the drink into a themed masterpiece.
The Final Flourish
Edible eyes add personality and a touch of whimsy that completes the ghostly look. They’re not just decorative; they enhance the visual storytelling of the drink. If you can’t find edible eyes, a tiny dot of dark chocolate or a small candy can substitute. The eyes make the drink interactive, encouraging guests to customize their own ghost faces.
Everything's prepped? Good. Let's get into the real action...
The Method — Step by Step
- Begin by heating 2 cups of milk in a medium saucepan over medium heat until it’s steaming but not boiling. Keep a close eye on it; you want it hot enough to melt the chocolate but not so hot that it boils over. Stir occasionally to prevent scorching on the bottom. The milk should emit a warm, comforting aroma that signals it’s ready. When you see tiny bubbles forming along the edges, you’re in the sweet spot.
- Add 1 cup of chocolate chips to the hot milk, stirring until they’re completely melted. The chocolate should form a glossy, smooth base that coats the saucepan. If it starts to thicken, lower the heat slightly; you want it pourable. The chocolate will settle into a rich, velvety layer that will coat the marshmallows. This is the moment where the flavors begin to mingle.
- Pour 1 cup of white chocolate chips into the pot and stir until they melt into a silky coating. The white chocolate adds a creamy contrast that balances the dark chocolate’s intensity. Keep the mixture at a gentle simmer to avoid burning the white chocolate. As it melts, it should develop a pale, almost translucent sheen. This coating will be the base for our ghost faces.
- Remove the pot from heat and let it sit for 30 seconds to cool slightly; this prevents the marshmallows from melting too quickly. The temperature should be warm but not hot enough to liquefy the marshmallows. This pause is essential for achieving that perfect bite. You’ll notice the chocolate base has thickened just enough to coat the marshmallows without dripping. It’s a delicate balance.
- Add 2 cups of mini marshmallows to the pot and stir gently until they’re evenly coated with the chocolate mixture. The marshmallows should float like tiny ghosts, each one coated in a glossy, slightly darkened film. As they stir, they’ll release a faint sweet scent that mingles with the chocolate aroma. The mixture should look like a sea of floating, edible ghosts. Keep stirring until every marshmallow is coated.
- Drop a few drops of black food coloring onto the surface, swirling it with a spoon to distribute the color evenly. The black dye should darken the coating, giving the marshmallows a subtle, eerie hue. Watch how the color spreads like ink in water, creating a dramatic contrast. This step is crucial for the spooky aesthetic. Be careful not to over‑dye; a light touch goes a long way.
- Let the mixture sit for 2 minutes so the color can set into the chocolate coating. During this time, the marshmallows will settle into a perfect, glossy finish. The chocolate should be thick enough to hold the shape of each marshmallow. The color will deepen slightly, giving the ghosts a realistic shadow. This pause ensures the coating is firm enough to hold the edible eyes.
- Place 8 edible eyes on top of the marshmallow ghosts, positioning them to create spooky faces. The eyes should be spaced evenly to give each ghost a distinct expression. This is the fun part where you get creative. You can adjust the spacing for a more dramatic look. The eyes add a pop of color that completes the aesthetic.
- Serve the hot cocoa in mugs, spooning the marshmallow ghosts into each cup. The drink should look like a haunted cup of chocolate, with floating ghosts ready to be devoured. The aroma will fill the room, making the experience even more immersive. Pour slowly to maintain the ghostly arrangement. This final presentation is the highlight of the recipe.
- Enjoy immediately while the marshmallows remain fluffy and the chocolate coating stays glossy. The combination of warm cocoa, airy marshmallows, and a spooky visual will leave you craving another batch. Sip slowly to savor the layers of flavor. The ghosts will melt into a silky texture that feels like a sweet, haunted dream.
- If you have leftovers, store them in an airtight container in the fridge for up to 3 days. Reheat gently on low heat, stirring until the chocolate melts again. The marshmallows will retain their fluffiness and the ghosts will remain intact. Add a splash of milk if the mixture seems thick. Serve hot for the best experience.
That's it — you did it. But hold on, I've got a few more tricks that'll take this to another level...
Insider Tricks for Flawless Results
The Temperature Rule Nobody Follows
The secret to a silky chocolate coating is maintaining a gentle heat. If the pot gets too hot, the chocolate will seize and become grainy. Keep the heat on medium and stir constantly, using a heat‑resistant spatula. A quick test: touch the bottom of the pot; if it feels hot but not scorching, you’re good. This simple rule ensures a smooth finish every time.
Why Your Nose Knows Best
Smell is your best indicator of readiness. When the chocolate starts to emit a rich, nutty aroma, it’s close to perfect. If it smells overly sweet, give it a minute to cool. The scent of chocolate is a reliable cue that the mixture is at the right consistency. Trust your nose and you’ll avoid over‑cooking.
The 5-Minute Rest That Changes Everything
Letting the mixture rest after adding the color allows the dye to set into the chocolate coating. This pause prevents the color from bleeding into the marshmallows. The result is a sharp, defined look that looks like a masterpiece. A quick 5‑minute rest is all you need to elevate the visual appeal.
Stir With a Spoon, Not a Whisk
Whisking can introduce air, causing the chocolate to froth and potentially separate. A spoon gently folds the ingredients together, preserving the smooth texture. This technique keeps the coating glossy and the marshmallows fluffy. Use a wooden or silicone spoon for best results.
Use Fresh Marshmallows for Maximum Fluff
Old marshmallows can become dense and lose their airy quality. Fresh marshmallows absorb chocolate better and maintain their shape. If you’re using store‑bought marshmallows, check the expiration date. Fresh marshmallows will give your ghosts a light, cloud‑like feel.
Add a Pinch of Sea Salt for Depth
A tiny pinch of sea salt enhances the chocolate’s sweetness without making it salty. Salt balances flavors and brings out the richness of the cocoa. Sprinkle just a dash before the final stir. The salt will make your ghosts taste even more indulgent.
Don’t Skip the Color Pause
Some people rush the coloring step, thinking it’s quick. Skipping the pause can cause the color to bleed, ruining the ghostly aesthetic. Take a moment to let the dye set; the result is a crisp, defined look that will impress your guests. This small pause pays off in visual impact.
Use a Silicone Spatula for Gentle Mixing
Silicone spatulas are heat‑resistant and flexible, making them perfect for stirring chocolate. They won’t scratch the pan or melt the chocolate unevenly. A silicone spatula also allows you to reach the bottom of the pot, ensuring every marshmallow is coated. This tool is a must‑have for chocolate lovers.
Creative Twists and Variations
This recipe is a playground. Here are some of my favorite ways to switch things up:
Maple‑Infused Ghosts
Swap half of the milk for maple syrup for a subtle sweet note that pairs with the chocolate. The maple adds a caramel depth that enhances the ghostly flavor. It’s especially good for fall gatherings. The result is a warm, comforting drink that feels like a cozy hug.
Peppermint Specters
Add a splash of peppermint extract after the chocolate has melted. The minty aroma will give the ghosts a refreshing twist. It’s a great choice for winter holidays or a festive party. The peppermint pairs wonderfully with the chocolate base.
Coconut‑Coated Ghosts
After the marshmallows are coated, roll them in shredded coconut for a tropical flair. The coconut adds a crunchy texture that contrasts the smooth chocolate. It’s perfect for a beach‑themed gathering or a summer bonfire. The coconut gives the ghosts a beachy vibe.
Spiced Chili Ghosts
Stir in a pinch of cayenne pepper before adding the marshmallows for a spicy kick. The heat will awaken the chocolate’s flavors and create a bold contrast. Ideal for adventurous palates. The chili adds a fiery edge that surprises the senses.
Coffee‑Infused Spectral Cups
Replace half of the milk with strong brewed coffee for a mocha twist. The coffee deepens the chocolate flavor and adds a subtle bitterness. It’s a sophisticated take for coffee lovers. The result is a rich, caffeinated ghostly brew.
Nutty Specters
Fold in chopped hazelnuts or almonds after the chocolate has melted. The nuts add crunch and a nutty aroma that complements the chocolate. Great for a crunchy texture lover. The nuts make each sip a multi‑sensory experience.
Storing and Bringing It Back to Life
Fridge Storage
Store the leftover ghosts in an airtight container for up to three days. Keep them in a cool place to preserve the marshmallow fluff. When you’re ready to enjoy them again, reheat gently on low heat. Stir until the chocolate melts and the coating becomes glossy. Serve immediately for the best texture.
Freezer Friendly
For longer storage, freeze the ghosts in a single layer on a parchment‑lined tray. Once frozen, transfer them to a freezer bag for up to two weeks. Thaw in the fridge overnight, then reheat as described. The flavor stays intact, and the marshmallows retain their airy quality. This method is ideal for meal prepping.
Best Reheating Method
Reheat the ghosts in a microwave on low power for 30‑second intervals, stirring between each burst. Add a splash of milk to keep the chocolate from thickening. The result is a silky, creamy coating that feels like fresh ghosts. Avoid high heat, or the marshmallows will collapse. Reheat just until the chocolate is molten again.