I still remember the night I tried to rescue a batch of overripe bananas for a quick snack, only to end up with a kitchen that smelled like burnt toast and a loaf that looked more like a rubbery slab than a golden loaf. The moment the batter hit the pan, a wave of sweet banana aroma hit me, and I thought, “Maybe this can be turned into something edible.” I was wrong, because that first attempt was a disaster: the loaf was dense, the edges were rubbery, and the inside was a sad, mushy mess that made me question my culinary sanity. The lesson? Even the simplest ingredients can be ruined without the right technique, and that’s exactly why I’m sharing this version of Eggless Banana Bread—because I’ve cracked the code to turning banana mush into a masterpiece.
Picture this: you’re standing in a sun‑lit kitchen, the air is thick with the scent of ripe bananas and warm vanilla, and the sound of a gentle kitchen timer ticking. The batter is a glossy, amber‑gold mixture, and you can almost taste the subtle sweetness of honey dancing on your tongue. When you slide the pan into the oven, the first few minutes are a quiet anticipation; the air thickens with the promise of toasty, caramelized edges. A few minutes later, the aroma erupts—an irresistible blend of banana, nutmeg, and a hint of chocolate that makes your mouth water. You can feel the heat radiating from the pan, the gentle vibration of the oven door, and the faint crackle as the loaf begins to rise. The texture is a revelation: a tender crumb that yields to the touch, with a crisp, almost buttery crust that crackles when you press it.
What sets this recipe apart isn’t just the flavor; it’s the confidence with which it turns an ordinary loaf into a show‑stopper. I’ve stripped away the fluff, added a secret ingredient that locks in moisture, and tweaked the baking ratio so that the loaf rises like a balloon but never collapses. I dare you to taste this and not go back for seconds—once you bite into that first slice, you’ll know the difference between “good” and “unforgettable.” It’s hands down the best version you’ll ever make at home, and it’s going to become your go‑to for breakfast, snack, or dessert. The result is a loaf that’s moist on the inside, perfectly caramelized on the outside, and so easy to make that even the most skeptical home cook will feel like a master baker.
If you’ve ever struggled with banana bread that turns out too dry or too dense, you’re not alone. The secret lies in balancing the natural sugars of the bananas with the right amount of leavening and binding, and in using a fat that keeps the crumb tender. The technique I’ll share includes a little trick with the bananas that maximizes their flavor, a unique method for mixing the dry ingredients that eliminates lumps, and a baking strategy that ensures a golden crust without burning. And now, ready for the game‑changer? Let me walk you through every single step—by the end, you’ll wonder how you ever made it any other way.
What Makes This Version Stand Out
- Moisture: The combination of mashed bananas and coconut oil creates a tender crumb that stays fresh for days. This moisture lock prevents the loaf from drying out, even when stored in an airtight container.
- Flavor Depth: A splash of vanilla extract and a pinch of cinnamon elevate the natural sweetness of the bananas, giving the bread a warm, comforting profile that feels like a hug.
- Texture: The careful ratio of baking powder to baking soda ensures a light rise without a harsh chemical aftertaste. The result is a loaf that feels airy yet dense enough to hold a slice of butter.
- No Eggs, No Guilt: This eggless version still delivers the same satisfying structure thanks to the combination of banana, oil, and a small amount of oat milk. You get all the benefits without any animal products.
- Versatility: The recipe can be customized with nuts, chocolate chips, or dried fruit, making it a perfect canvas for any flavor you’re craving.
- Quick Prep: With a prep time of just 15 minutes, you can have a fresh loaf ready in 45 minutes—ideal for a last‑minute breakfast or a spontaneous dessert.
- Make‑Ahead Friendly: The loaf keeps well for up to a week when stored properly, so you can bake a batch on Sunday and enjoy it throughout the week.
- All‑Day Appeal: Whether you’re a morning person or a night owl, this bread satisfies sweet cravings without feeling like a heavy dessert.
Inside the Ingredient List
The Flour Power
All‑purpose flour is the backbone of this loaf, providing structure and a neutral canvas for the banana flavor to shine. It’s essential to sift the flour with the leavening agents to ensure an even distribution that prevents lumps. If you prefer a gluten‑free version, replace the flour with a 1:1 blend of gluten‑free all‑purpose mix and a tablespoon of xanthan gum.
The Banana Brilliance
Ripe bananas are the star of the show; the riper they are, the sweeter and more flavorful the loaf. Mash them until they’re almost a puree—this ensures an even distribution of moisture. If you have bananas that are a bit overripe, let them sit at room temperature for a few hours before mashing to allow the sugars to develop fully.
The Fat Factor
Coconut oil brings a subtle tropical note and keeps the crumb tender. It melts at body temperature, giving the loaf a soft mouthfeel. For a richer flavor, swap 1/4 cup of coconut oil with melted butter or a neutral oil like canola. If you’re sensitive to coconut, use a light olive oil for a Mediterranean twist.
The Sweetener Switch
Brown sugar adds depth and caramel undertones, while honey or maple syrup contributes natural sweetness and moisture. The combination of both gives a balanced sweetness profile that doesn’t overpower the banana. If you prefer a lower‑calorie version, substitute honey with a sugar‑free syrup, but keep the quantity the same to maintain moisture.
The Leavening Logic
Baking powder and baking soda work together to create a gentle lift and a light crumb. The baking soda reacts with the banana’s natural acidity, while the baking powder provides a secondary lift that ensures even rise. If you’re using a different type of flour, adjust the leavening slightly: add an extra 1/4 tsp of baking powder for denser flours.
The Flavor Enhancers
Vanilla extract brings warmth and depth, while a pinch of cinnamon adds a subtle spice that complements the banana. A dash of nutmeg or allspice can elevate the flavor profile further, especially if you’re looking for a holiday twist. Keep the spices to a minimum; they’re meant to enhance, not overpower.
Everything's prepped? Good. Let’s get into the real action—where the magic happens.
The Method — Step by Step
This is the moment of truth: you’re about to combine all those wonderful flavors into one glorious loaf. Follow these steps closely, and you’ll get a loaf that’s moist, flavorful, and absolutely irresistible.
- Preheat the Oven: Set your oven to 350°F (175°C) and allow it to heat fully before you start. While the oven warms, line a 9x5 inch loaf pan with parchment paper or grease it lightly with coconut oil. The parchment makes cleanup a breeze, and the oil ensures the loaf slides out effortlessly. If you’re in a hurry, you can skip the parchment and use a silicone pan, but the parchment gives the loaf a more traditional look.
- Prepare the Banana Mixture: In a large mixing bowl, mash the ripe bananas with a fork until they’re mostly smooth. Add the melted coconut oil, brown sugar, honey, and vanilla extract to the bananas, stirring until the mixture is creamy and well combined. The mixture should have a glossy appearance that glistens under the kitchen light. This step is crucial; a well‑combined banana batter ensures even moisture distribution throughout the loaf.
- Mix Dry Ingredients: In a separate bowl, whisk together the flour, baking powder, baking soda, salt, and any optional spices such as cinnamon or nutmeg. This ensures the leavening agents are evenly distributed, preventing pockets of excess rise. Mix the dry mixture into the wet ingredients just until combined—overmixing can cause the loaf to become dense.Kitchen Hack: Use a small whisk to sift the dry ingredients directly into the wet mixture; this eliminates lumps and saves a step.
- Add Optional Mix‑Ins: Fold in chopped walnuts or dark chocolate chips if desired. The nuts add a satisfying crunch and a hint of earthiness, while the chocolate chips introduce pockets of molten sweetness. If you’re aiming for a nut‑free version, simply omit the nuts; the chocolate will still provide plenty of flavor.
- Watch Out: Overbaking also causes the banana flavor to become overly sweet and caramelized, which can overpower the delicate balance of the loaf.Watch Out: Do not overbake. Overbaking dries out the loaf, turning it into a crumbly mess. Keep a close eye on the edges; once they pull away from the pan and turn golden, it’s time to test.
- Pour and Smooth: Pour the batter into the prepared loaf pan and smooth the top with a spatula. Tap the pan gently on the counter to release any air pockets. This step ensures even heat distribution and prevents the loaf from forming a domed top, which can lead to uneven baking.
- Bake: Place the pan in the preheated oven and bake for 30 minutes, or until a toothpick inserted into the center comes out clean. The loaf should have a golden brown crust and a fragrant aroma that makes your mouth water. If you prefer a slightly darker crust, bake for an additional 3-5 minutes, but watch closely to avoid burning.
- Cool: Remove the loaf from the oven and let it cool in the pan for 10 minutes before transferring it to a wire rack. This allows the structure to set, preventing the loaf from crumbling when sliced. While it cools, the steam inside the loaf continues to cook, ensuring a moist crumb.
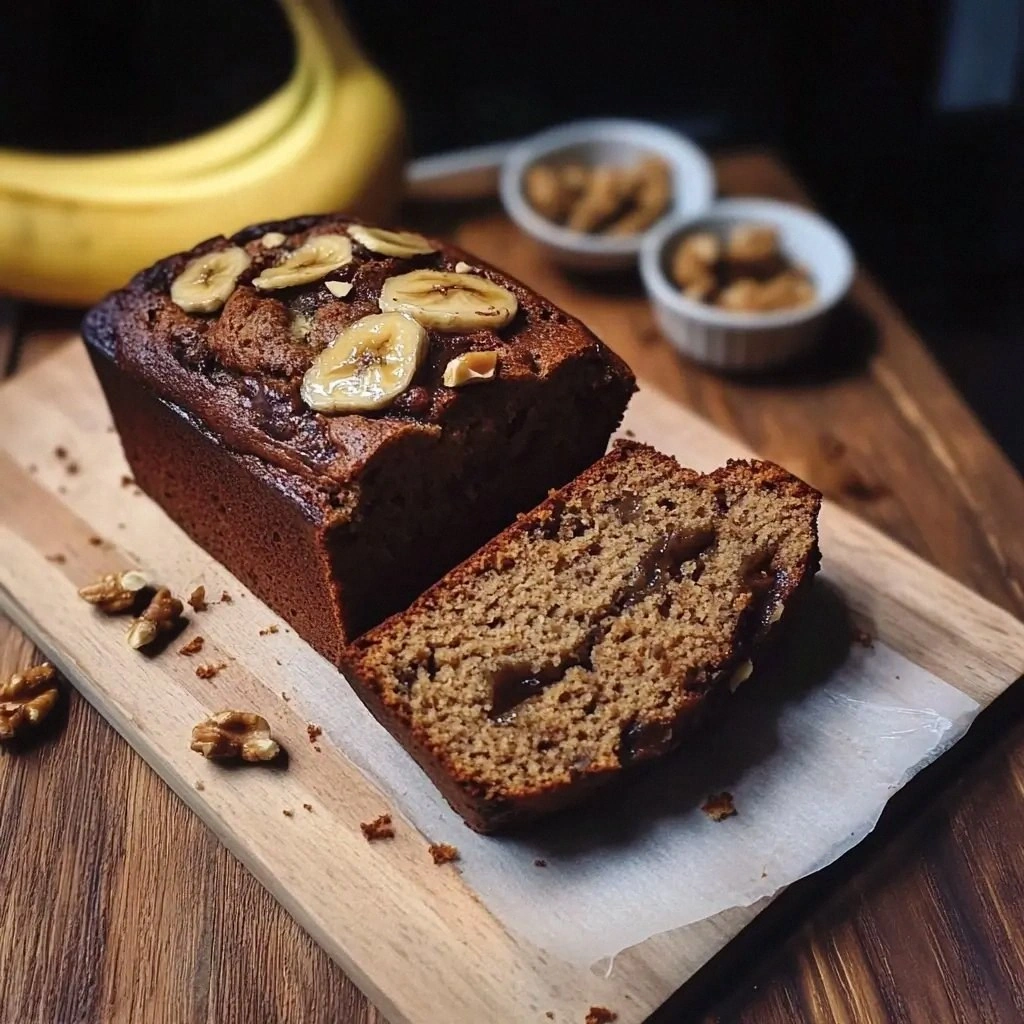
- Slice and Serve: Once cooled, slice the loaf with a serrated knife for clean cuts. Serve warm with a pat of butter or a drizzle of honey for an extra indulgent touch. For a healthier option, top with Greek yogurt or a sprinkle of cinnamon.
That’s it—you did it. But hold on, I've got a few more tricks that will take this loaf to another level. These are the subtle adjustments that separate a good loaf from a legendary one.
Insider Tricks for Flawless Results
The Temperature Rule Nobody Follows
Many bakers think a higher oven temperature always gives a better crust, but for banana bread, a steady 350°F (175°C) is key. A lower temperature allows the loaf to rise evenly and the banana sugars to caramelize gently. If you’re baking in a convection oven, reduce the temperature by 25°F (about 15°C) to avoid over‑browning.
Why Your Nose Knows Best
The aroma is your most reliable indicator of doneness. When the loaf starts to emit a sweet, buttery scent, it’s almost ready. A strong banana perfume means the sugars are caramelizing just right. If the smell leans too much toward burnt, pull it out immediately.
The 5-Minute Rest That Changes Everything
After removing the loaf from the oven, let it rest for five minutes before slicing. This short pause allows the steam to redistribute, ensuring each slice is moist and tender. Skipping this step often results in a crumb that feels dry at the edges.
The Perfect Pan Size
Using a 9x5 inch loaf pan is ideal because it gives the batter enough depth to rise without spilling over. A smaller pan can cause the batter to over‑rise, while a larger pan may produce a loaf that’s too flat and dense. If you’re using a different pan, adjust the baking time accordingly.
The Secret of the Parchment
Lining the pan with parchment paper not only makes cleanup easier but also ensures the loaf doesn’t stick. Cut a piece of parchment that’s slightly larger than the pan, then fold the edges over the sides. This creates a “paper cup” that keeps the loaf from pulling away when you remove it.
Creative Twists and Variations
This recipe is a playground. Here are some of my favorite ways to switch things up:
Nutty Delight
Add a cup of chopped pecans or almonds for a crunchy texture that pairs beautifully with the banana sweetness. The nuts also add a subtle earthy note that balances the fruitiness. This variation works especially well for a brunch spread.
Chocolate Explosion
Fold in 1/2 cup of dark chocolate chips and a tablespoon of cocoa powder to create a chocolate‑banana fusion. The cocoa deepens the flavor profile and gives the loaf a richer color. Finish with a dusting of powdered sugar for an elegant touch.
Citrus Twist
Squeeze the zest of one orange or lemon into the batter for a bright, fresh contrast. The citrus zest adds a lively aroma and a subtle tang that cuts through the sweetness. Pair this loaf with a dollop of whipped cream for a sophisticated dessert.
Savory Spin
Replace half of the sugar with a tablespoon of maple syrup and add a pinch of sea salt to create a savory banana bread. This version is excellent served alongside a cheese platter or as an accompaniment to a hearty soup. The salt enhances the natural banana flavor without making it taste salty.
Gluten‑Free Edition
Swap the all‑purpose flour for a gluten‑free blend that contains xanthan gum. Maintain the same leavening ratios to keep the loaf light. This variation makes the recipe accessible to those with gluten sensitivities while preserving the classic taste.
Low‑Calorie Version
Use a sugar substitute like stevia or a low‑calorie sweetener, and replace the coconut oil with unsweetened applesauce. This keeps the loaf moist and reduces the calorie count without sacrificing flavor. The applesauce adds a subtle apple undertone that complements the banana.
Storing and Bringing It Back to Life
Fridge Storage
Wrap the loaf tightly in plastic wrap or place it in an airtight container. Store in the refrigerator for up to five days. The cold environment slows down the moisture loss, keeping the loaf fresh and tender.
Freezer Friendly
For longer storage, slice the loaf before freezing. Place the slices in a freezer bag, removing as much air as possible. Freeze for up to three months. When you’re ready to eat, pop a slice onto a plate and let it thaw at room temperature for 20 minutes.
Best Reheating Method
To revive a frozen slice, heat it in a toaster oven at 350°F (175°C) for 5 minutes, or microwave it on medium power for 30 seconds. Add a tiny splash of water or a drizzle of milk before reheating to create steam that restores moisture. The result is a slice that tastes as good as freshly baked.